
Did you know that Photoshop has a Photomerge feature that allows us to create a panoramic photograph? I didn’t! Not until last week anyway. I’ve been working on a photo album from our vacation last May, and stumbled upon this feature.
For this tutorial I am working in CC2015. Photoshop Elements users, you have the option of creating Panoramas also. Here is a great article that explains the process for you: Create a Panorama in Photoshop Elements.
Here’s how it works in CC2015:
- File > Automate > Photomerge
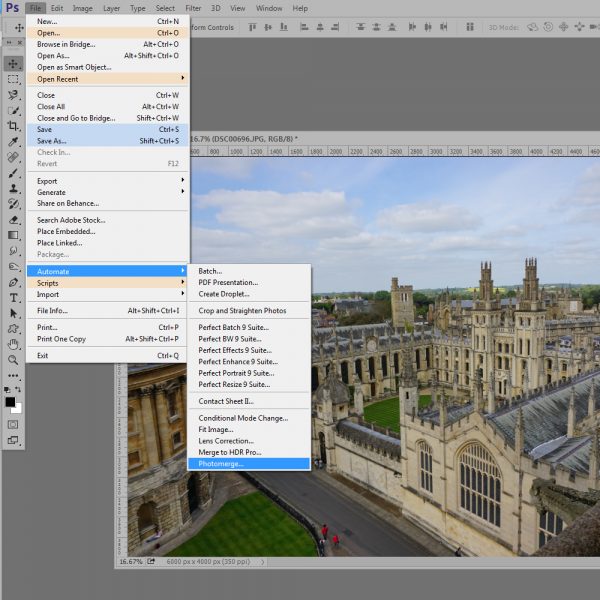
2. The Photomerge window will open. You have two options to select the photos you want to merge:
- If you already have the files that you want to merge open, choose “Add Open Files.”
- If you do not have the files open, choose “Browse,” navigate to where the files are on your computer, and select the ones you want.

3. Click OK and let Photoshop do its magic! Here’s my final result (after a little clean-up).

Now let’s back up a bit and see how to get this end result.
When you are taking the pictures you plan to later merge in Photoshop:
- Stand in one spot, snap a picture, swivel a little, snap your next picture, and so on. Try to keep your feet in one spot.
- Overlay your photos by 25-40%.
- Keep a constant focal length (do not zoom in or out).
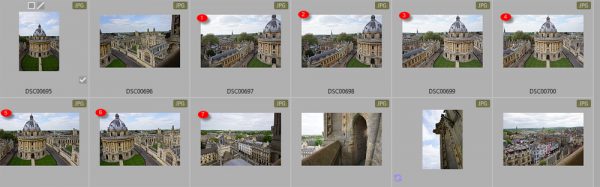
These are the 7 photos I started with (indicated by the red dots). You can see here what I mean about overlaying the photos.
Once I selected them, and chose the Photomerge option, this is the initial result I received:
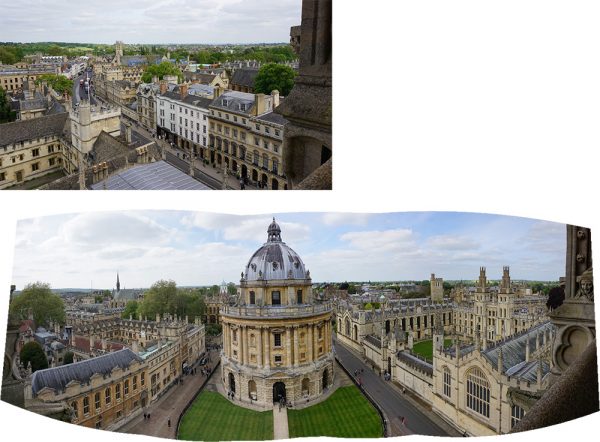
I had one extra picture that did not go with the group shots. Photoshop placed it at the top of my document (to let me know it wasn’t included), and then merged the other photos.
I think Photoshop did a really great job; but, of course, I needed to straighten up those edges by cropping them into straight lines. I tried to crop away as little as possible. When I did this, there were some transparent areas visible (indicated by the red in the image below). If I cropped until the transparent areas were gone, I would have lost the top of the tower and too much of the photo bottom. So I very carefully cloned in the corners.


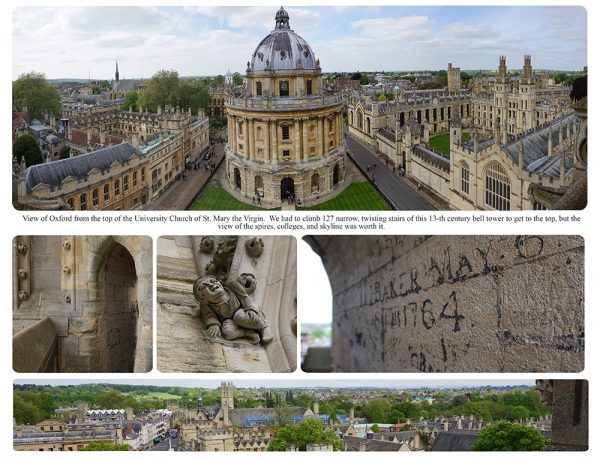
Here is another example:

Using the Photomerge feature in Photoshop is a great way to get panorama shots, if you don’t have a panorama feature on your camera – or even if you do!
Grab a pocket scrapping template, add a few close-ups for contrast, and you’ve got a super quick scrapbook page done in a jiffy!
When I am doing a large photo album (this one was 200 pages), sometimes I add embellishments to pages, and sometimes I just let the photos make the statement. Honestly, if I tried to embellish every single page, the album just wouldn’t get done when it’s of this size!
We have a great selection of pocket scrapping embellishments and templates here at theStudio in our Pocket Scrapping Category! It’s really a great way to get those large albums done quickly!
If you would like to keep this tutorial on your computer for easy reference, you may download a PDF here: Creating a Panoramic Photograph in Photoshop.
If you are a visual learner, you can view this tutorial on SnickerdoodleDesigns YouTube Channel and on theStudio’s YouTube Channel.
Please head over to YouTube and take a minute to Follow both channels. Each Channel will have some exclusive videos, so by following both channels, you will be sure not to miss a thing!


I have tried this with one photo a long time ago, not realizing that I needed 2, I have just had an awesome result. Thank you.
Great, Faith! I used 7 photos, I believe. Using less could give a really good result as well. I’ll have to try that.
Will HAVE to try more. Thanks
You can also do this on Windows Photo Gallery if you don’t have/use Photoshop.