Harvest Sunset, our current Coordinated Collection, celebrates that magical time of day when the sun starts going down, tossing gorgeous colors into the sky as a good-bye to the day. This special time invokes peace, as we sit quietly and watch the transition from day to night. From sun to moon.
For those not familiar with our Coordinated Collection, here is how Toiny describes it:
It’s time for our quarterly coordinated collection. Harvest Sunset is our 17th Coordinated Collection! Each time I am amazed and in awe of the infinite talents in the fingertips of our Design Team. The entire Studio Design Team bands together every quarter to create one, big, huge, stunning collection. Harvest Sunset is no exception.
Each piece is on sale for only $1.00 each until October 28th. You can build your collection as big, or as small as you’d like. The choice is up to you
While each designer has their own interpretation of the Harvest Sunset theme, as well as their own personal design style, one element that could easily work with every designer pack is a big harvest moon! Today, let’s have some fun and make a moon!
This tutorial is for Photoshop and Photoshop Elements users. I am using Photoshop CC2015.5 for screen shots. This is an advanced tutorial, and assumes you know the basics of layers.
- Create a new blank document. File > New > 3600 x 3600 px; 300 dpi (Or whatever size you would like, considering the size you want you moon to be. I want a large moon so am choosing a large sized blank document.)
- Fill the blank document with Black
- Change the Foreground Color to White and the Background Color to Black
- Add a New Fill layer and select Gradient.
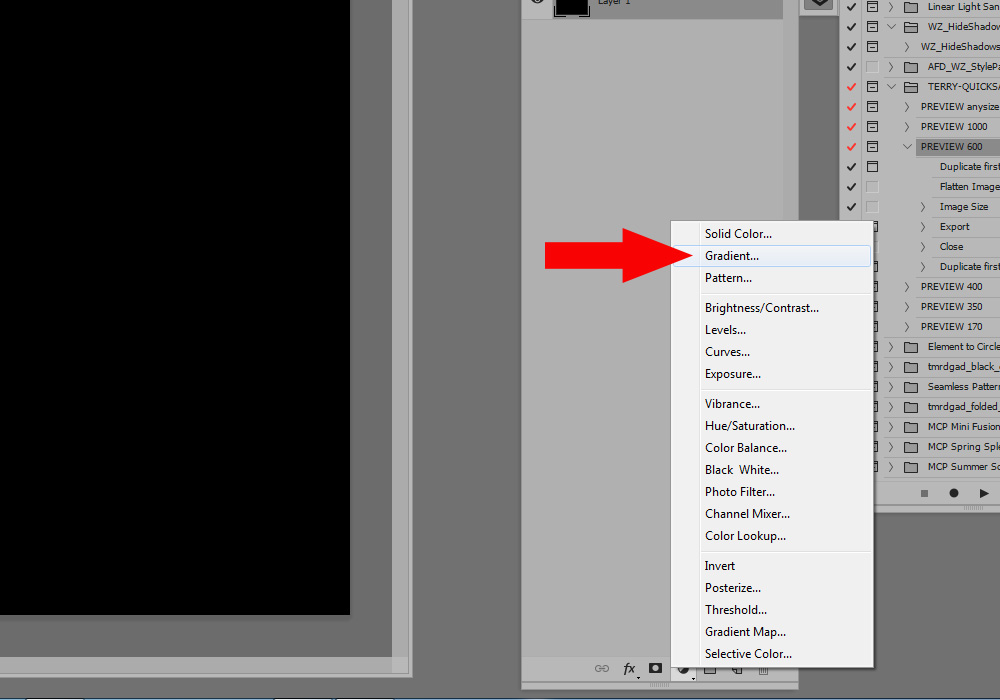
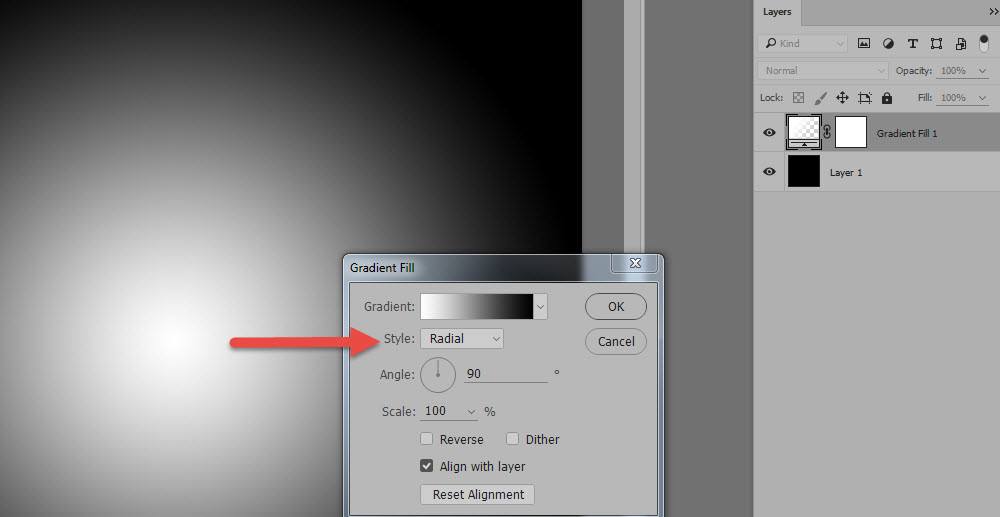
- When the Gradient Fill box opens, click on the down-pointing area in the Style’s option. Change the Style to Radial. Click OK.
- Create a new blank layer. Select the Ellipse Tool. Hold down Shift to draw a circle. Fill it with white. (If your circle isn’t exactly in the middle of the document, select the Move Tool and move it into position.) Control + D to deselect.
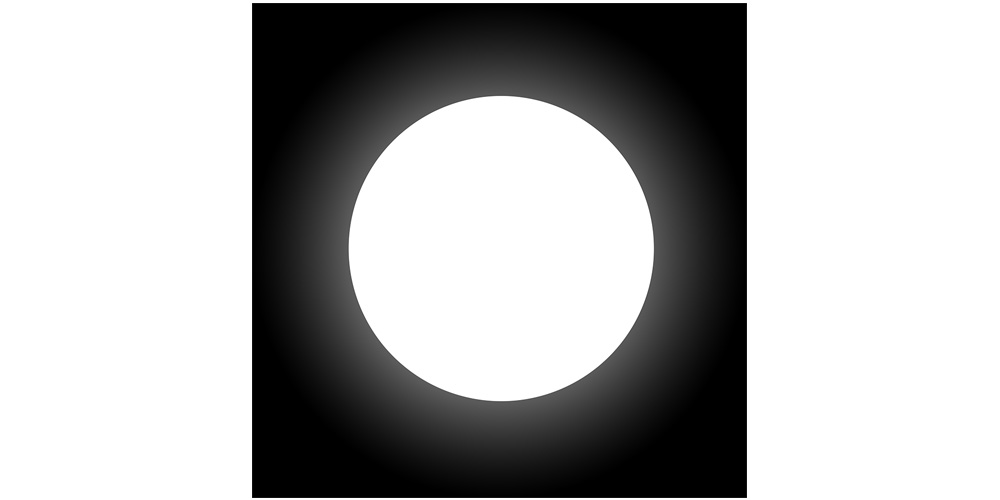
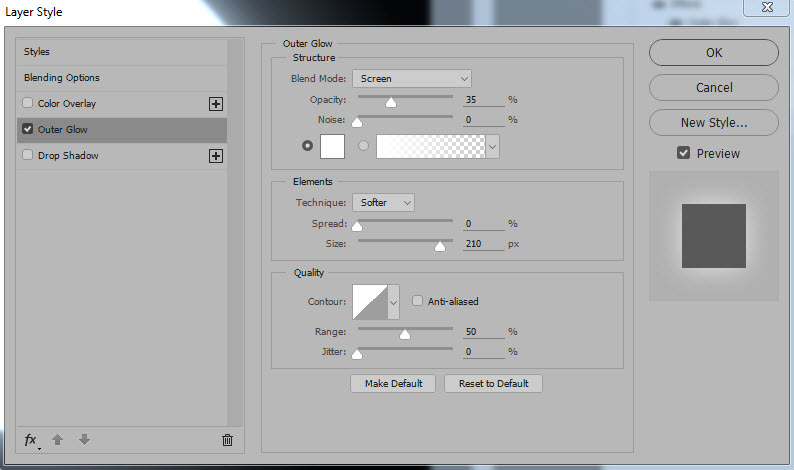
- Click on FX at the bottom of the layers panel and click on Outer Glow. Adjust the Outer Glow Structure until the glow on your moon looks good to you. (Experiment with Opacity, Spread, and Size, especially.) (Photoshop 101: Outer Glow) These are the setting I used for my moon, which is on a 3600 x 3600 px document.
- Hold down the Control key and click on the icon on the layer which contains your moon, to select the moon shape.
- Create a new blank layer
- Confirm that your Foreground color is Black and your Background color is White
- Go to the top Menu bar. Filter > Render > Clouds
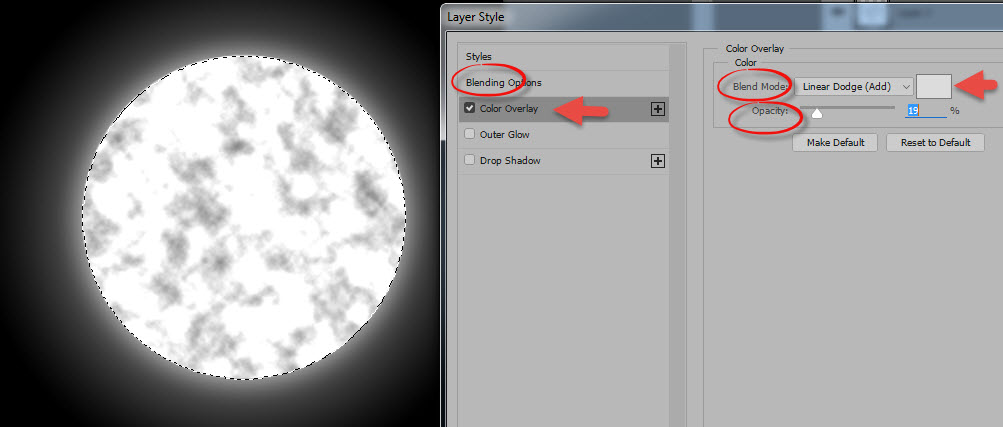
- Click on the FX icon at the bottom of the Layers Panel and Select Blending Options
- In the Layer Style box, select Color Overlay and change the color to White in the Color options box. Change the Blend Mode to Linear Dodge, and experiment with the Opacity. I have mine set to 19% for my size moon and taste.
- Hit Control + D to deselect the moon shape.
Depending upon the size of your moon, this might be all you need to do. For a smaller moon, this procedure will produce a very nice result.
If you’ve created a large moon, such as I have, let’s do a few more things to make it look more realistic.
- Right click on the Filter / Clouds layer. Choose Rasterize Layer Style
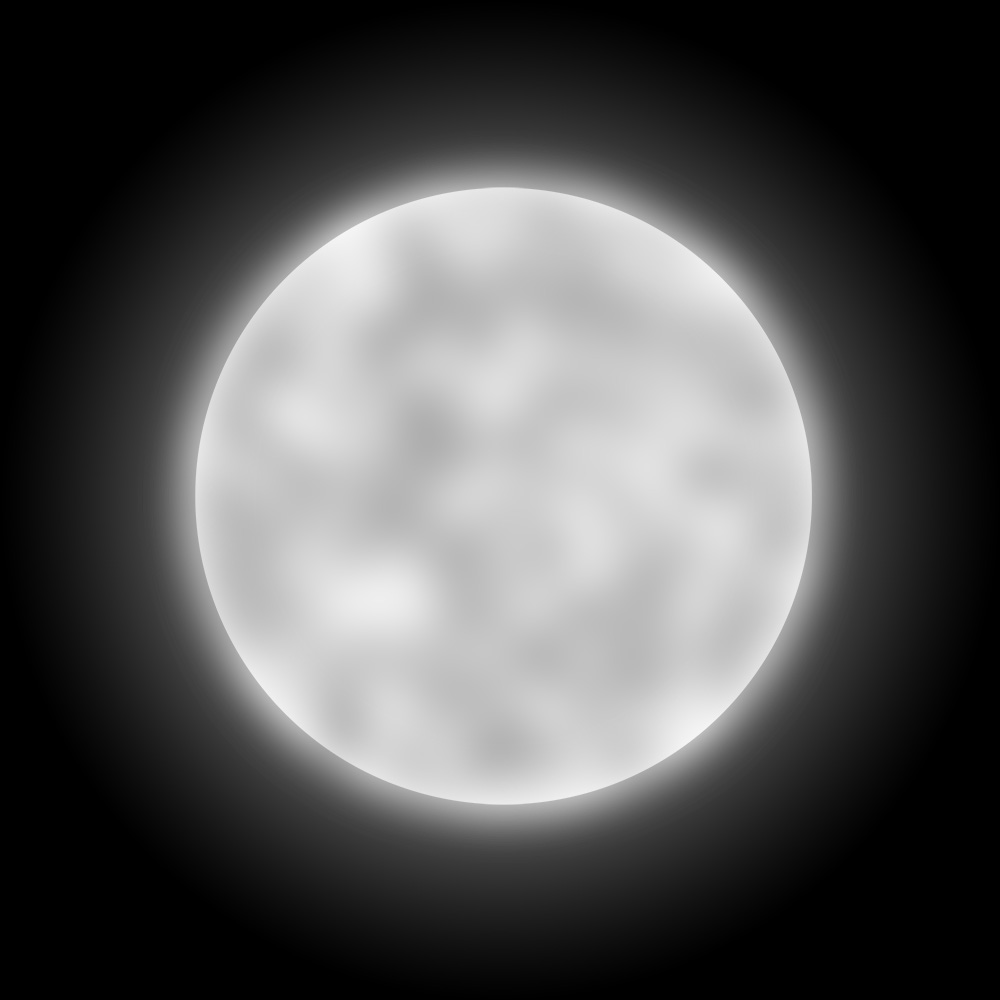
- Go to the Top Menu Bar: Filter > Blur > Gaussian Blur. Adjust the Radius slider until you are satisfied with the look of your moon. I set my Radius to 81 Pixels for my sized image. Click OK
Here is my result:
- Make the first black layer invisible. Merge the remaining 3 layers, and you have a moon element that you can use on any page you like.
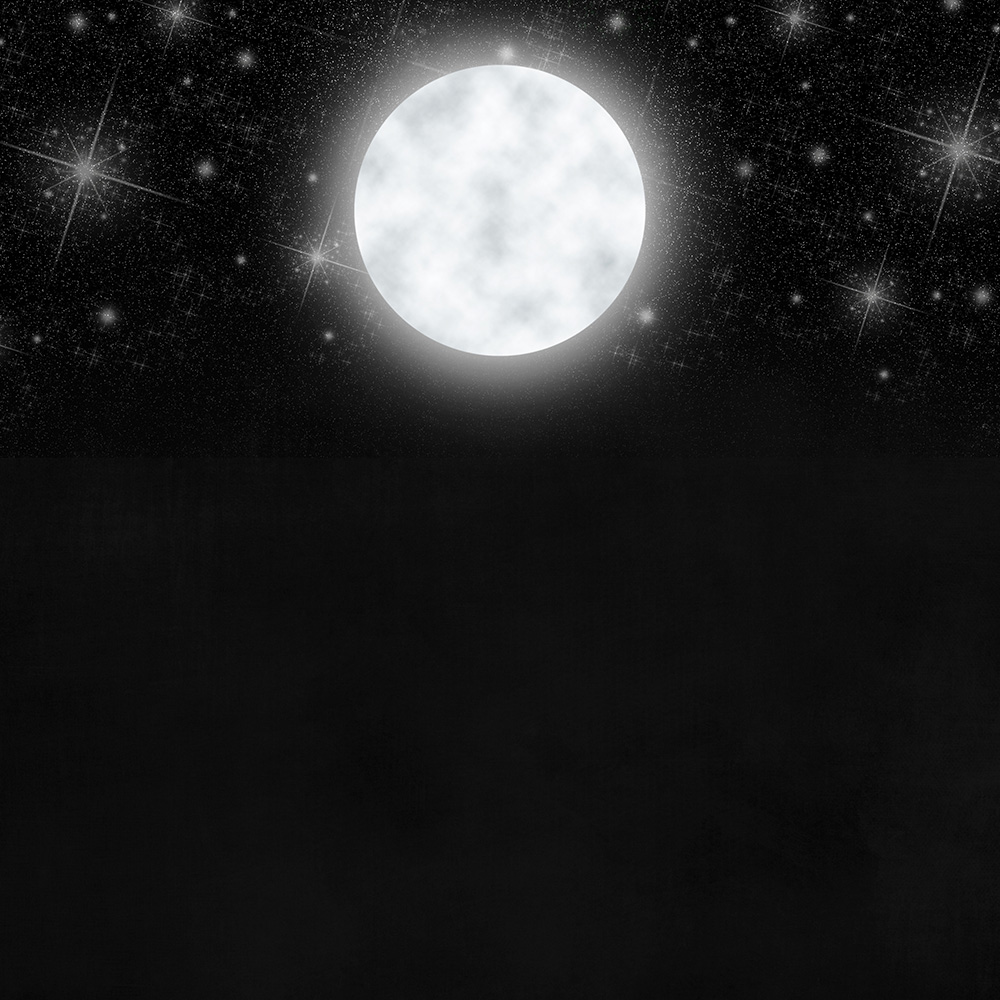
I used this technique to create one of the papers in my newest collection, Trick or Treat.
If you would like to download this tutorial in PDF format, you may do so here: How to Create a Moon in Photoshop
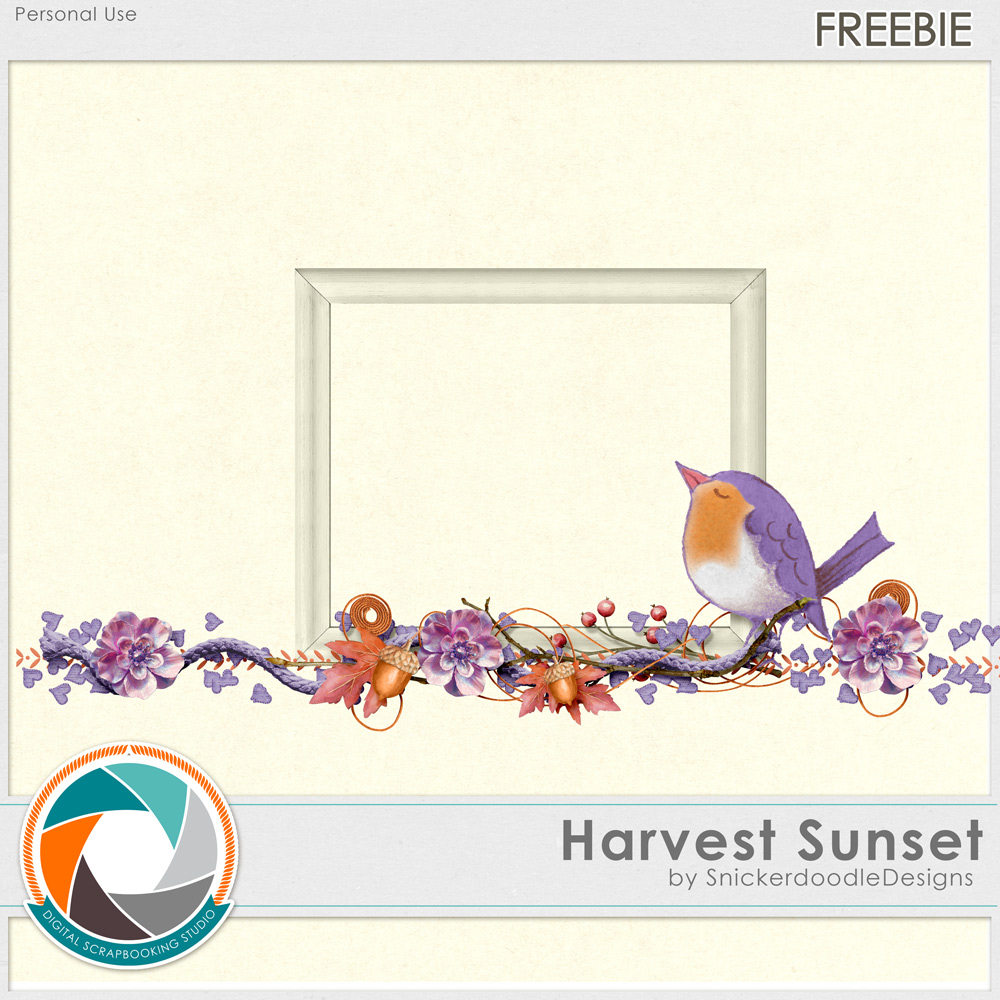
Here is a Harvest Sunset that matches my collection, but I’m sure it would go with any of the products within this category too! Remember that the $1 Sale ends on October 27th! Just click on the image below to download!


Love that moon of yours. It’s really beautiful. How I love looking at the moon. Years ago when I had some long distance driving where I was driving all alone in the car I always loved seeing the moon and would call it God’s flashlight and know it was there to help guide my way while driving alone.
Thanks so very much for the pretty cluster frame. Love your Harvest Sunset Collection.
What a beautiful thought, Carol. Thanks for sharing!
Love that cute perky bird in your freebie! Thanks! and neat tut on the moon. I am wondering if you can do this in PSE?
Gloria, I checked with PeggyS, who is now assisting with PSE questions, and her detailed response is as follows:
I used your directions, but PSE doesn’t have blend modes in the layer effects, so you have to do it after you get out of layer effects. I found pin light worked best for what I wanted. Then I did the Gaussian blur on the spots and put a layer mask on to remove some of the spots. The rest is as you describe it.