If you have children, or grandchildren, do you create special photobooks for each child? Or for each of your siblings, or friends? Do you like to use the same scrapbook page for each album, replacing only the photograph?
If so, here’s a quick tip on how to do so quickly and easily, using Smart Objects.
If you are not familiar with Smart Objects, this post will introduce you to them: What is a Smart Object?
I am using Photoshop CC2017 for this tutorial. While Photoshop Elements (PSE) does utilize Smart Objects, they will not function in PSE as described in this tutorial.)
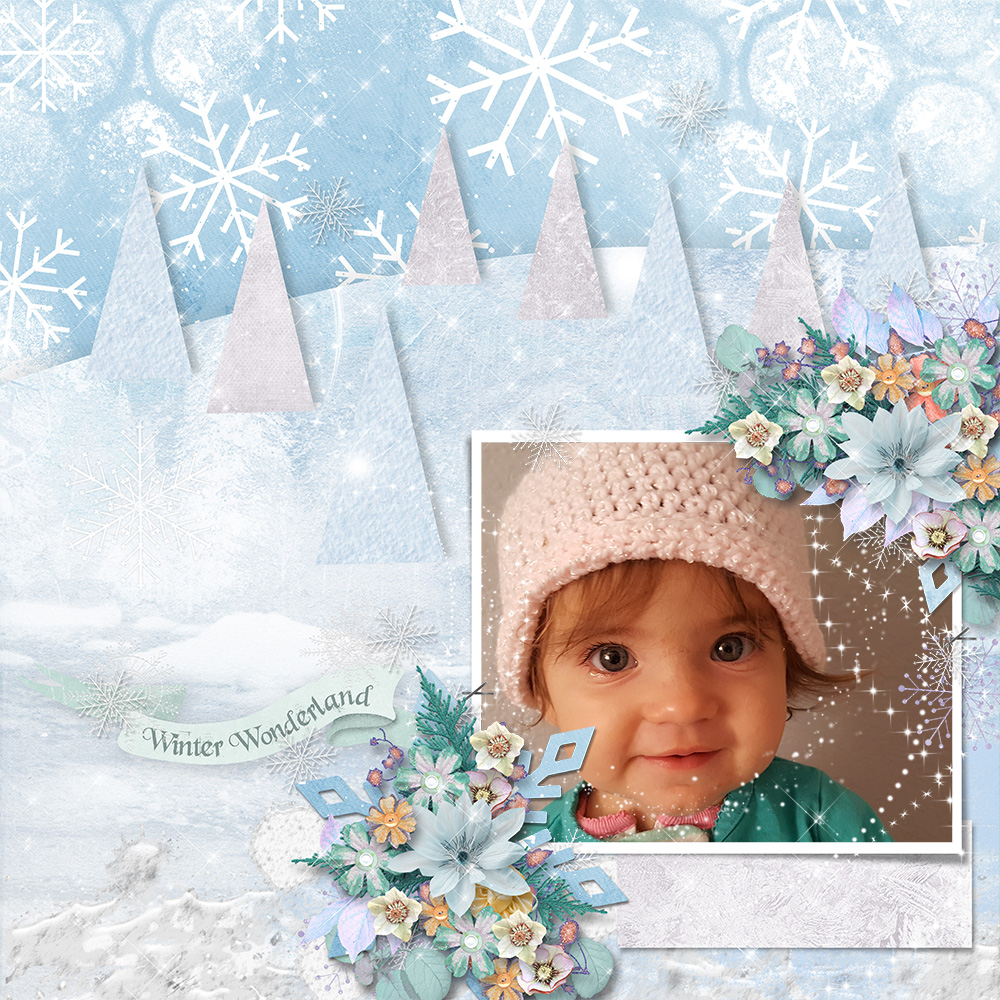
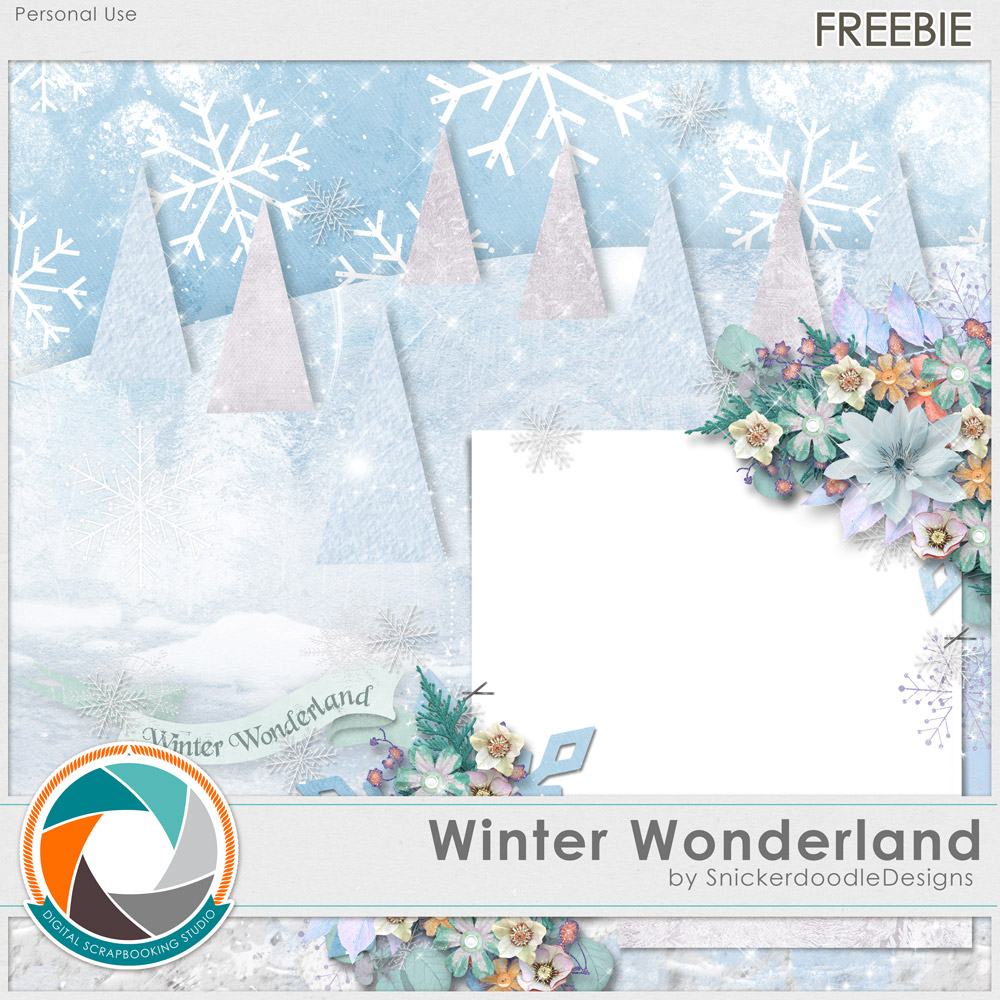
I absolutely love this layout by 6grand using my Winter Wonderland Collection. She has generously allowed me to create a Quick Page for you using her page. You will find the download link at the end of this post.
Here is 6grand’s original layout.
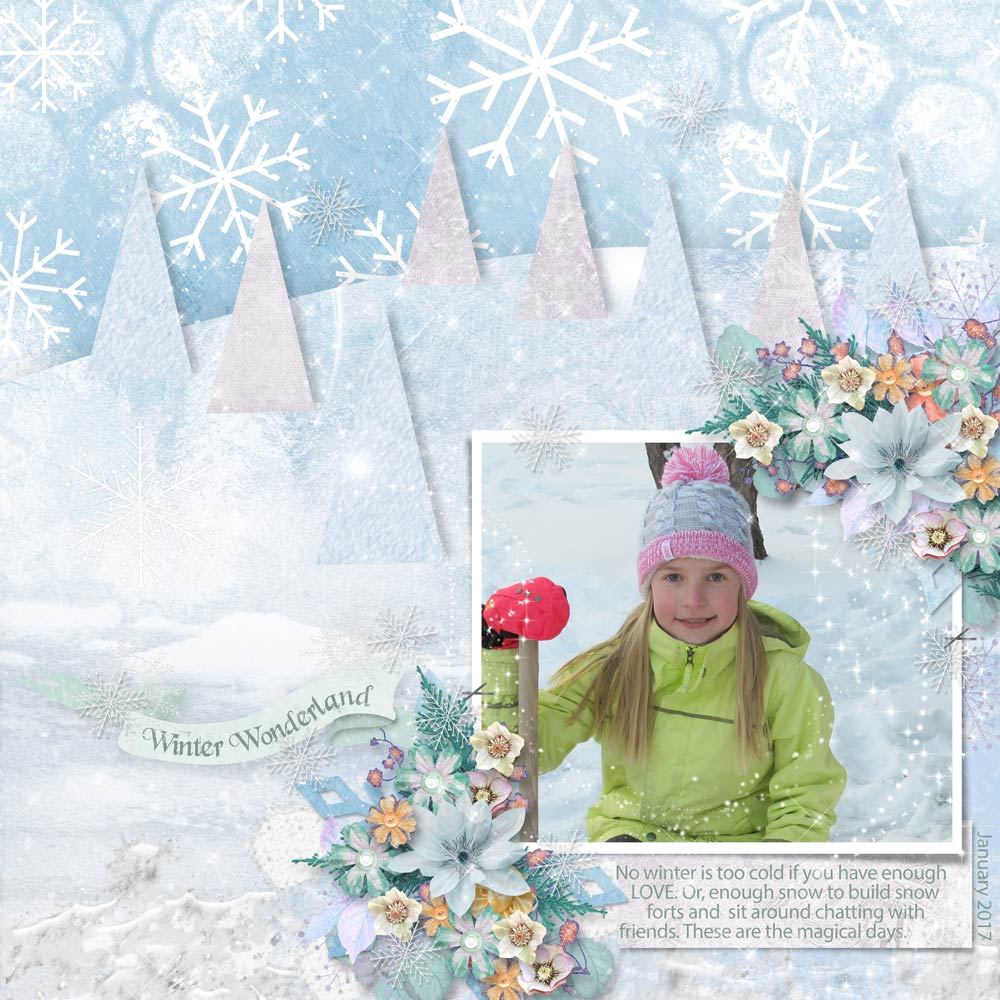
I have removed the text, date, and photograph from the layout for the Quick Page, so you can personalize it.
I would like to use this same layout, but use 2 different photographs.

Here is how to switch out the photographs quickly:
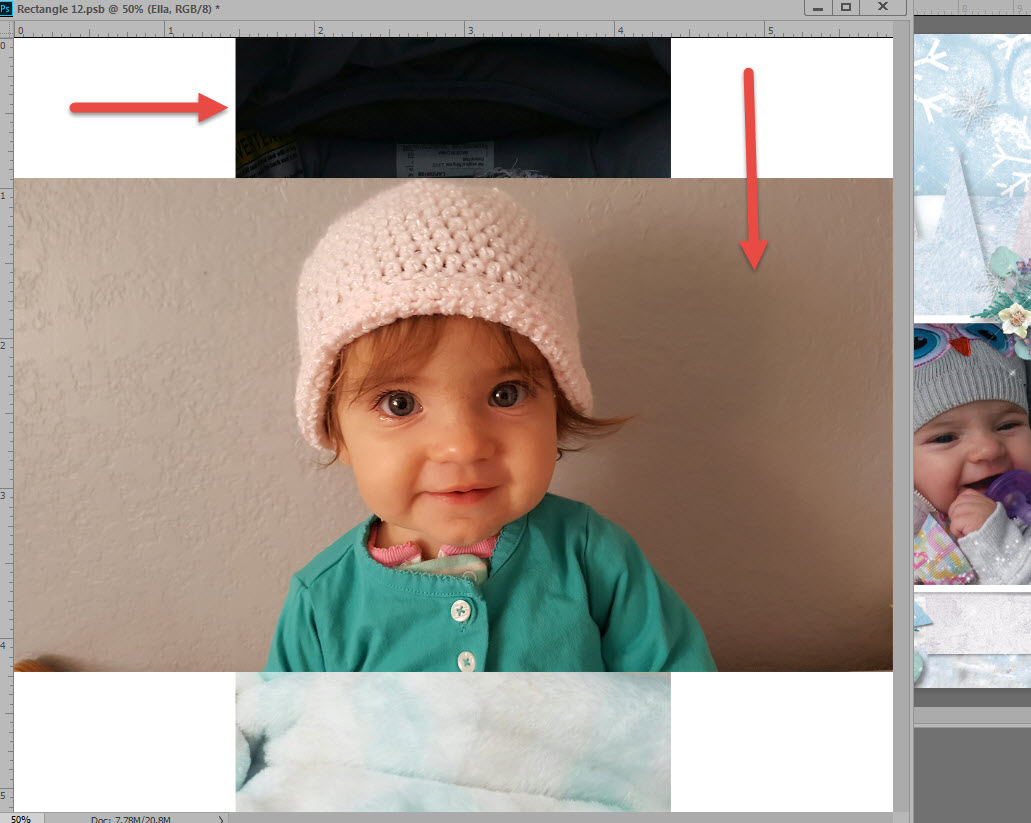
- Create a blank layer below the opening on the Quick Page
- Using the Shape Tool create a rectangle on the blank layer, just a little larger than the transparent opening. (Then click on any tool to release the Shape Tool.)
- Right click on the Rectangle in the Layers Panel to open options. Choose “Convert to Smart Object.”
- Double click on the thumbnail of the Rectangle in the layers Panel. The Rectangle will open outside of the Quick Page.
- In the top menu bar choose: File > Place (or Place Linked, whatever your Photoshop version uses)
- Navigate to the photo you want to use; click on it to Select it. Click Place. The photo will land on the “opened” Rectangle.
- Go to the top menu bar: File > Save. You will see the photograph land in the transparent area of the Quick page. You may then just close the “opened” rectangle by clicking on the “X” in the upper right hand corner.
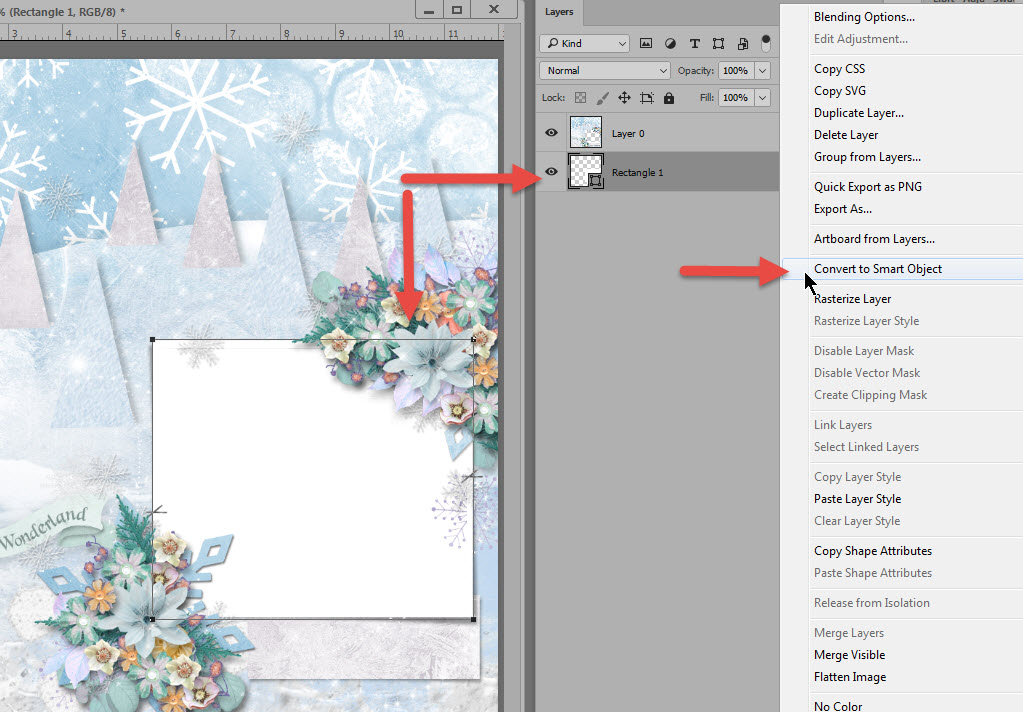
Create blank layer under photo insert. Create a rectangle. Convert rectangle to Smart Object.
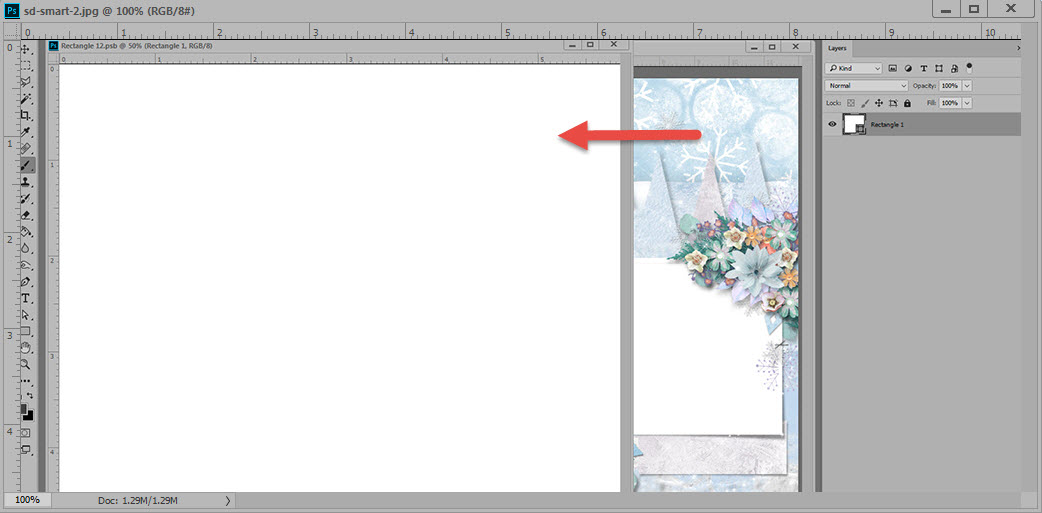
Double click on Rectangle thumbnail. Choose File>Place. Navigate to the photo you want to use. Choose Place. File > Save. Close the opened Rectangle.
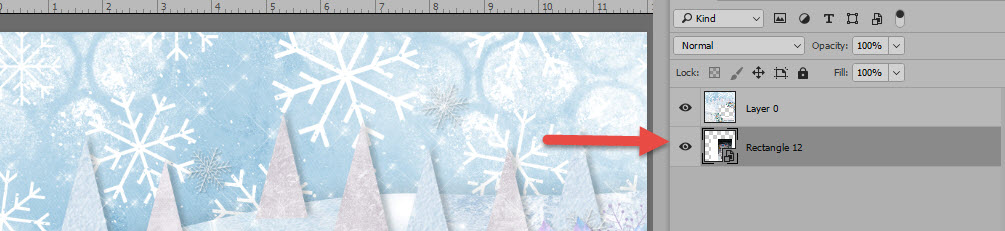
Photo has become a Smart Object.
Now if you would like to use the same layout for a different photo, repeat the process. Click on the Smart Object, and choose a different photo.
When you click on the Rectangle in the Layers Panel, it will open with your first photograph visible. That’s okay. Just navigate to the new one you would like to use. It will be replaced perfectly!
When you have a layout with multiple photos you want to replace, this can be a real time saver!
Click on the image below to be taken to the freebie!
If you would like to download a PDF of this tutorial, you may do so here: How Smart Objects can save time in Scrapbooking


Can’t seem to downloaded quickpage 🙁
My mistake! I forgot to link the Freebie. It’s linked now! Thanks!