Two weeks ago, we looked at how to create Text on a Path , around a shape. Today, let’s take a look at how to create our own path, and add text to that.
For today’s tutorial I am using Photoshop CC2017. At the end of this tutorial, Peggy Slemp, one of our Studio members who is extremely proficient in Photoshop Elements, will give us her findings on the new pen tool options in Photoshop Elements 15.
The Pen Tool is a powerful tool; today’s tutorial is intended to introduce you to this tool and spark your interest in learning more about it, if you desire. So let’s get started!
- Choose the Pen Tool. Be sure Path is selected in the Top Options bar. Click on the Gear symbol, and in the drop-down box, check Rubber Band. This will give you a preview of the path as you draw it, which is helpful.
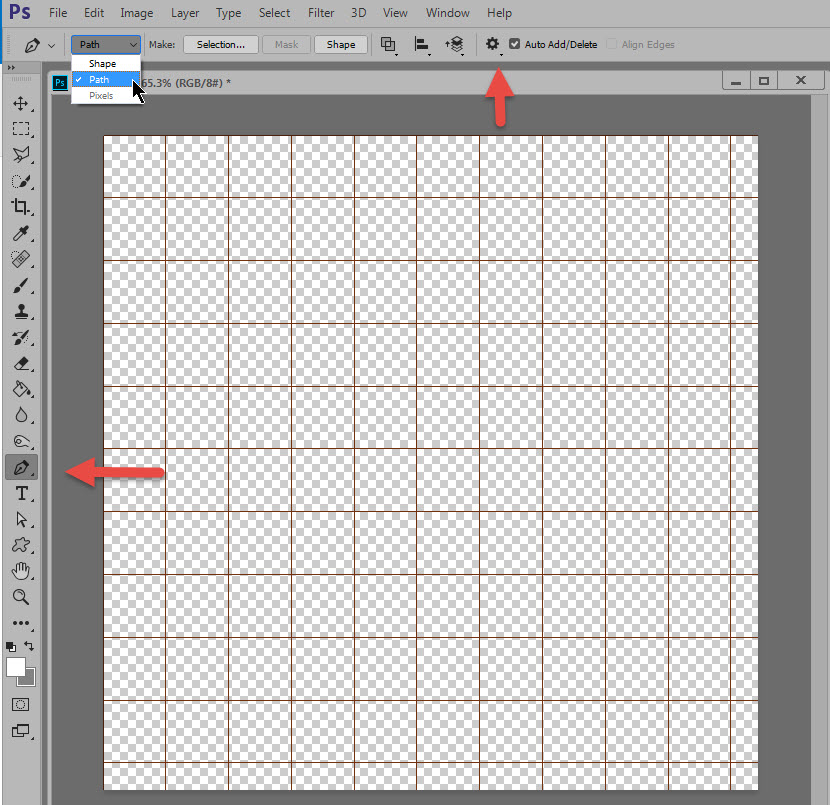
- I like to have my Grid lines visible. To turn these on, go to the top menu bar: View > Show > Grid. You can customize the grid to your needs by going to the top menu bar: Edit > Preferences> Guides/Grids/Slices. I currently have my Gridlines set at 1 Inch; 1 Subdivision. Note that you can also change the color of the Gridlines if you like. Click on the Color Picker in the Guides/Grids/Slices Panel to do so.
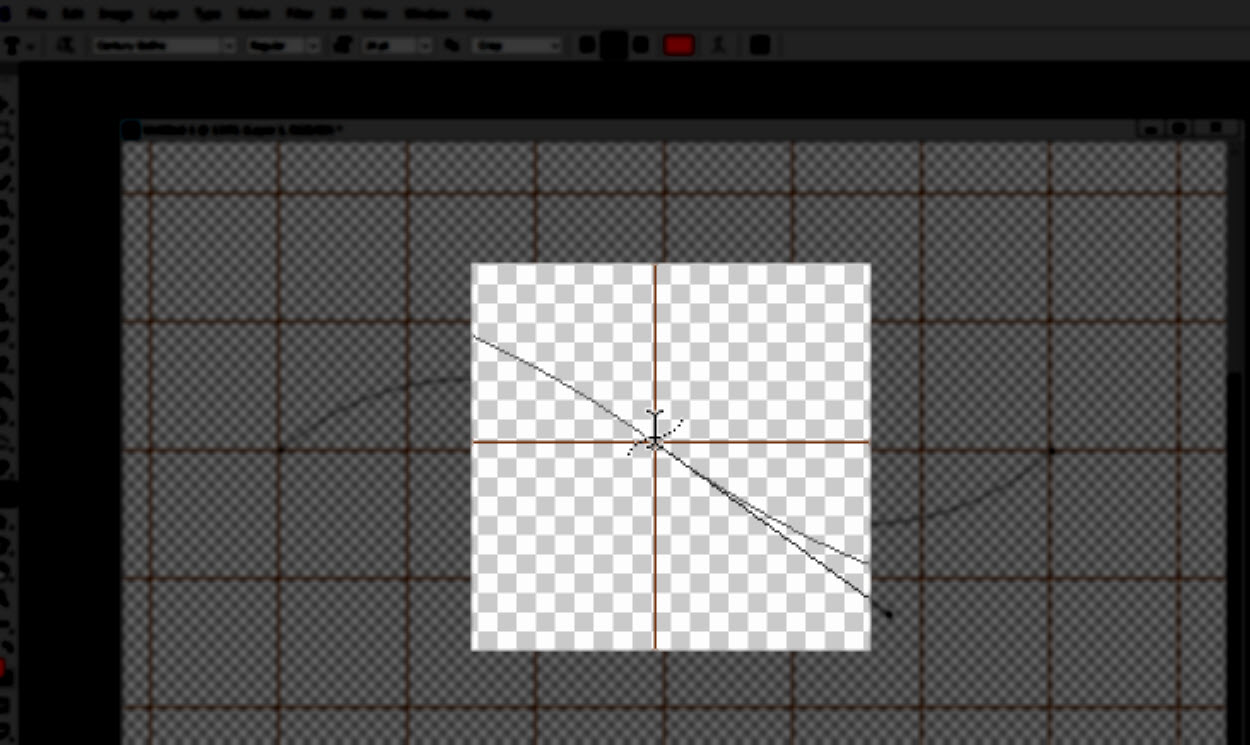
- We are going to make a simple wavy line. With the Pen Tool selected, click on your document where you would like your line to start. Release the mouse. Photoshop will place an “anchor point,” (a small black square) there.
- Drag to where you would like your 2nd point to be and click. Without releasing your mouse, drag your mouse up or down, and/or right or left, to curve your line. You will see “handles” extending from your 2nd anchor point. It will take some experimentation, but as you move your mouse, you will see the handles responding to your moves. These handles dictate how the line is curved. You will note that longer handles give a gentle curve, while shorter handles give a sharper curve, or turn. Create as many waves as you like.
- Once you have completed your wavy line, drag your mouse completely off of the document to release the Pen Tool.
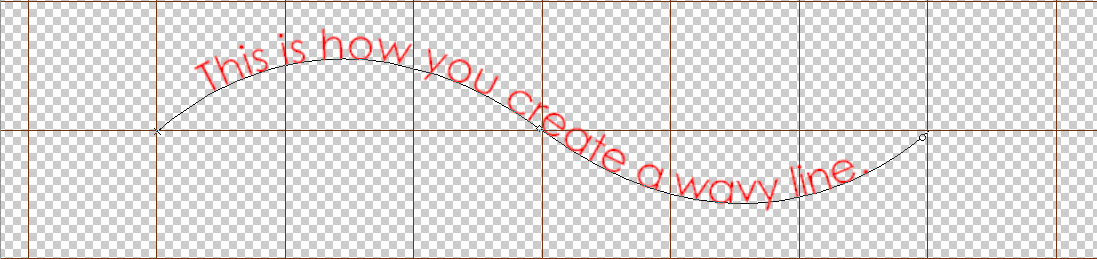
- Click on the Text Tool. Select your font, font size, and font color in the top Menu Bar.
- Text Justification: Select the Left, Centered, or Right justification, and be sure to start typing your text according to that choice.
- Place your mouse close to the wavy line.The Text cursor will turn into an “I” with a wavy line through it. Begin typing your text. When you have finished, commit your text, and you’re done.
Save your Text Path:
You may save your text path to use another time. It’s easiest to just leave the text you have written in place, and save the file as a PSD. When you want that same path again, open the PSD, select the text tool, and change the text.
Removing an anchor point:
If you decide you do not like where you placed your anchor points, you may hit the Delete key to remove the most recent point. Alternatively, right click on the anchor point and choose: Delete Anchor Point.
Photoshop Elements Users:
Information provided by Peggy Slemp
Photoshop Elements 14-15 added Text on a Path. It could be useful in some situations, but is not as easy to work with as CC. You need to draw your line as smoothly as you can for it to work well. Then you click on the part of the line where you want text to start. You can alter the path a little by switching to the modify tool next to the text path tool. That lets you move points to smooth a little, either before or after typing. This allows for some straightening of crooked letters. A simple font works best. I was disappointed to see that pushing shift or control while drawing did not straighten the line. When typing along the curve, if you spacebar over corners or jags, you get a more readable result. You can experiment on another “canvas”, then slide it over to the layout and make it bigger/smaller to fit. If the layout is casual, it can be fun. For anything you want just right, I’m afraid PSE users will need to buy text paths from designers, or snitch some from templates they may already have.
After reading Peggy’s evaluation, I experimented a little with Photoshop Elements. A workaround would be to avoid the text path tool altogether, and create and merge shapes to get a desired path. Type your path around the part of the shape you would like to use, then delete the shape itself. Not an easy task, but an alternative.
I hope you have found this tutorial helpful, and that it will spark your interest in learning more about the powerful Pen Tool.
If you would like to download a PDF of this tutorial, you may do so here: Text on a Path, Part 2


Karen, your work around sounds like a great alternative, especially for rounded shapes. Thank you!
Oh, good. I’m glad you think that will work, especially based upon all the research you did on this! Thanks for your contribution!
Another amazing tutorial, thank you.
Thank you, Faith!