The Clone Stamp Tool is one of my favorite Photoshop tools. It is used to remove distracting elements from an image; and, to me, it just seems like magic!
This is a picture I took of my daughter-in-law, Melissa, when we were hiking “The Narrows.” I love the shot, but find the reflective labels on her back-pack distracting. Let’s remove those via the Clone Stamp Tool.
For this tutorial, I am using Photoshop CC2017. This technique works the same way in Photoshop Elements.

Before cloning – too much reflection
Here’s how:
- Select the Clone Stamp Tool from the Tool Bar on the left.
- In the Options bar at the top of the screen:
- Choose a soft-round brush
- Choose Normal as the Blend Mode
- Choose an Opacity percentage (I usually leave this at 100%, but may lower it depending upon the result I get at 100%).
- Choose a Flow percentage (I usually leave this at 100%)
- Choose Aligned
- Choose: Current & Below in the Sample box
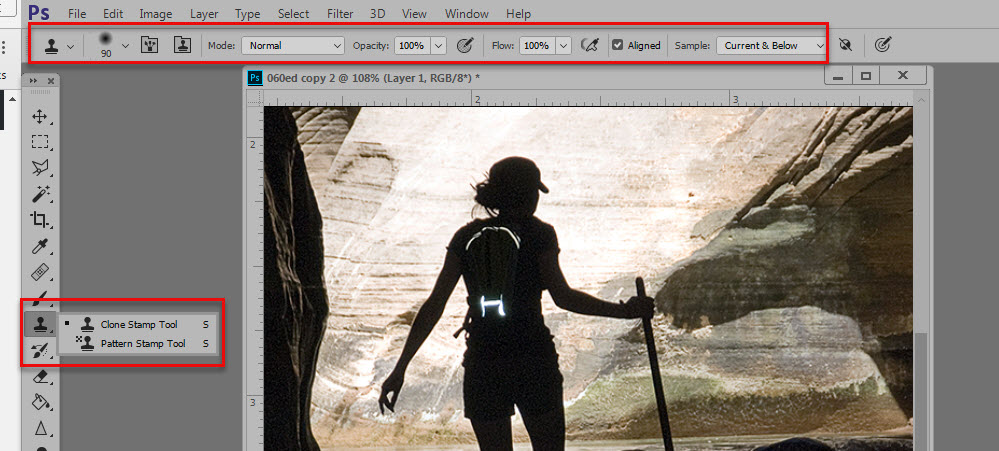
Selecting the clone tool AND setting the layers sample

PSE 15 Screenshot
- It’s always best to work non-destructively, when we have that option; and we do with the Clone Stamp Tool. Create a blank layer above the photograph.
- Making sure you still have the blank layer selected, click in the document. Then Alt+Click to select a place from which to clone. It’s best to clone from an area that looks as close as possible to the area you wish to replace. In this image, I wanted to replace the white labels with black, so the most obvious place to clone was a black area on her shorts..
- Next, click over the area you want to replace. Short drags or simple clicks will do the trick.
- Continue until the “offending” areas has been replaced by the cloned pixels.
This is my final image, which I am happy with. Even better, the cloning was done of the blank layer, so the process was non-destructive, leaving my original image intact.

Final image, post cloning
If you would like to download a PDF of this tutorial, you may do so here: Using the Clone Stamp Tool Non-Destructively.
I hope you’ve found this tutorial helpful!


This is a fabulous way to get rid of distracting objects in your photo’s. Thank you for sharing!