This is the 4th and final tutorial in our Photoshop Brush series. If you are just tuning in and want to catch up with us, here are the links to the previous tutorials:
- Installing Brushes in Photoshop
- How to use the Brush Tool in Photoshop
- How to Customize a Photoshop Brush
So now that you’ve installed your brushes and experimented with customizing them, what’s next? Once you place your brush on your document, you have created a “digital stamp.”
Digital Stamps are super fun and easy to use on our scrapbook pages. They can be used in multiple ways to either make a bold statement or add subtle interest. You can:
- color them
- apply styles to them
- use Blend Modes on them
- clip papers to them
You can:
- tuck them into clusters
- apply masks to them and brush away parts you don’t want to use
- place them behind photos or frames
- certain stamps will lend themselves to creating borders or paper edges
There is really no limit to what you can do with brushes and “digital stamps.”
Today I want to show you one really quick and easy way to color a stamp. This stamp is included in the NSD Grab Bag created by Manu Scraps and SnickerdoodleDesigns. Stamped in black, the digital stamp shows a lot of contrast and is quite pretty; however, I want it to be full of beautifully blended colors.
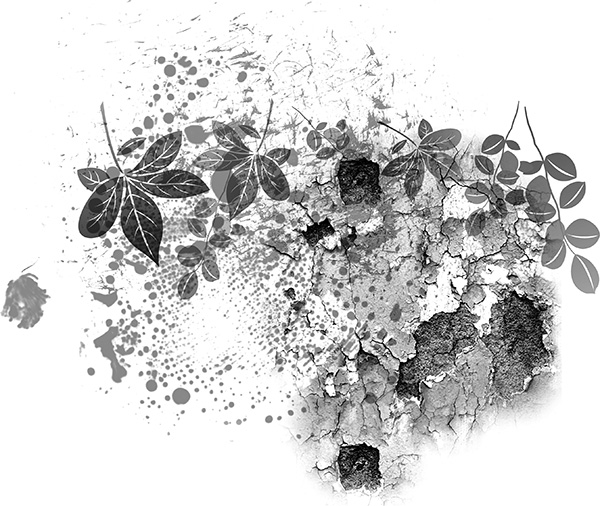
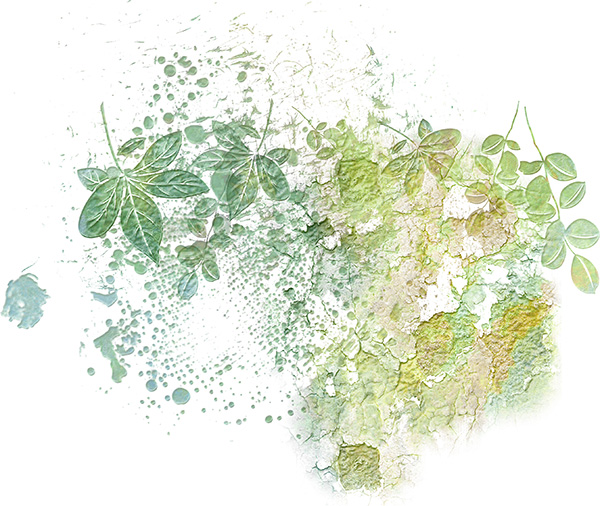
Brush stamped in black
Here is the same brush stamped in color. Some brushes look GREAT in color, this one really doesn’t.
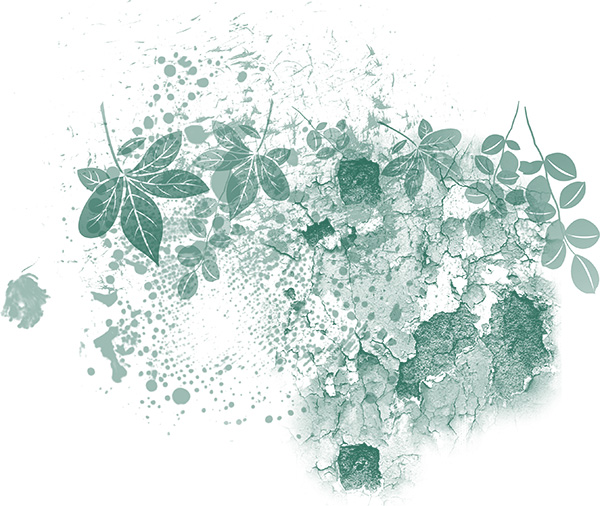
Brush stamped in color
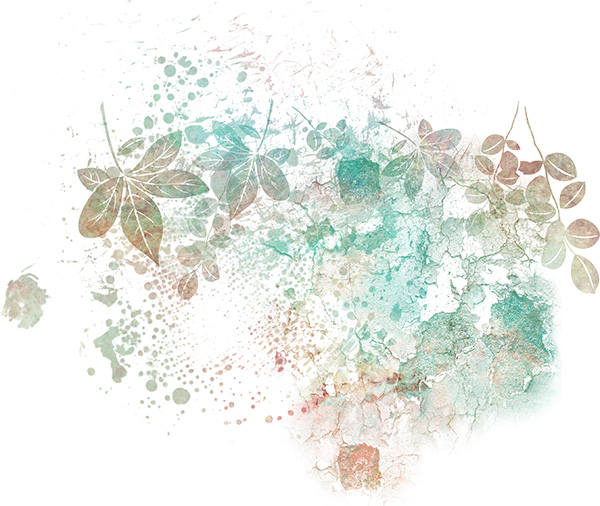
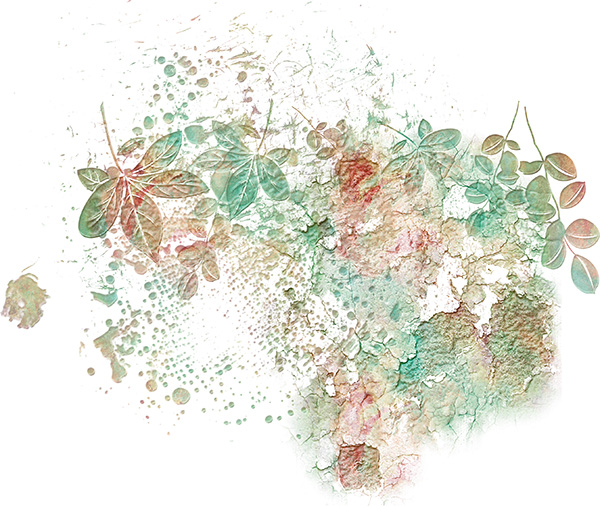
Stratified Overlay clipped to the digital stamp
Here is the stamp with multi-colors. I like this and think it’s really pretty. So how would you get this look?
Well, you could grab a brush and select your foreground color, and randomly stamp over the image. Then change your color again, perhaps change your brush, and stamp some more.. and so on. That would definitely take a while, and it takes practice to get pretty blended colors.
But I wanted (and promised) “fun and easy”……so let me share one of my secrets with you.
When I color digital stamps, I very often will use one of my Stratified Overlays or Stratified Rock Styles. (Stratified Overlays and Styles Super Bundle offers the best savings.) In the image below, I simply clipped a Stratified Overlay to the stamp. It took mere seconds to achieve this pretty look.

Clip the Stratified Ovelray to the stamp with a Clipping Mask
I have the same overlays in Styles (.asl) format (Stratified Rock Styles). The Styles use the same color patterns but with the effects that are added to the styles, they create a quite different look. The stamps above and below use the same pattern; however, the stamp above was created by the overlay and the stamp below by the use of the Style. Both are pretty. The Styles add more texture, an embossed look, and more contrast. You would choose to use the overlay or the style based upon the end look you wanted to achieve.
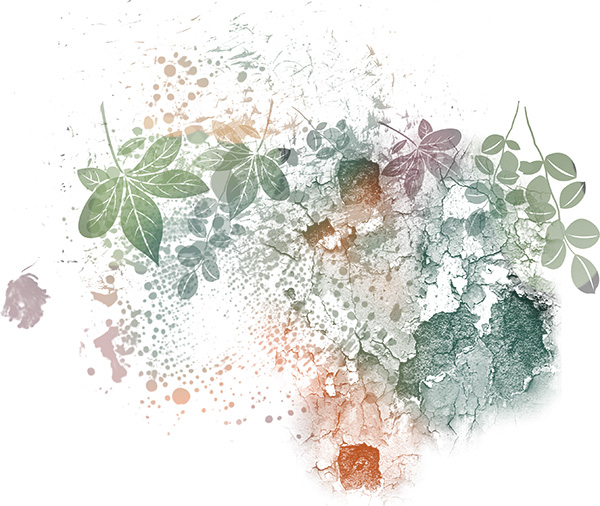
Stratified Overlay clipped to stamp
Here is the same stamp with a different Stratified Rock Style applied. So pretty, I think.
Stratified Rock Styles applied to stamp
If you like the variation of a pattern but want it just a little bit different color… it’s not a problem. Just add a color adjustment layer above the digital stamp. This holds true for both the Overlays and the Styles. Here is the same Style I applied to the 2nd image above, with a few color adjustment layers added, to create a totally different look.
Stratified Rock Style applied to stamp, with added Color Adjustment layers
Simple and easy, as promised!
Have you wanted to make your own digital stamps, but not sure how to do it? Manu Scraps has a dynamite Action in her CU Action Grab Bag with Jill’s Bits of Bytes that will help you get started!
Our NSD 50% Sales starts tomorrow! Save shopping time this weekend by starting your NSD Shopping list today!


Karen – do you have a .PDF for this tutorial? Great tutorial! I love the way the Stratified Rock Style adds the embossed look to the stamp.