Do you ever have the most perfect element for a layout, but it’s a little too much of a good thing? Maybe it’s a flower with a stem, and you just want a flower. Or a sprig of leaves and you wanted a leaf? Or a cute dangly heart, but you just wanted the heart? I have a solution!
To get rid of the extra bits of an element, simply mask them away! It’s easier than you think. Non-destructive. Quick & easy. I use this all the time, especially in clusters. I hate when I have the perfect cluster and then there’s an ugly stem poking out where there should be nothing poking out. Here, let me show you.
For todays handy-dandy how-to I’m using the brandnew, utterly fantabulous, March | Anthology Flower Essence by ML Designs. As always, I’m working in Photoshop CC but this tutorial should work in Photoshop Elements as well.
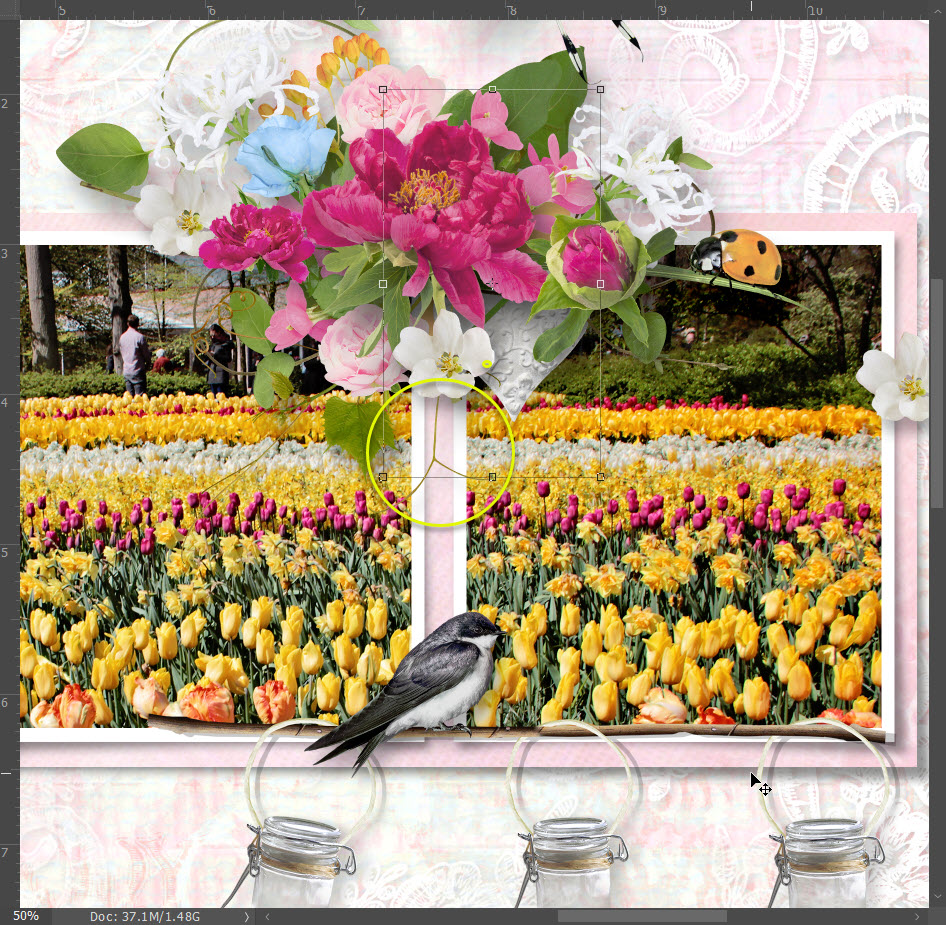
We are starting near the end of my layout process, I am almost completely done, but I needed some blossoms to flesh out my cluster. Marie had the perfect pink cluster to help me do that. But. It has a stem. Normally I love stems! I carried a presentation bouquet at my own wedding, with long-stemmed irises, lilies and gladiolus.
See? Not averse to stems. But in this cluster the stem proved problematic:
The I-don’t-want-the-stem beautiful blossom from Marie.

With the blossom resized & in place, the stem pokes out too thick & heavy.
With the magic of mask the blossom stays in place but the stem is gone!
How did I do that? With a simple vector mask:
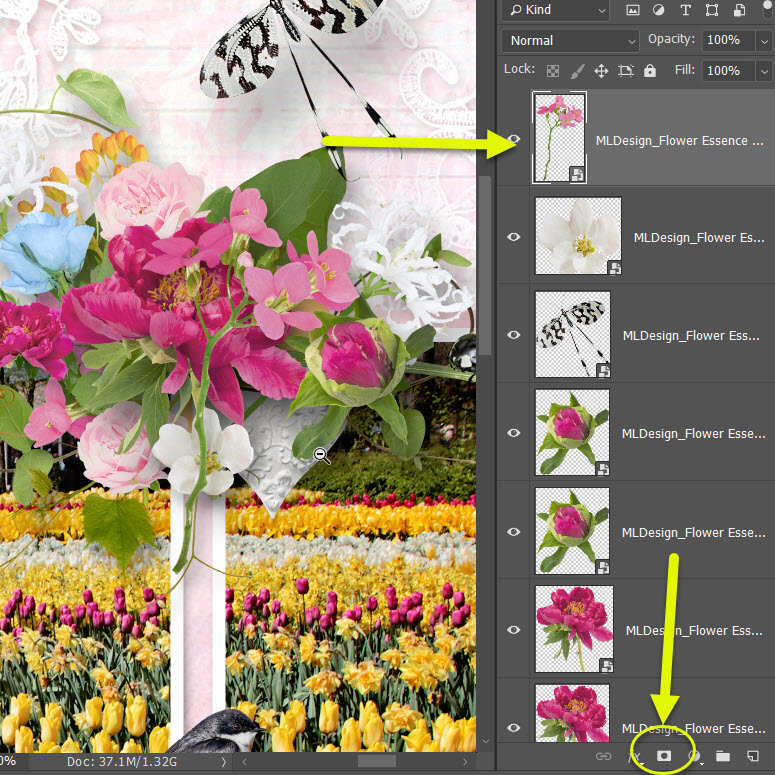
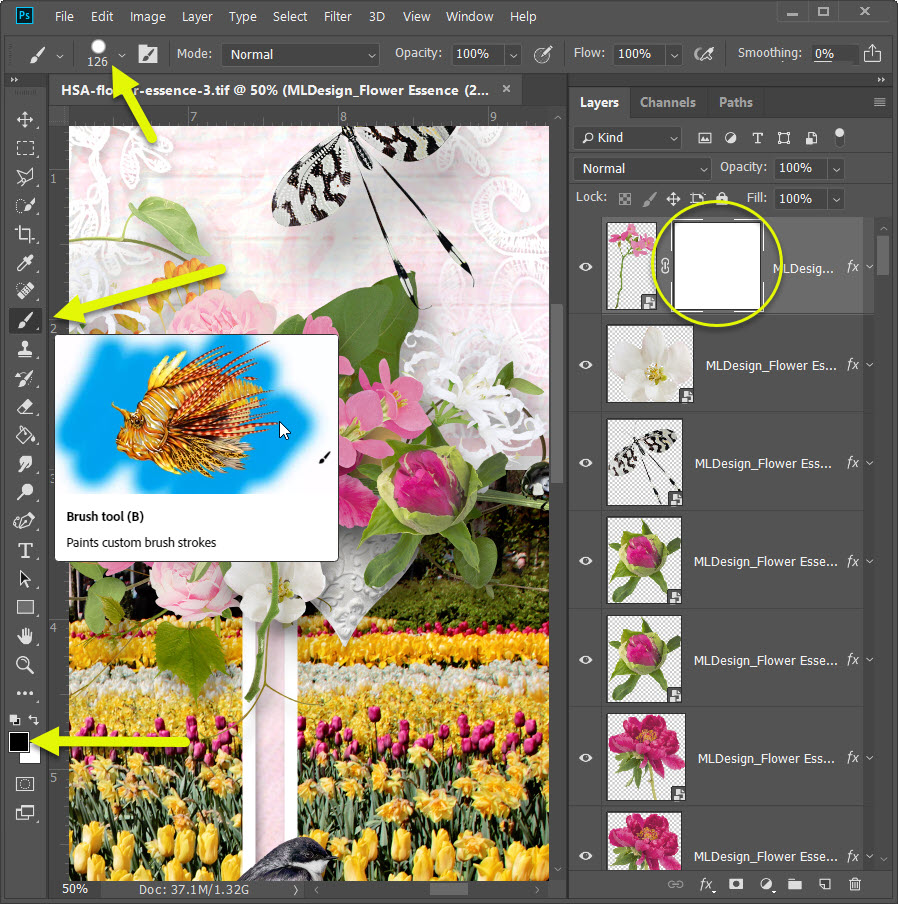
- Click on the blossom (MLDesign_Flower Essence (29)) in the layer palette
- Click on the Add Vector Mask icon in the menu bar of the layer palette
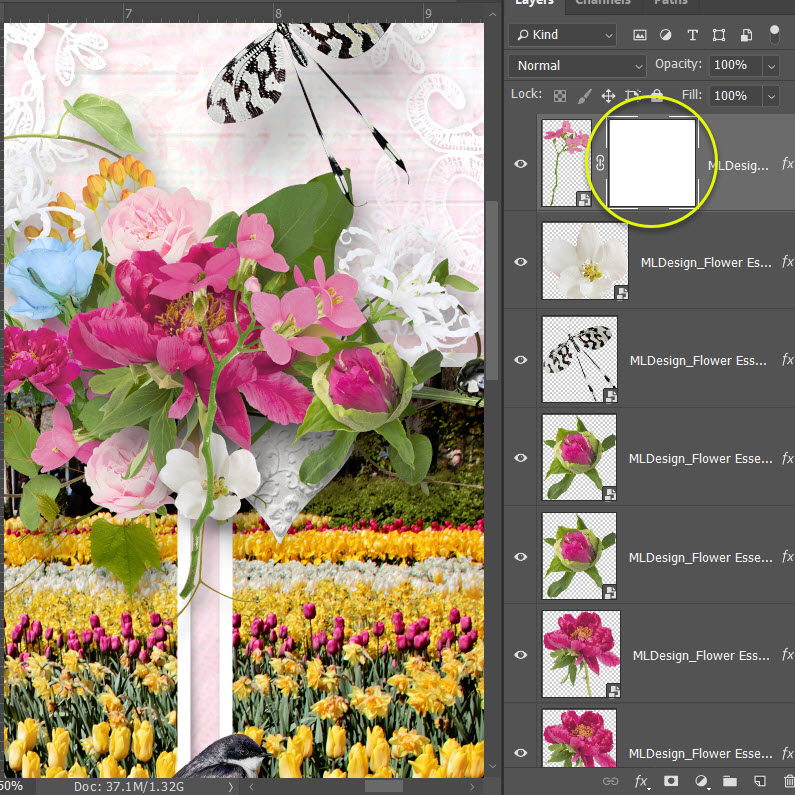
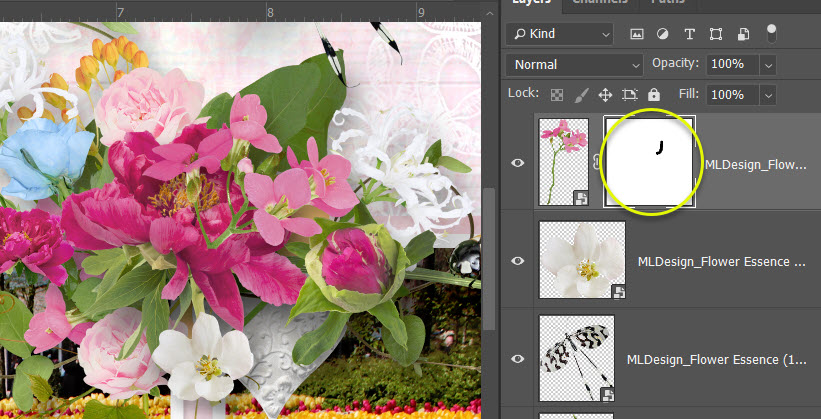
 The Vector Mask magically pops up, linked, to the blossom layer:
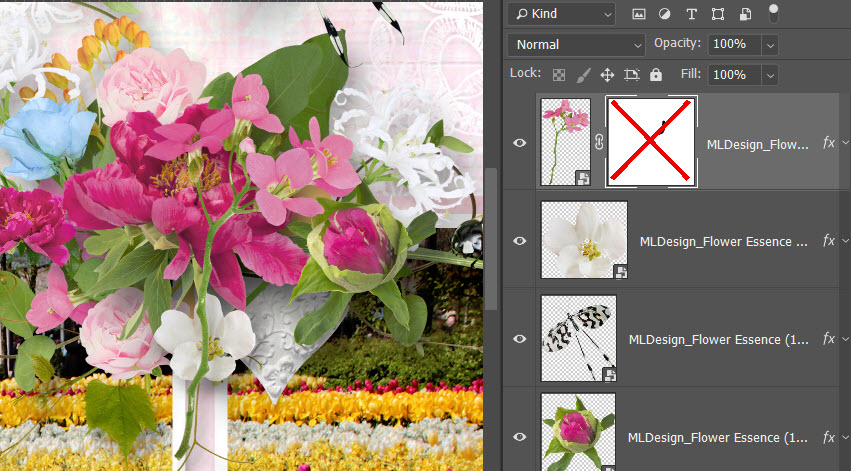
The next bit is a little trickier, only because you must be clicked on all the right things:
- Be sure you are clicked on the blossom layer and clicked on the Vector Mask
note: this is the trickiest part, photoshop only shows that you selected the Vector Mask with a very thin, white line - Click on the brush icon (my brush is a hard round at 126 px)
- To erase choose black (conversely, to add bits back in, change the brush color to white)
A quick video to show the actual erasing (by using paint brush) of the blossom stem:
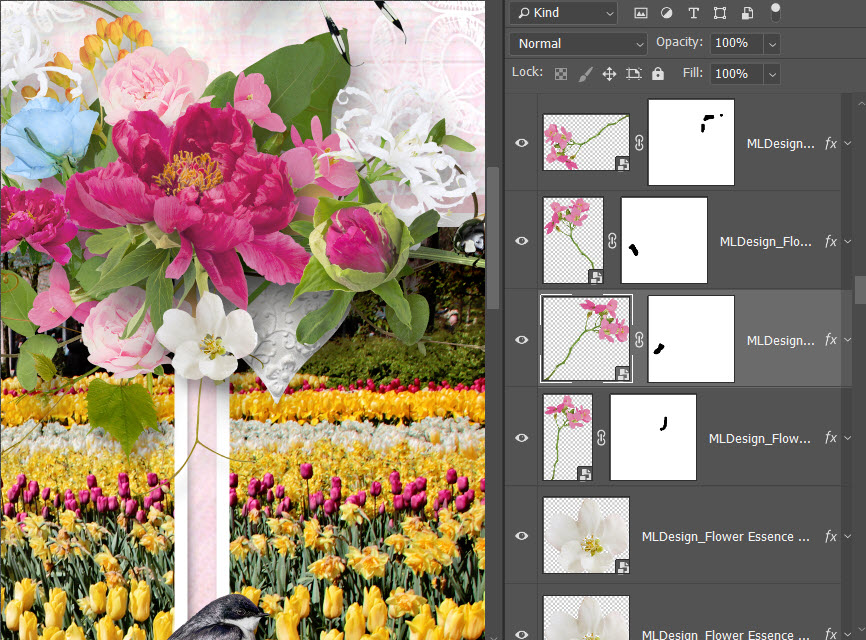
Now your Vector Mask has an ugly black streak where the stem would have been. But your blossom is beautiful & stemless:
Even better while the stem is gone on your layout, the stem is still fully intact on your element! You can double check by right-clicking on the Vector Mask and selecting Disable Layer Mask. Try it! Watch your stem magically reappear:
You can now easily duplicate the layer, the vector mask will duplicate right along with the blossom, and use the blossom everywhere & anywhere in your layout. Or, simply disable the Vector Mask to have the full blossom.
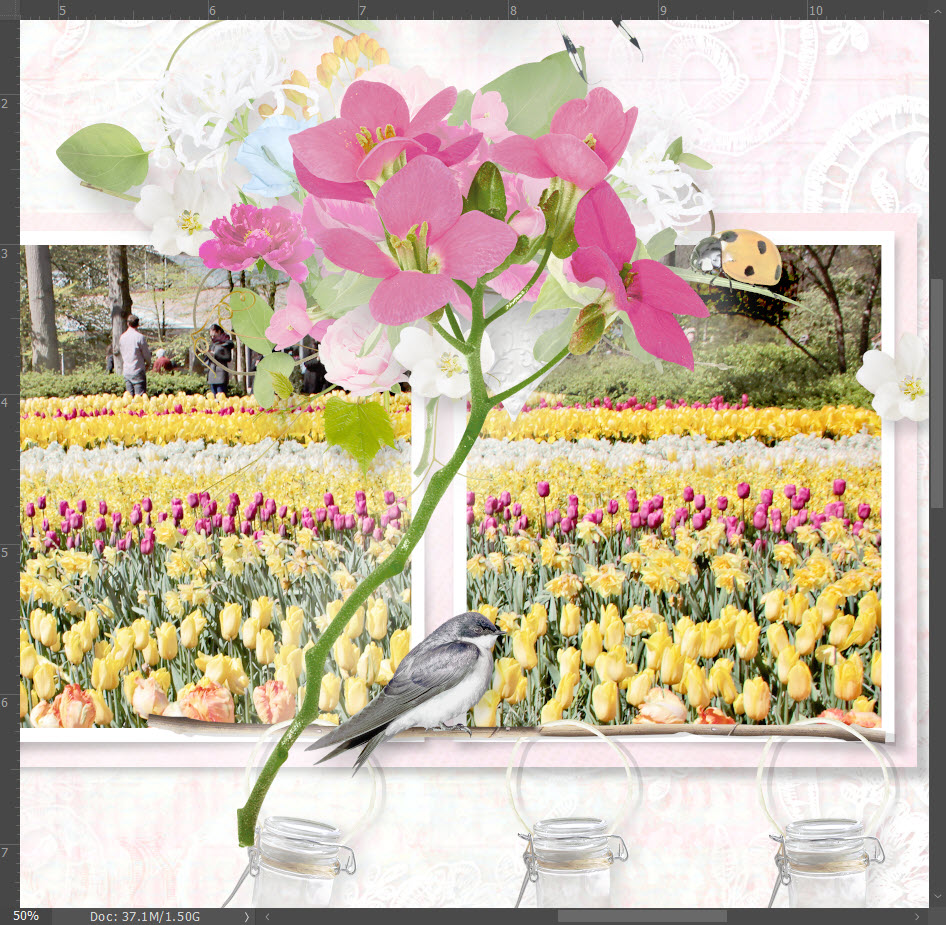
On my completed layout you can see that I used the blossom element in multiple places; and you can see that I choose to “paint out” various bits of the stem using a Vector Mask dependent upon each blossoms location in my layout:
That’s all she wrote folks! Give this quick & simple technique a try today and let me know how it goes, or if you have any questions.
My completed layout is available as a quickpage in the bonus album of the brandnew March | Anthology Flower Essence by ML Designs.
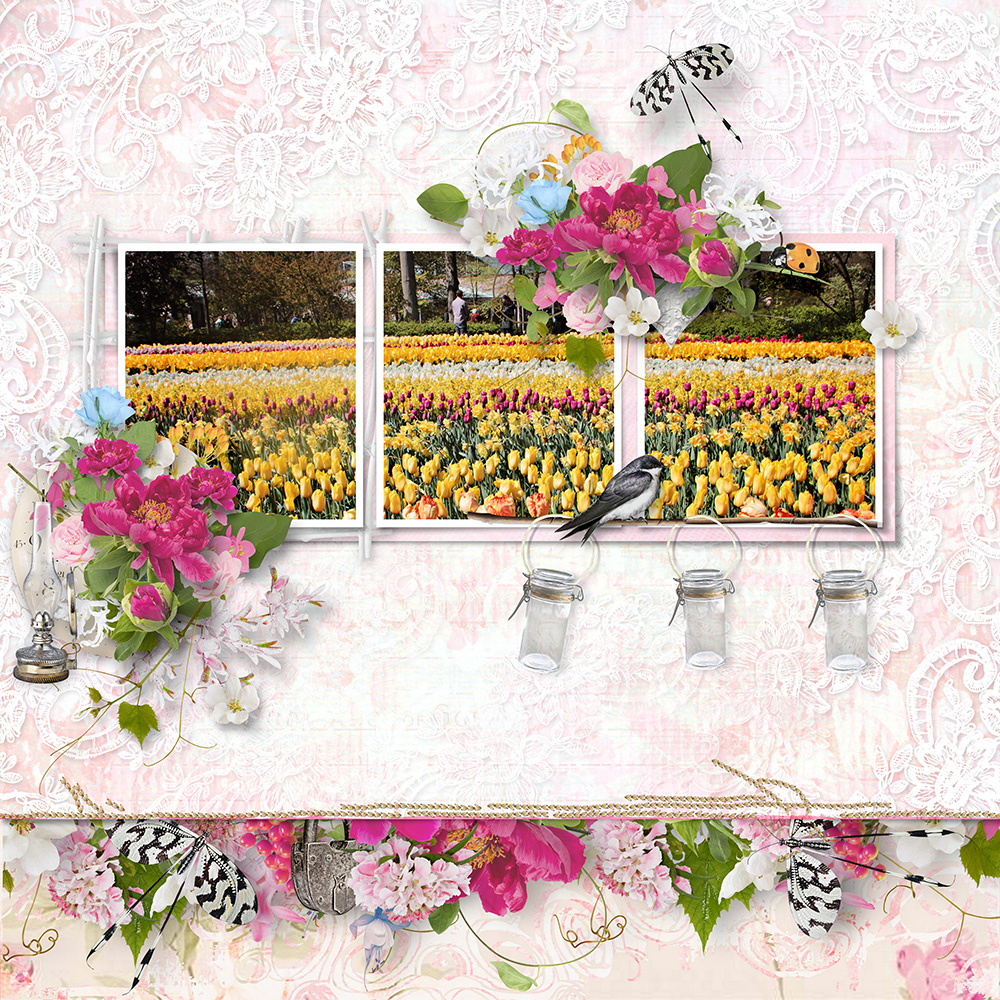
Keukenhof in Lisse, NL, 2017


what is the difference between a layer mask and a vector mask? I always use layer masks and have not come across vector masks before
That isn’t actually a vector mask. It is a regular layer mask. A vector mask is made using the pen or shape tools. After adding a layer mask, if you click the mask button again a vector mask will be added. You would need to rasterize a vector mask before using a brush on it.
Just learned a bit today from Michelle Stelling about vector and raster and sharp object images! Now this tonight! Wow, this was awesome! And so easy and I was using PSE 2018!!! Just FYI. Will hang on to this info and know I’ll use it many, many times. Thanks!!!!!