Hello there! It’s Ann with another post about Scrapping on the iPad. Last time, we covered getting access to your files, creating a document, and adding a background. Now, let’s add photos and elements to the page. For this post, we’ll continue using Pixelmator as our app.
First step – getting your photos onto your device. iOS or MacOS users can transfer images via Airdrop or cloud services. From an Android device or Windows desktop, you can also use cloud services like iCloud, Google Drive, Dropbox, Amazon, etc. to share images between devices and laptops. Also, third-party apps allow Android users to transfer photos. For my page, I found the images I want to work with on an external hard drive connected to my MacBook, and I transferred them to iPad via Airdrop. Airdrop places images in the Photos app.
I’m ready to open Pixelmator and start a page. Like we covered in the last post, I created a 3600×3600 px document, and placed my background paper in the document. Now it’s time to add photos. Tap the Plus sign, and grab your photos from the Photos app or use Insert from… to grab from the cloud.
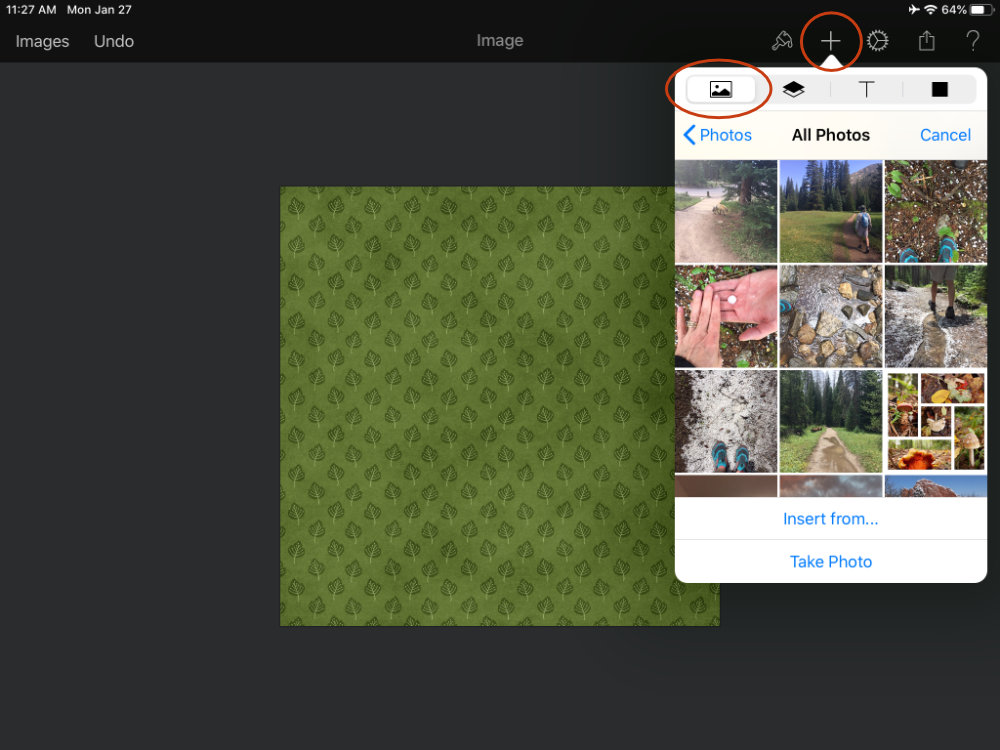
Once you tap to select your photo, you can resize it within your document by grabbing a corner handle and dragging the image to size. Once you have your photos in place, we’ll start to add some elements. This week, I’m using Connie Prince’s National Park kit.

To this point, I have added a background, four photos, and one element. When I go to grab my next element, Pixelmator says no more layers— I am limited to seven. 🙁 No problem! There’s a workaround. We’ll clean up then merge to reduce our number of layers.
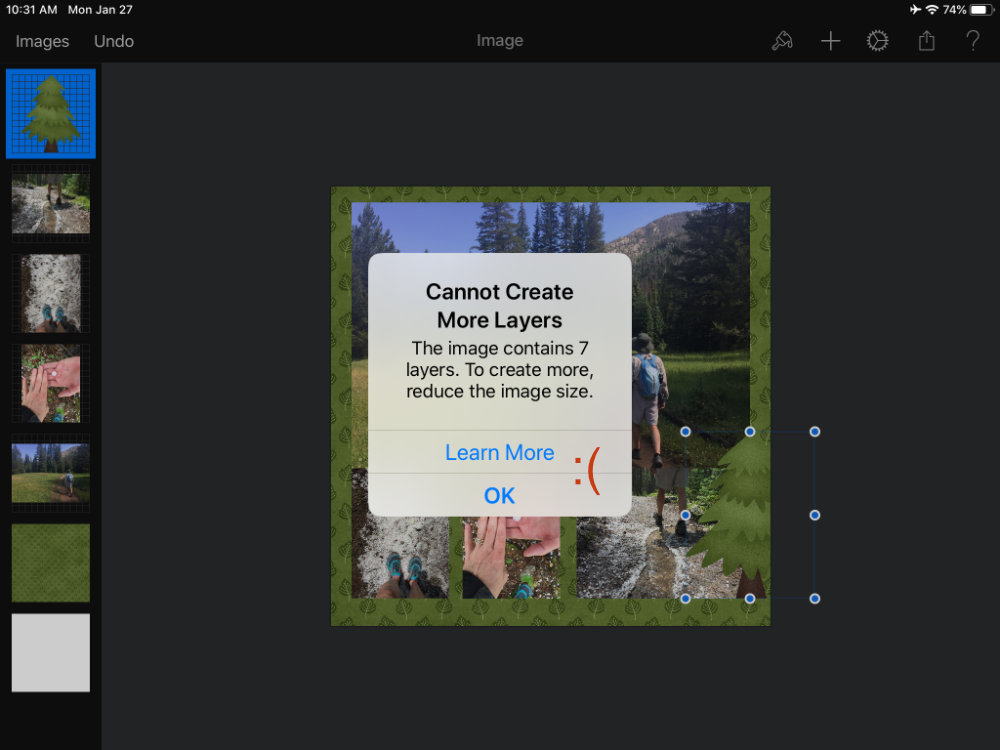
First, we’ll delete any unused layers. Pixelmator adds a background when you create a document. Swipe from the left edge of the Pixelmator screen to reveal the layers palette. Now tap twice on the blank, white background and select Delete from the fly out menu.
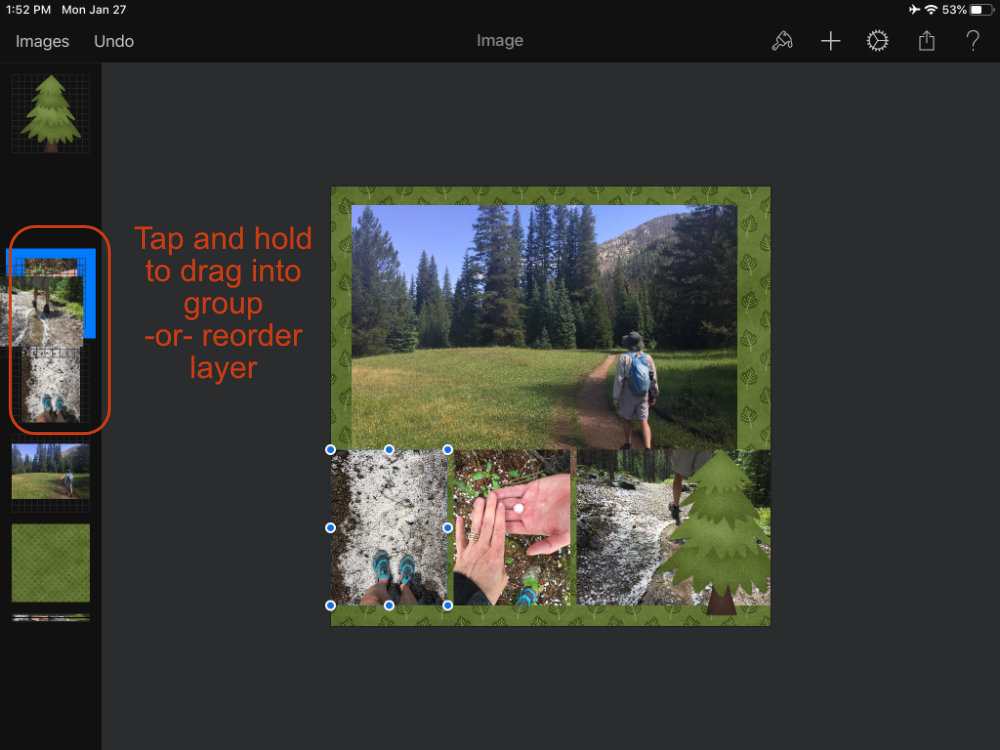
Now, let’s group and merge some layers. From the same layers palette at the left of the screen, tap a photo, and drag the layer down on top of another photo layer. This creates a Group of layers. You’ll see a little blue box appear to indicate you’re grouping items. I grouped the three smaller photos together.
Hint: Try to get your photo or element sizing close to how you want it before grouping. In Pixelmator, you can resize an individual layer, or a merged layer, but not a Group.
Tapping and holding in the layers palette also allows you to drag layers to reorder above or below other layers.
Now, from the layers palette, tap once on the group, and select Merge from the fly out menu.
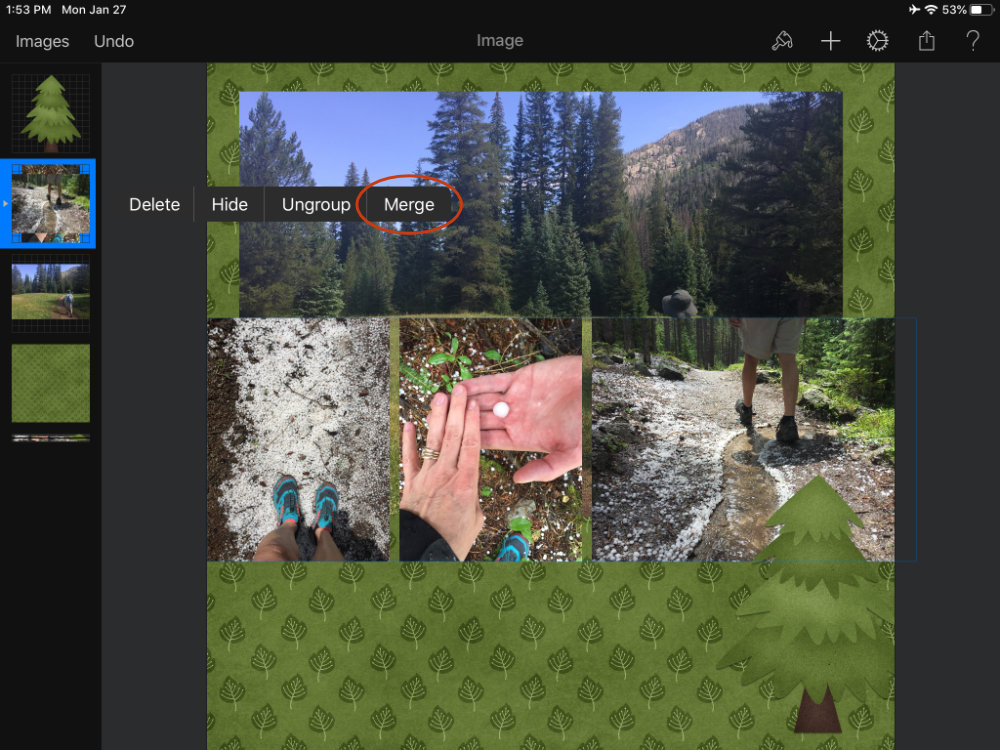
Hint: See the little squished rectangles at the bottom of the layers palette? It’s a hidden layer. From the layers palette flyout menu, you can Show and Hide layers, as well as Cut, Copy, Delete, Duplicate, and Format. If you’re on a group, you can Merge and Ungroup.
Let’s add a shadow to the merged layers. Tap to select the newly-merged layer, and select the Tools menu, hit Format at the bottom, then switch on Shadow. My final step for this bottom area of the layout was to add a drop shadow to the tree, then merge it with the row of photos.
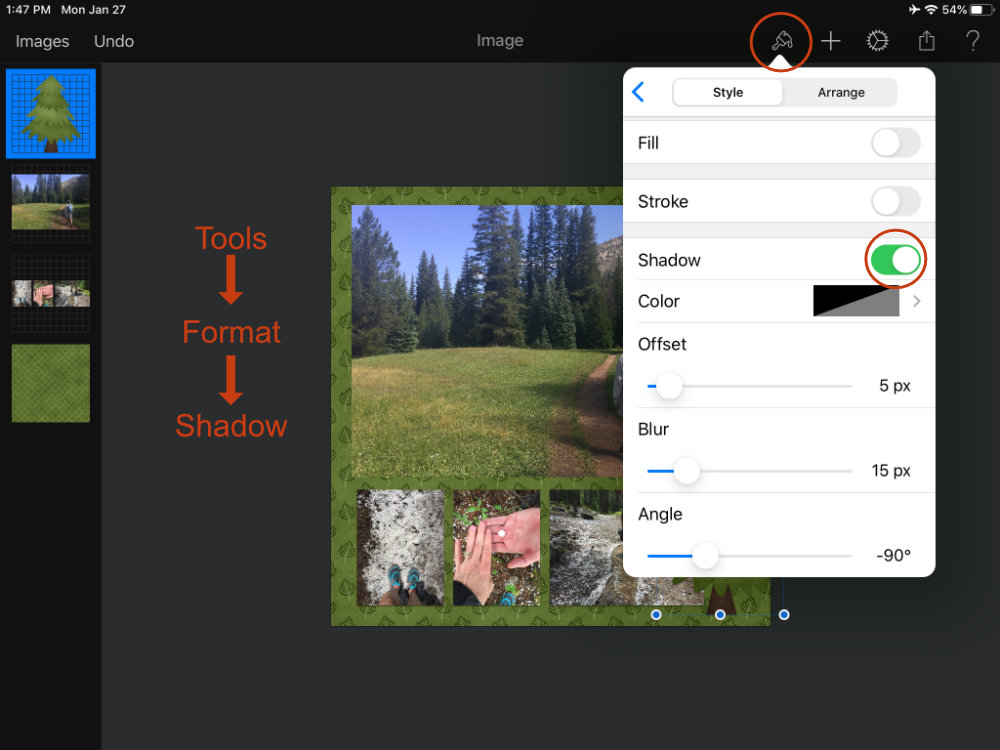
Hint: if you’re trying to find the Format command in the Tools Menu and see only Arrange at the bottom of the popover, make sure you have a layer selected and not a group.
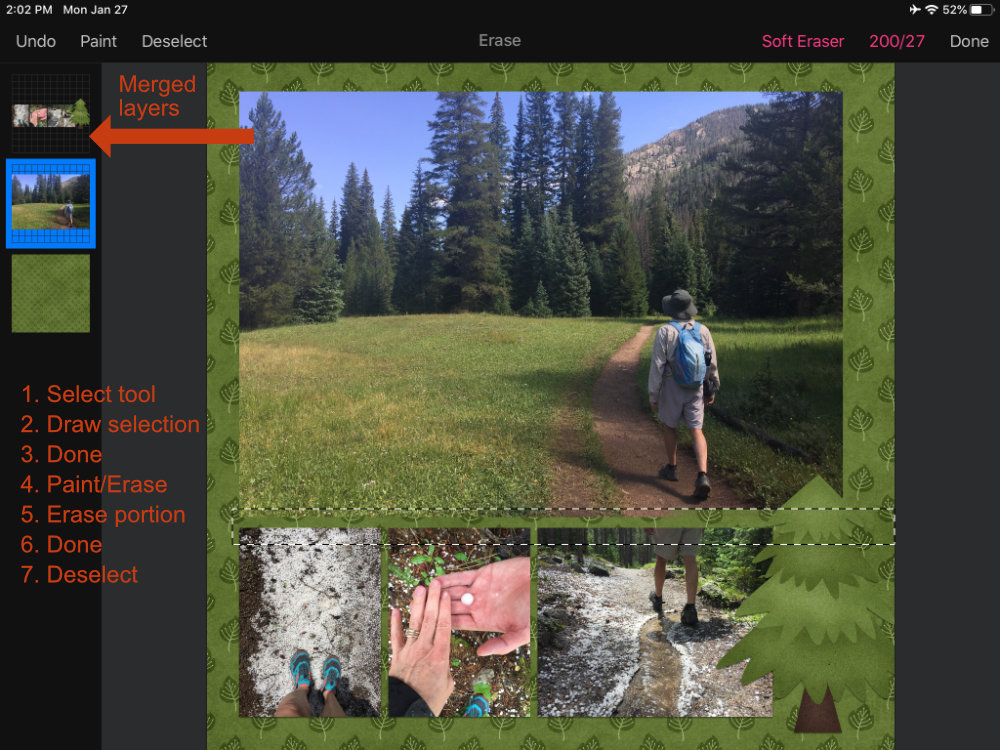
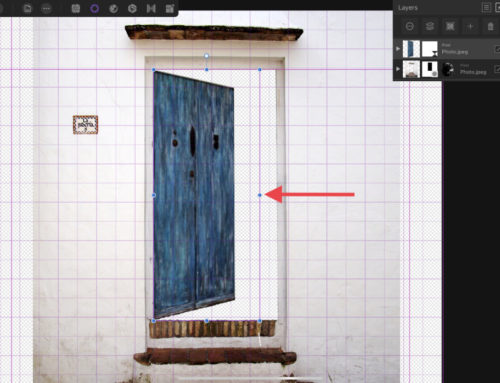
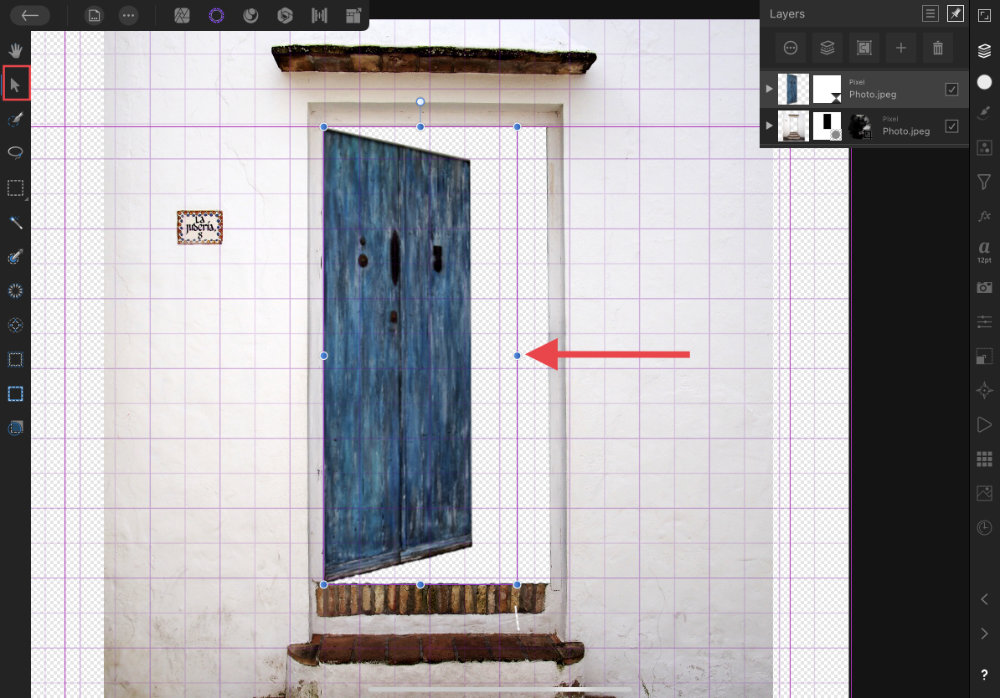
Next let’s shave the bottom off our large image. Since Pixelmator does not have non-destructive layer editing (like layer masking), we have to erase part of our image. To do this, open the Tools menu again, tap Select, then tap Rectangular. Draw a rectangle over the lower part of the photo, tap Done. Tap Tools again, and select Erase (not Paint- these brush-based tools work in tandem in Pixelmator). Select your eraser tool, and erase that portion of the image. When you’re finished, tap Done. Then tap Deselect.
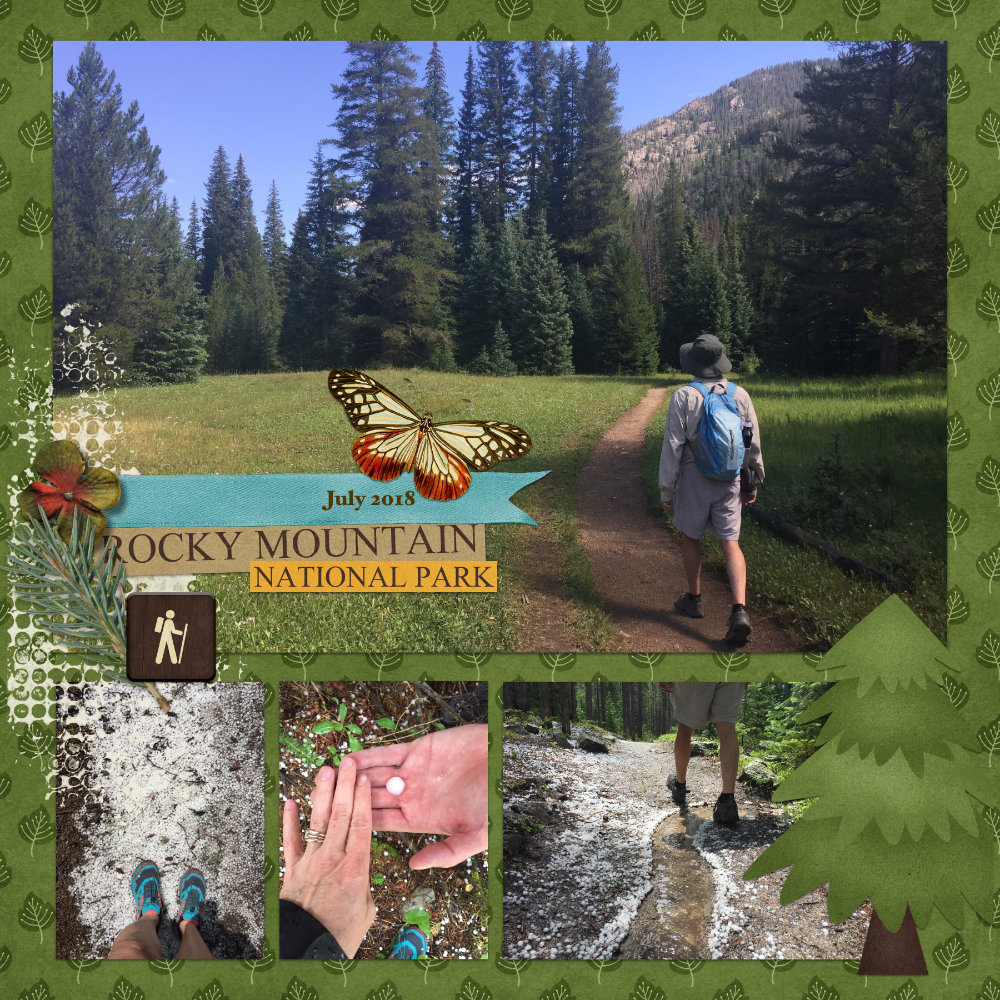
You now have all the tools you need to complete a page similar to this one by adding a few more elements. Just remember, if Pixelmator complains about the number of layers, delete any unused ones, and group and merge whenever you are able!
See you again soon for another post about Digiscrapping on iPad!

Leave A Comment