Thanks for joining me as we begin the second lesson in Photoshop Elements Ultimate Basics. Yesterday we learned how to create a blank document.
There are times when you will want to start your design with a blank document; for example, if you are creating word art or a cluster that you want to save as a png while maintaining transparency. Today we will bring a paper into Photoshop Elements(PSE) to act as our foundational base, and build upon that.
Everyone organizes their photos and scrapbook kits differently, and organization is a topic unto itself! For the purposes of this lesson, you simply need to know how to navigate to the images that you want.
So open Photoshop Elements, and let’s get started!
1. Go up to the top Menu Bar, far left, and click on File. A drop-down menu will open. Click on Open, and and you will see the Windows Tree, showing the folders on your computer.
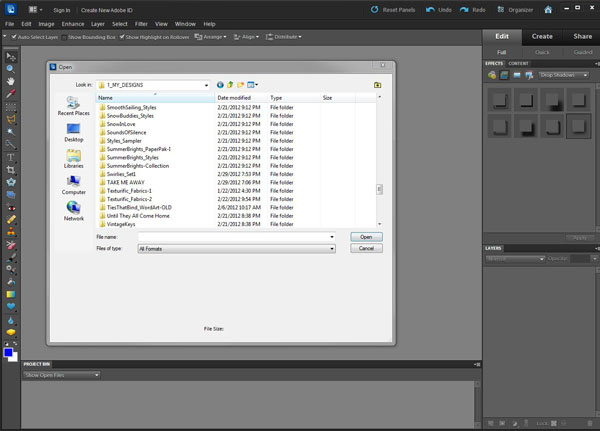
Navigate to the paper you would like to use. Once you locate it, click on the paper to select it, then click Open. The paper will fill your canvas.
2. Go back to the Menu Bar, click File>Open again, and navigate to the kit elements that you would like to use. (Here’s a tip: Click and hold the Control Key as you select multiple elements. Without letting go of Control, click Open, and all of your selected elements will open in PSE at once.)
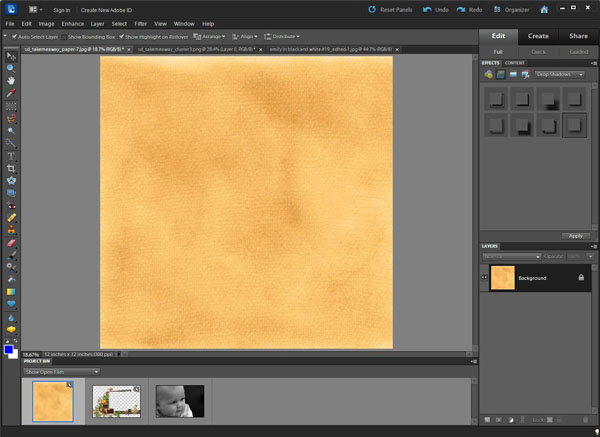
In the Project Bin below your canvas, you will see thumbnails of the items you have opened. These are the items that you have available to work with.
I have opened 1 paper, 1 cluster, and 1 photo. The last item I opened is the last one in the Project Bin but the one present on my screen.

3. I want the paper to be the background of my scrapbook page, not this photograph ( as cute as it is!). So I double-click the thumbnail of the paper in the Project Bin to place it on my canvas.
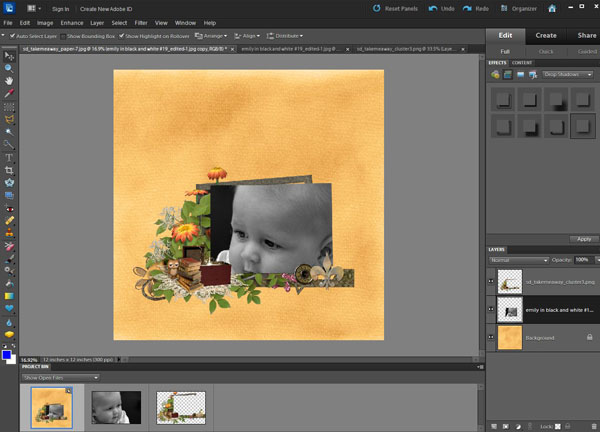
4. Next I want to bring the opened elements and/or photographs onto my page so that I can work with them. I select them in the Project Bin by clicking on them and holding my mouse button down. I then drag them up onto my background paper, and let go of my mouse.
To keep things simple, today I am using a pre-assembled cluster, and have dragged it onto my background paper, along with a photograph. I positioned the photograph under the cluster, and I’m happy with it so far!
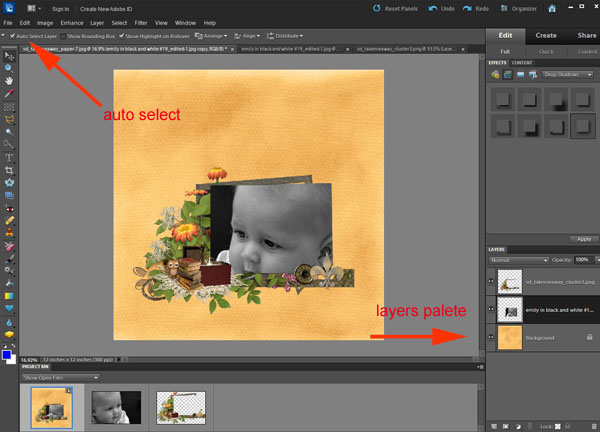
You can bring as many elements onto your background paper as you wish. Be sure to have the “Auto Select Layer” box checked so that when you click on an element, it will become active. While holding down your mouse button, move and manipulate the element as you wish.
You will also want to pay attention to how your elements are stacked in your Layers Palette. View your layers palette as you would a regular scrapbook page. When making a traditional scrapbook page, you start with a paper, and then begin stacking photographs and elements on top of each other as you create your page. The same concept applies to your digital scrapbook page. By looking at your Layers Palette, you will see how your elements are stacked. You can move elements up or down in their stacking order by clicking on the desired layer in your Layers Palette to make it active, holding down your mouse button, and dragging the layer either up or down to its desired position.
Tomorrow, I will add some text to my page, then save it!
In the meantime, play around with your own page, and have fun!


Thanks for going back & covering the basics for all of us newbies!!!
Thanks, Donna! I’m glad you are finding it helpful!
Thank you for these tutorials. I have my PSE on one window and this tutorial on the other window and trying this. So far it hasn’t been working for me. The cluster element I’m trying to use does not pull up to the page right. The transparent areas are white. Could this be because I am using PSE 6 and not a more current PSE? I have tried it several times with going back and forth between PSE and the tutorial.
[…] Photoshop Elements – Ultimate Basics #2 – 1 freebie(s)? […]
@Carol –
Are you using a Mac? I have issues with the drag and drop method described in PSE6 on my Mac. Often times dragging from the photo bin to a new document adds white to my elements and resizes my papers to a thumbnail image. If you drag from one file to the other though, that works fine. I’m going to try and describe with words here:
Have your layout in progress open, place it to one side of your workspace. Double click the element in the photo bin to pull it up in your workspace at the front. Click on the element (or on the element in the layers palette) and click and drag it over to your layout (if you hold shift at the same time, it will center it). This seems to work for me to keep the right size and transparency!
I hope that helps! Feel free to contact me with further questions!
@Carol & Manda – i’m using a PC and have never had this problem, but if it still persists you can always use the copy/paste method instead of the drag/drop method: instead of dragging the element onto the background paper, pull up the element you want to place, do SELECT>ALL, then EDIT>COPY. Next, bring up your background and go to EDIT>PASTE. Hopefully this will eliminate the extra white showing up. 😉
Mandak and Kimberkatt — Thank you so very much for your help. I just finished trying both and both methods worked just great. I have been going back and forth between two different software programs while trying to do my layouts with one being an old discontinued Microsoft 2000 PictureIt program. It would keep my “png” files okay while adding them to page. I prefer PSE to work on to restore my scanned old pictures of my ancestors and to finish layout so would switch back to PSE once PictureIt had my page okay with “png” file. What a time saver this will be. Thanks again — and a big thank you to Karen Schulz and the Studio for having this tutorial and the chance to find out how to do this. You are all so great and I truly appreciate your help.
Thanks, Carol, for letting us know that both of these options worked for you! Thanks to Amanda and Kimberly for their input!
Thank you!!