Hello Memory Keepers! Welcome to another DUO Element tutorials. These are read-along, follow-along on the blog and there’s the exact same tutorial up on our YouTube. We’ve had a couple of these, so I’ll skip some of the skills in this follow-along tutorial. I’ll include a complete list of element tutorials at the bottom of this post.
In case you don’t know, I was sick this year (Spoons). In case you also don’t know, I try to put together a yearly book for my mom. I’m very, very late! Luckily I not only love Templates but I have access to a store full of templates LOL! And yet, with a store full to choose from, I’m choosing one I just used earlier this month.
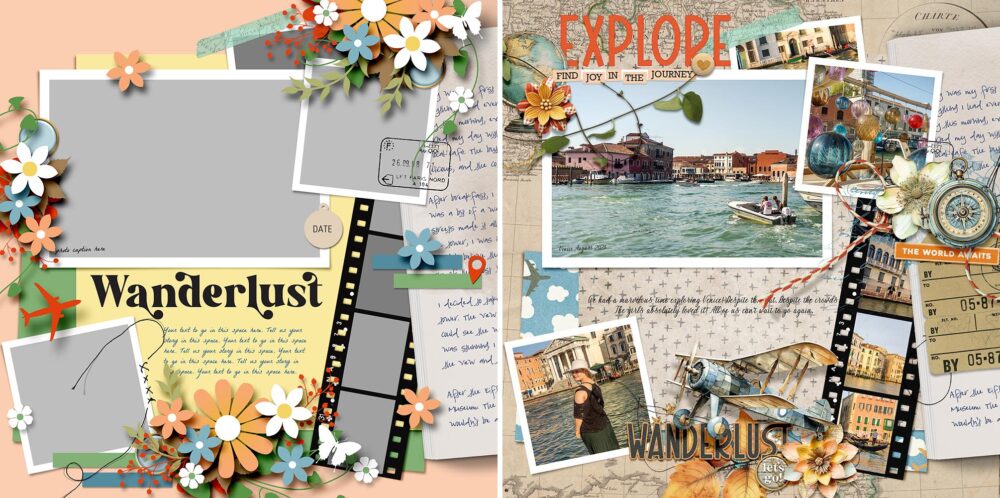
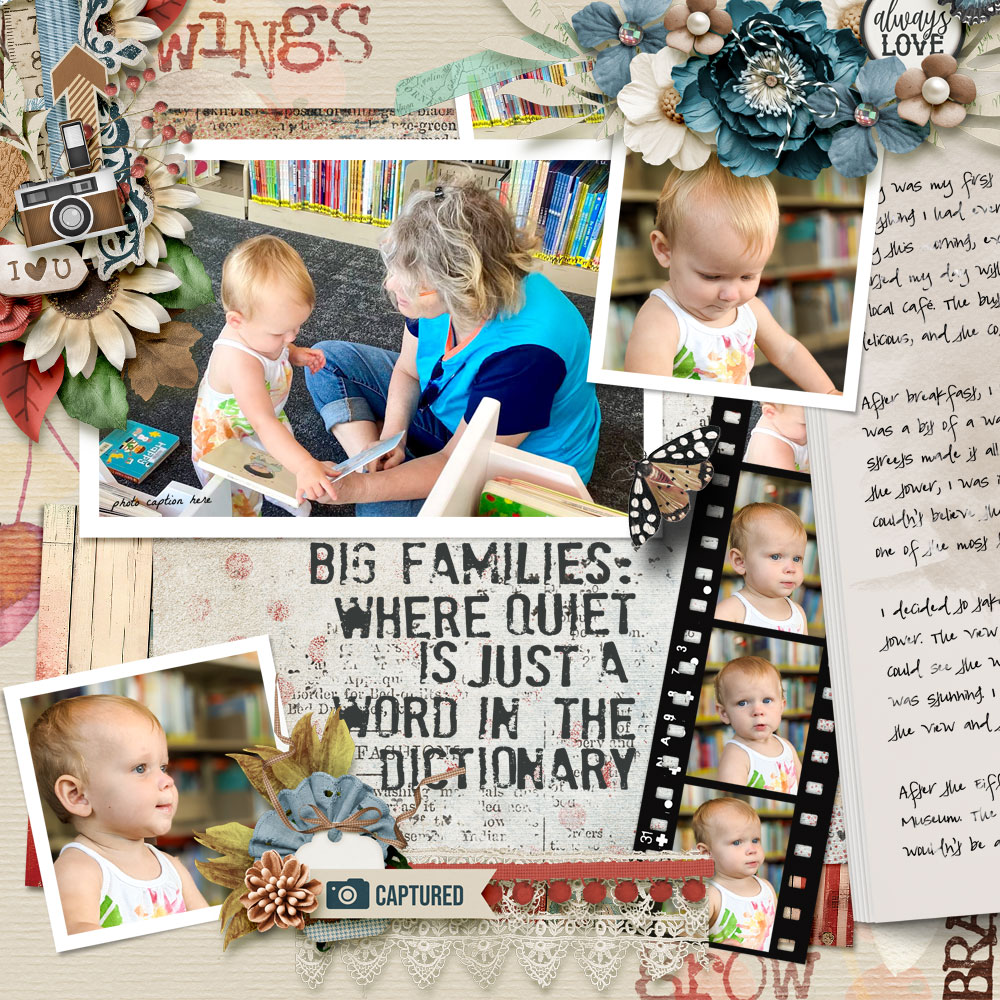
created using the November AnthologyFlex Wander Woman by Heartstrings Scrap Art
I wanted to show you how versatile digital scrapbooking supplies are, and how you can reuse & reuse. I’ve already got my template open in my Photoshop Elements 2022. I’ve also opened all the files & photo’s I’ll be using to scrap this page.
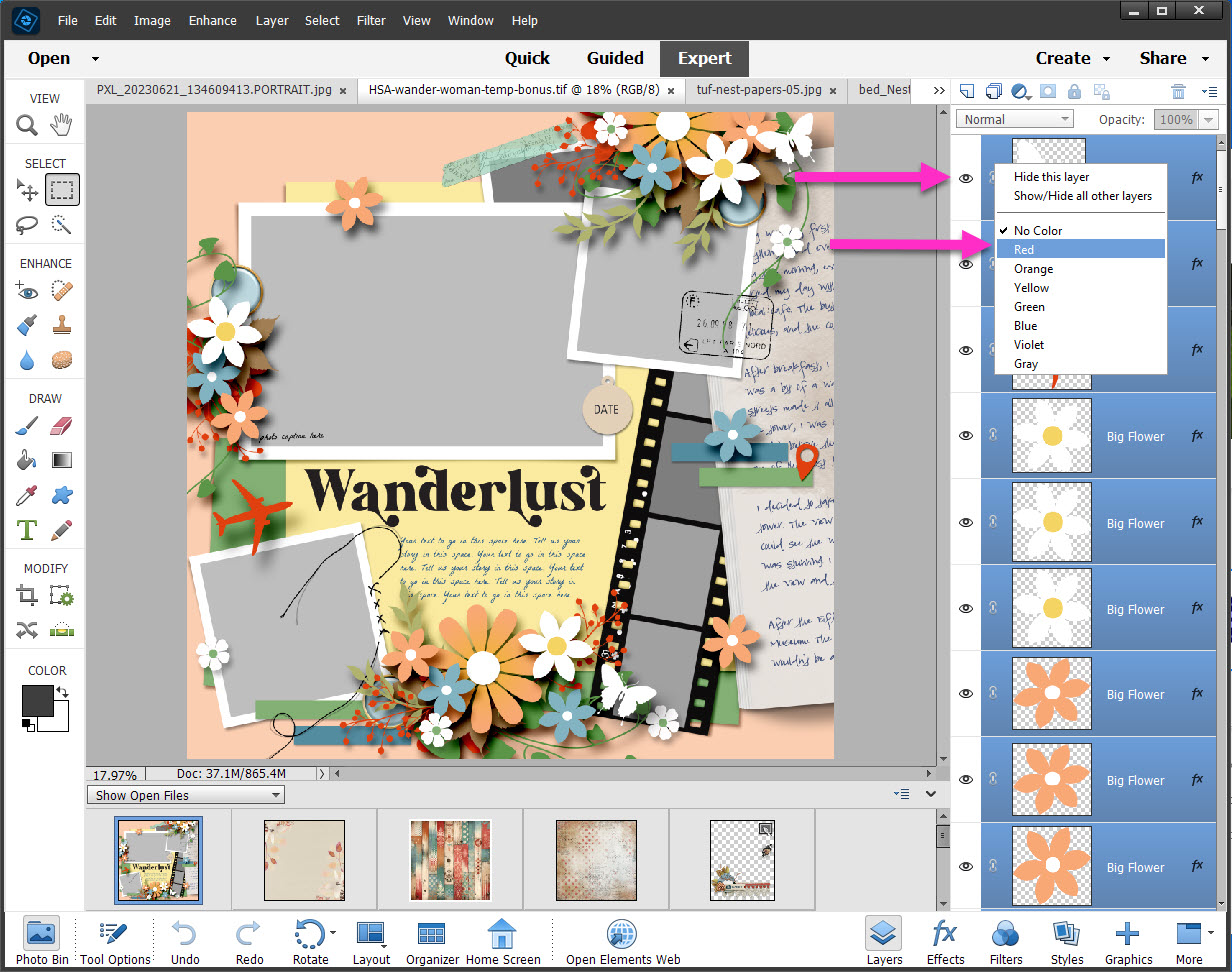
The first thing I always do when using a template is give all the template elements a “layer” color. This way I can easily spot if I haven’t replaced an element from my stash.
- Click on the bottom template layer in your Layer Palette
- Scroll all the way up to the top template layer
- Shift+Click to select all the template layers
- Right Click in the “eye” column
- Choose Red (or really any of the available colors)
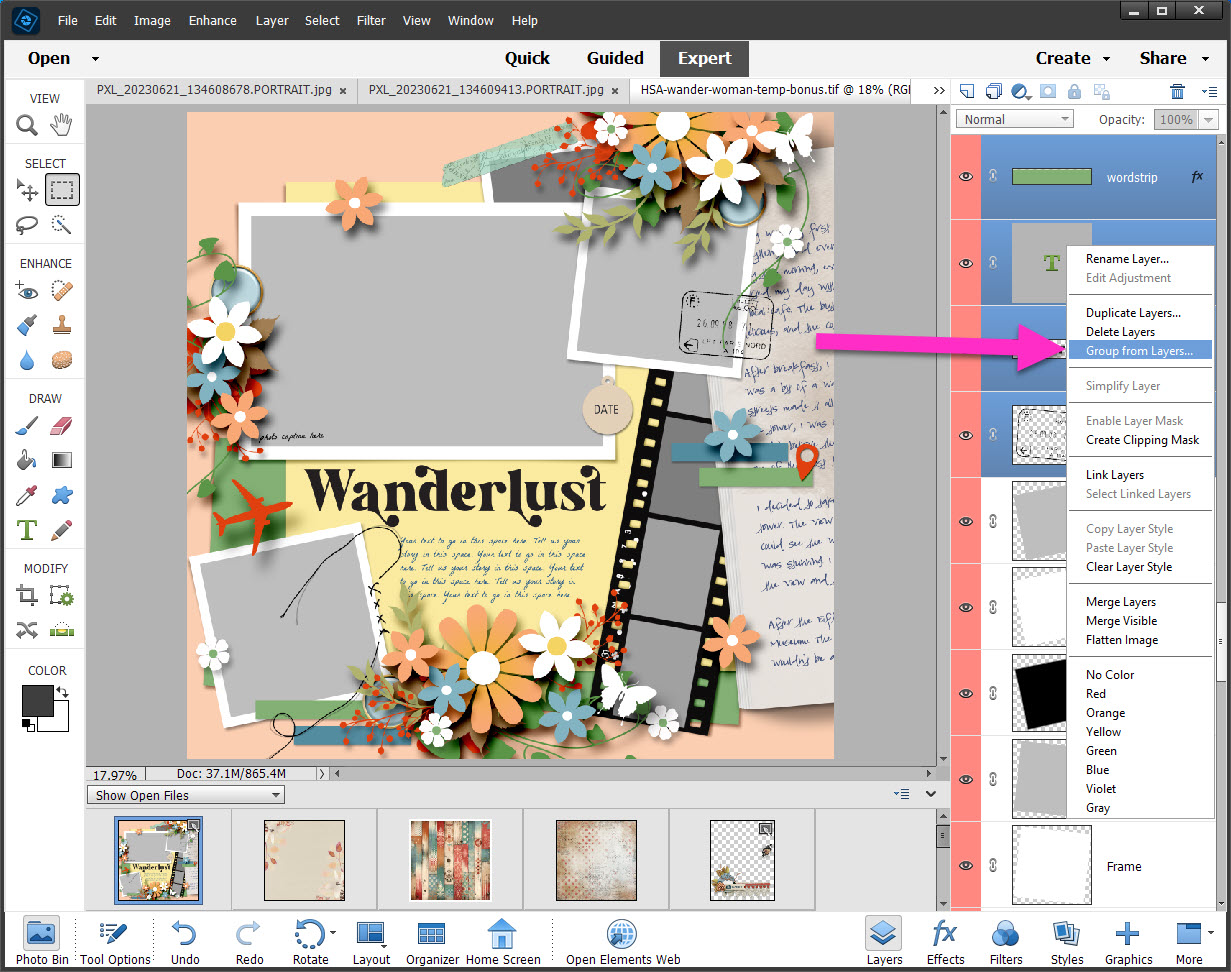
I find it easier to add the photo’s & papers by hiding the template elements.
- Select all the template layer elements in the Layer Palette
- Use the same method as above
- Right Click and choose Group from Layers
- You can now easily hide/unhide all the template elements as needed
With the template elements hidden, I start replacing the papers. My background paper is by The Urban Fairy, from the coordinated collection Nest. In fact, all the papers & elements in my layout are from Nest. I looooooove that every piece, from every Designer, coordinates!
Add a copy of the Paper to your Template:
- Click + Hold the Paper icon in the Photo Bin
- Drag the Paper icon directly onto your Template file
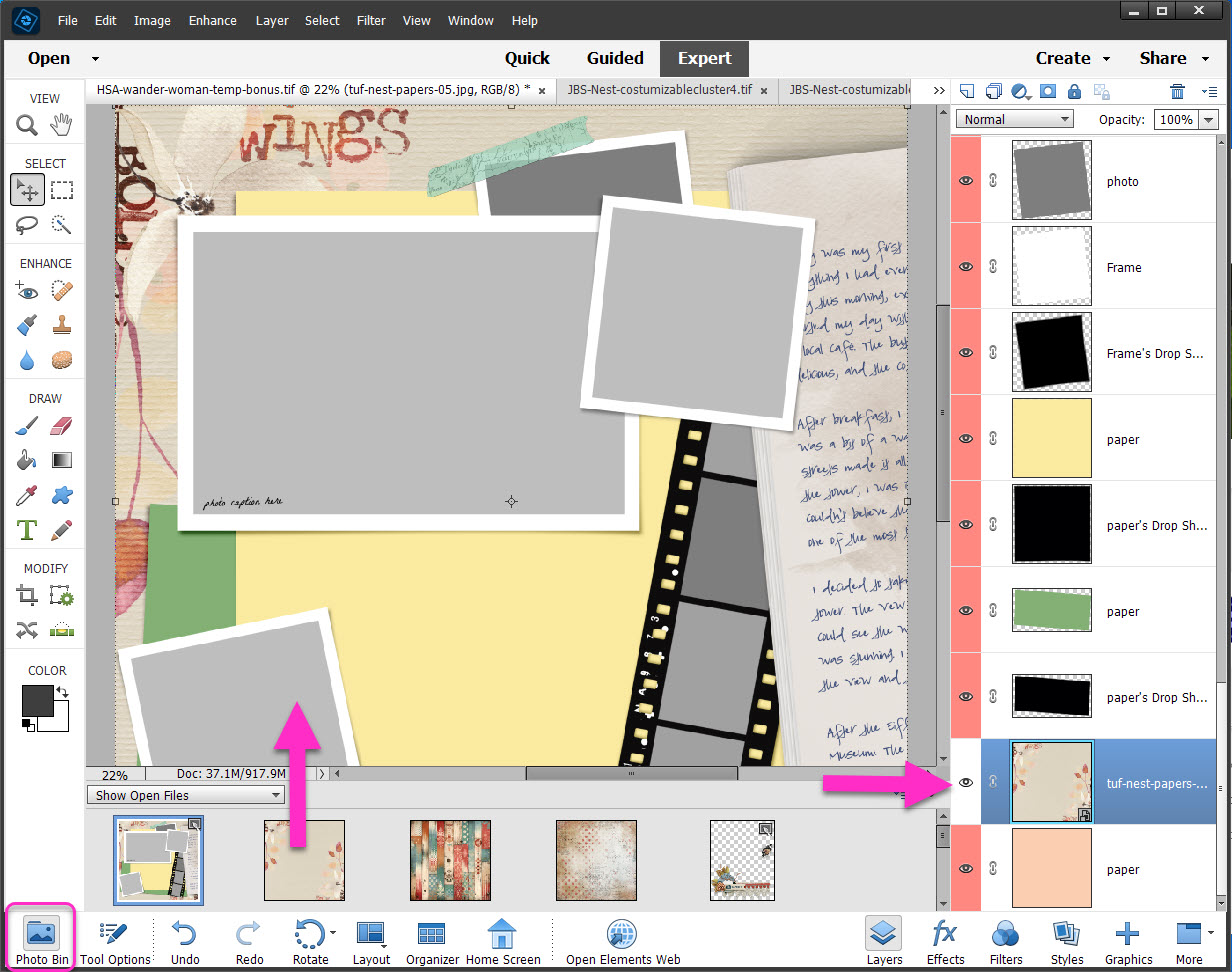
If needed. Click, hold & drag the paper in your Layers Palette until it’s just above the paper layer from the Template. Repeat this process with the other paper layers in the template until all the papers are replaced. I mixed & matched from Nest using papers from Neia Scraps and Bekah E Designs.
I saw one word art I absolutely had to have, and I knew exactly were it would go! Designed by JB Studio, it is the perfect word art for me and the perfect word art for this page. We add this word art element the same way as we added the papers.
- Click + Hold the word art icon in the Photo Bin
- Drag the word art icon directly onto your Template file
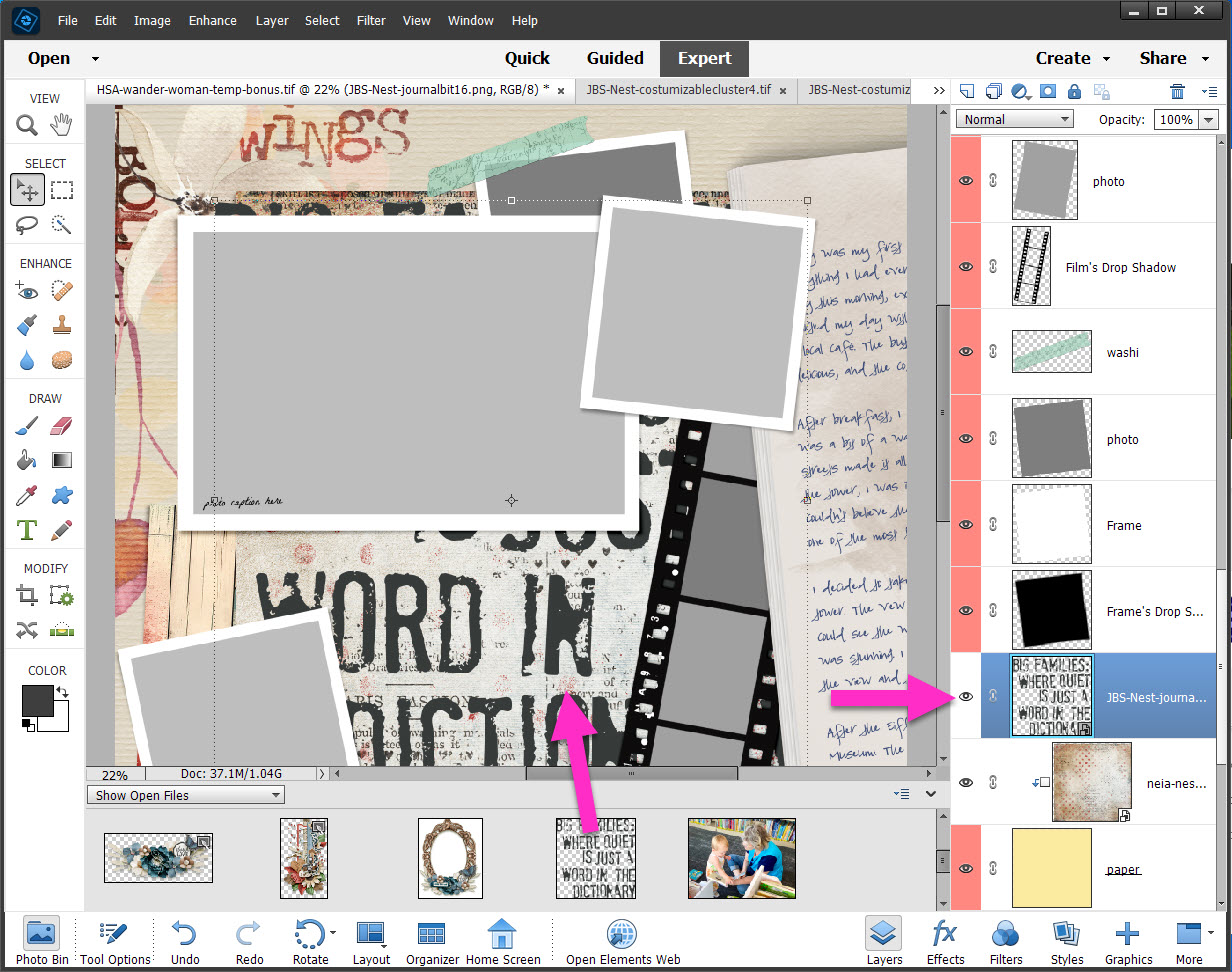
You can now resize the word art element as needed. I’ve already picked my photo’s, and uploaded them to the Photo Bin so I can quickly add them to the template as well.
- Click + Hold the photo icon in the Photo Bin
- Drag the photo icon directly onto your Template file
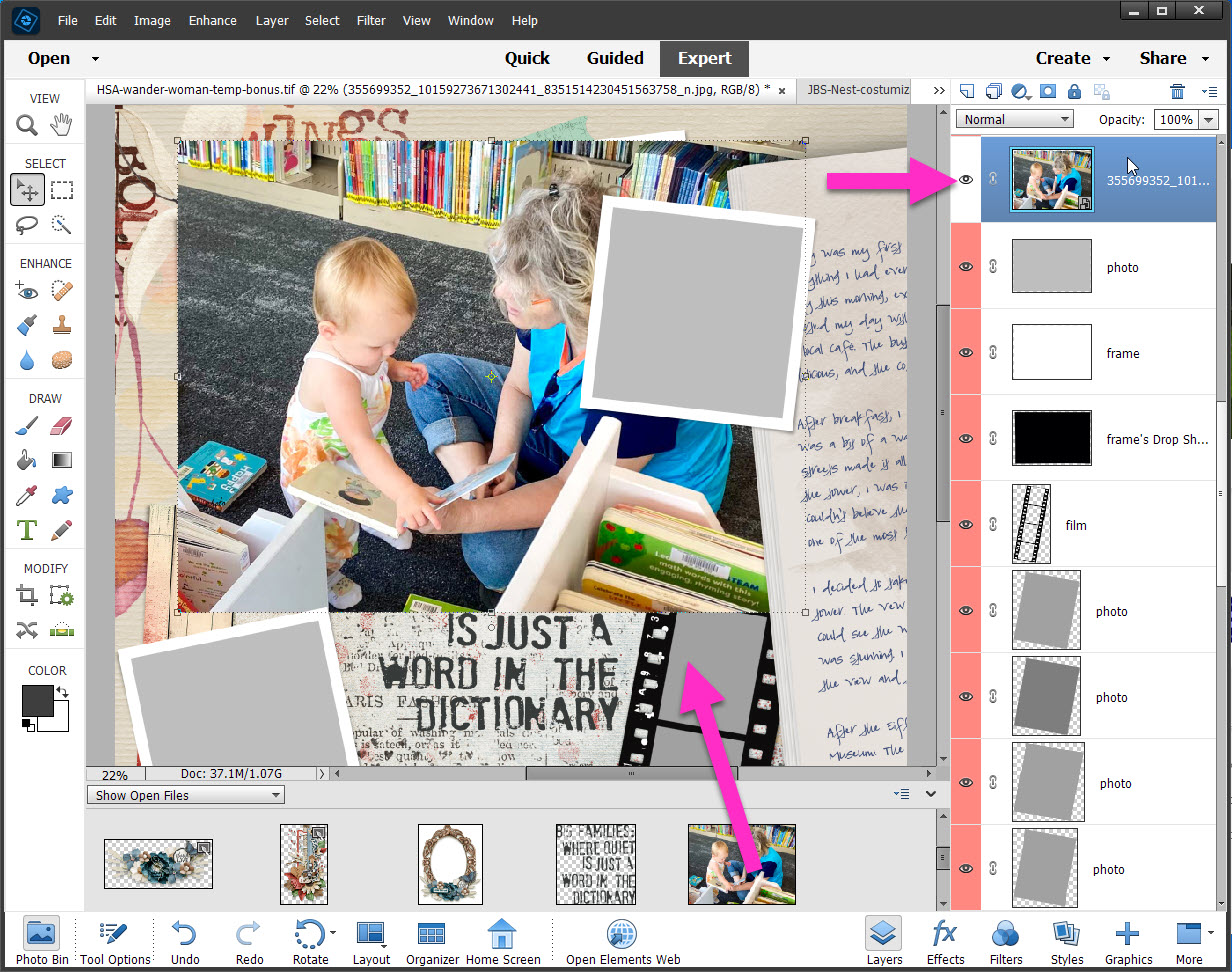
Once it’s in place, I Create a Clipping Mask and resize to get it just right. Rinse & repeat with the remaining photo’s.
Tip: with a filmstrip, I frequently use one photo multiple times in one layout. I simply show different parts of the same photo.
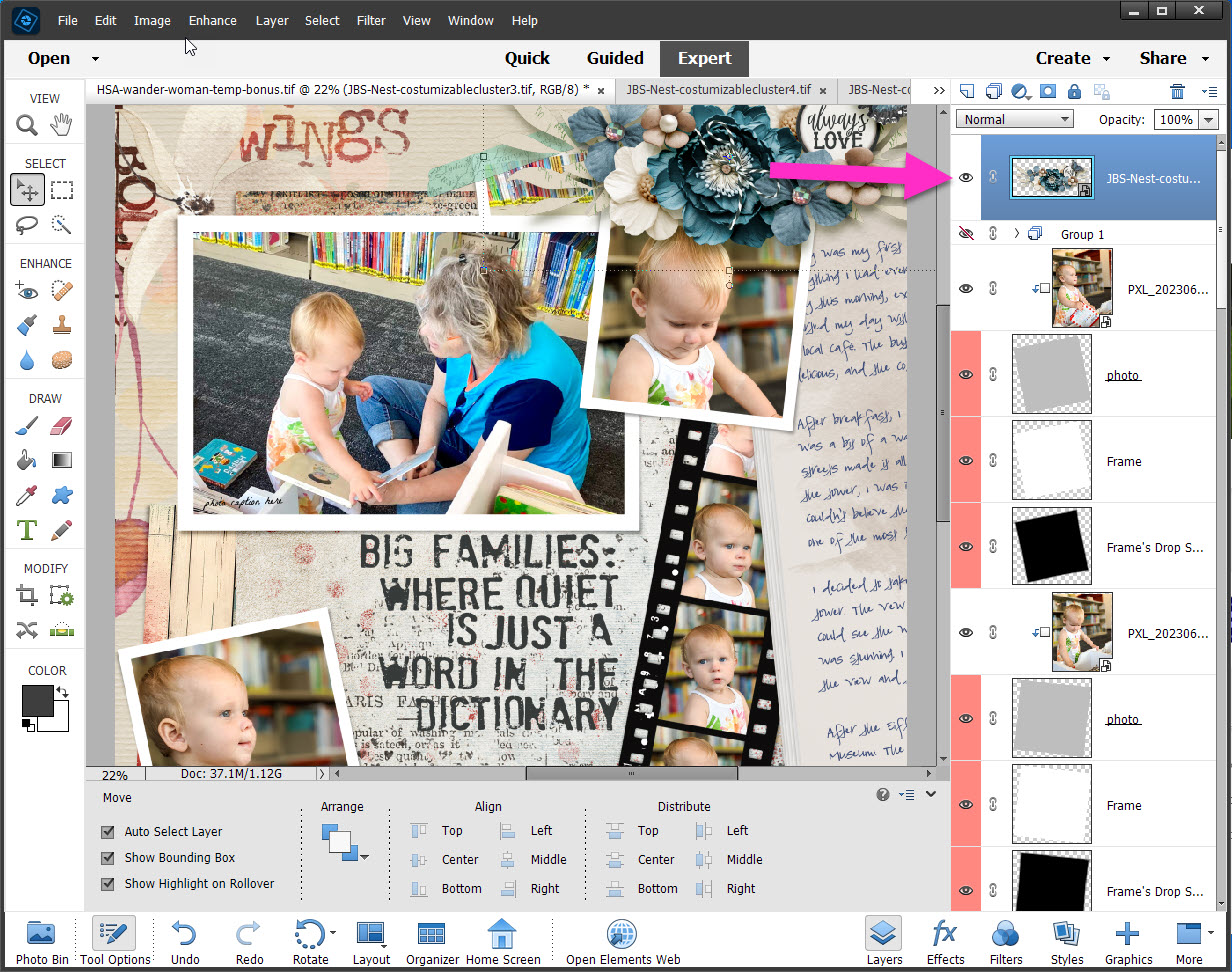
With most of my layout done, I want to quickly finish and add clusters. I took a quick peek at how the template placed the elements by unhiding/hiding the “grouped elements”. Then I moved over to JB Studio’s amazing customizable clusters. Dani’s clusters are fantastic not just because I move things around, but also because she includes the entire merged cluster as well as the individual pieces. It makes using these a snap.
- Hide what you are do not want in your cluster by click on the Eye icon
- Merge all the layers you do want
- Click + Hold the cluster icon in the Photo Bin
- Drag the cluster icon directly onto your Template file
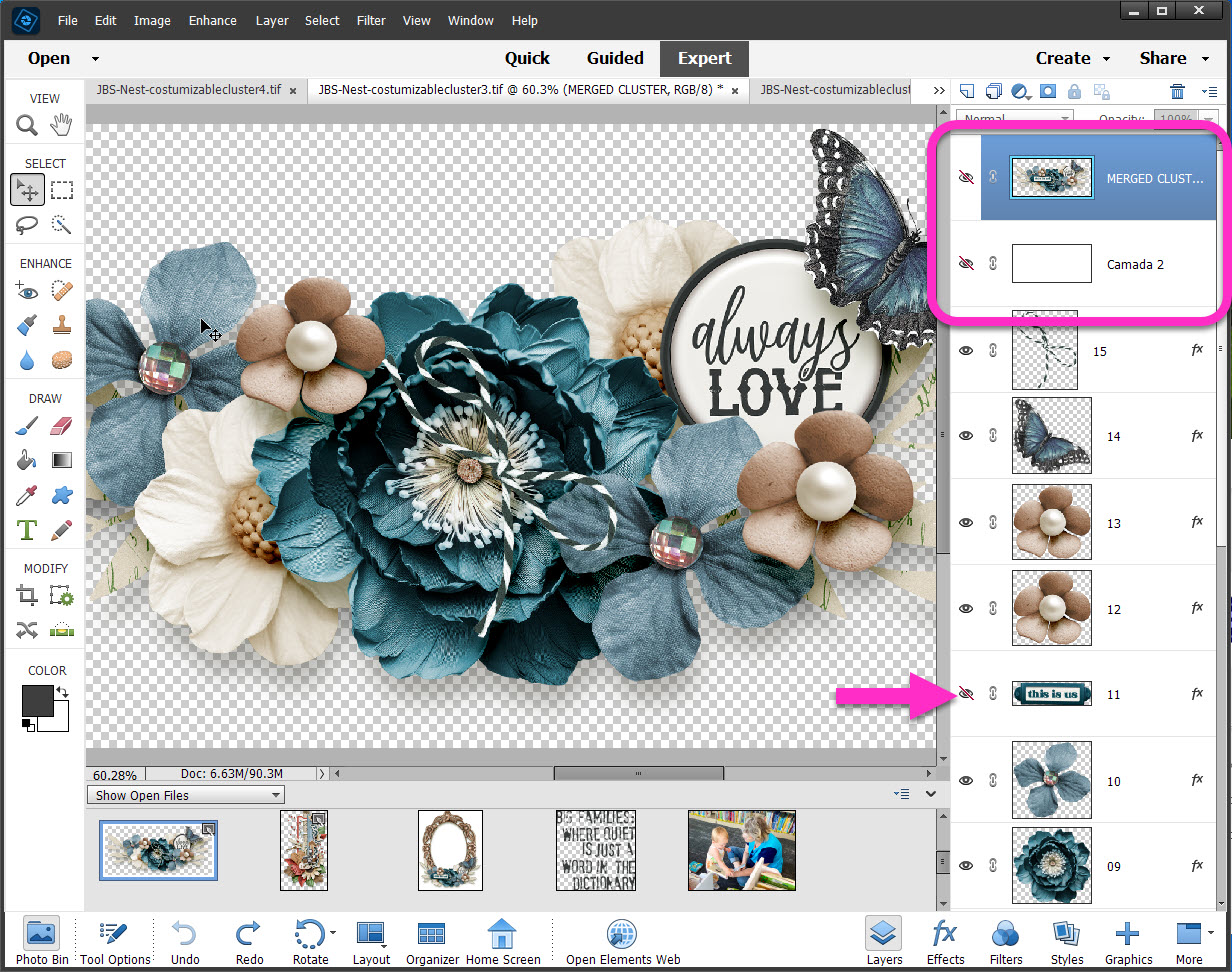
Once the cluster is merged and in your template, you can move or resize as needed.
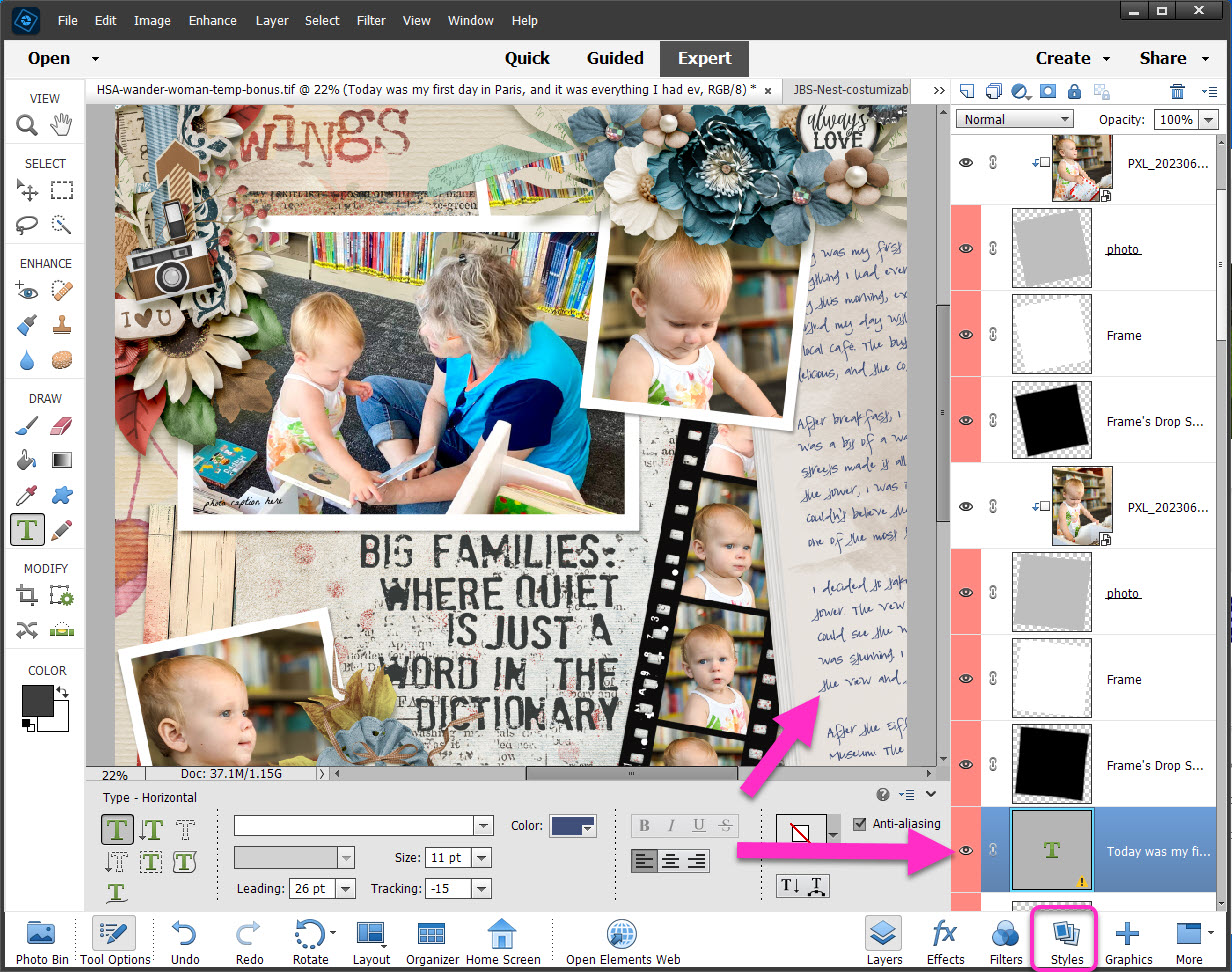
The first time I used this template, I kept the partial journaling exactly as it was. This time I’m still keeping the words, but I want a different look & feel.
- Select the Type Layer in the Layer Palette
- Click on the Styles icon
Once you are on the Styles Palette:
- Click the teeny tiny dropdown arrow at the top & select Patterns
- I choose the Black Marble pattern
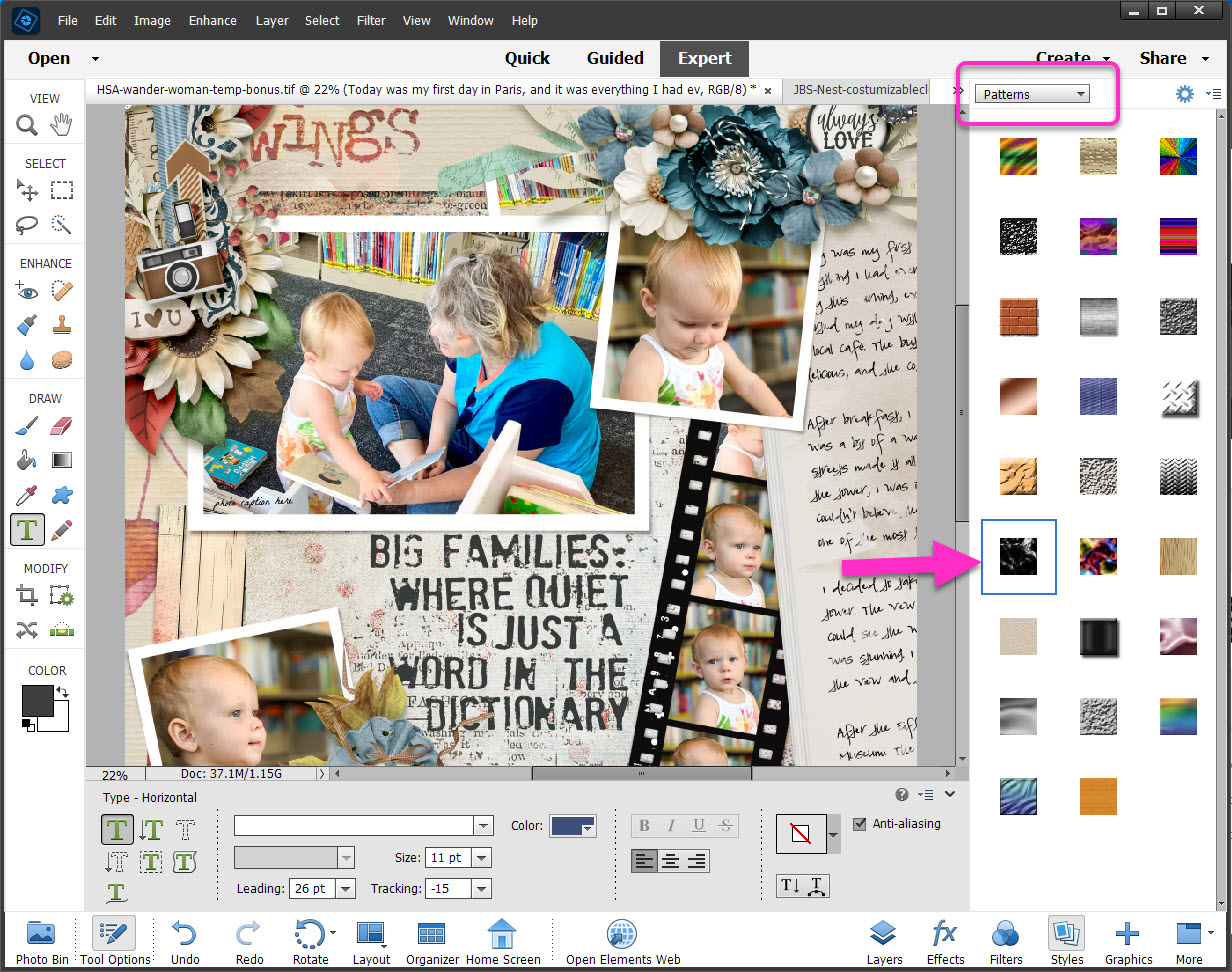
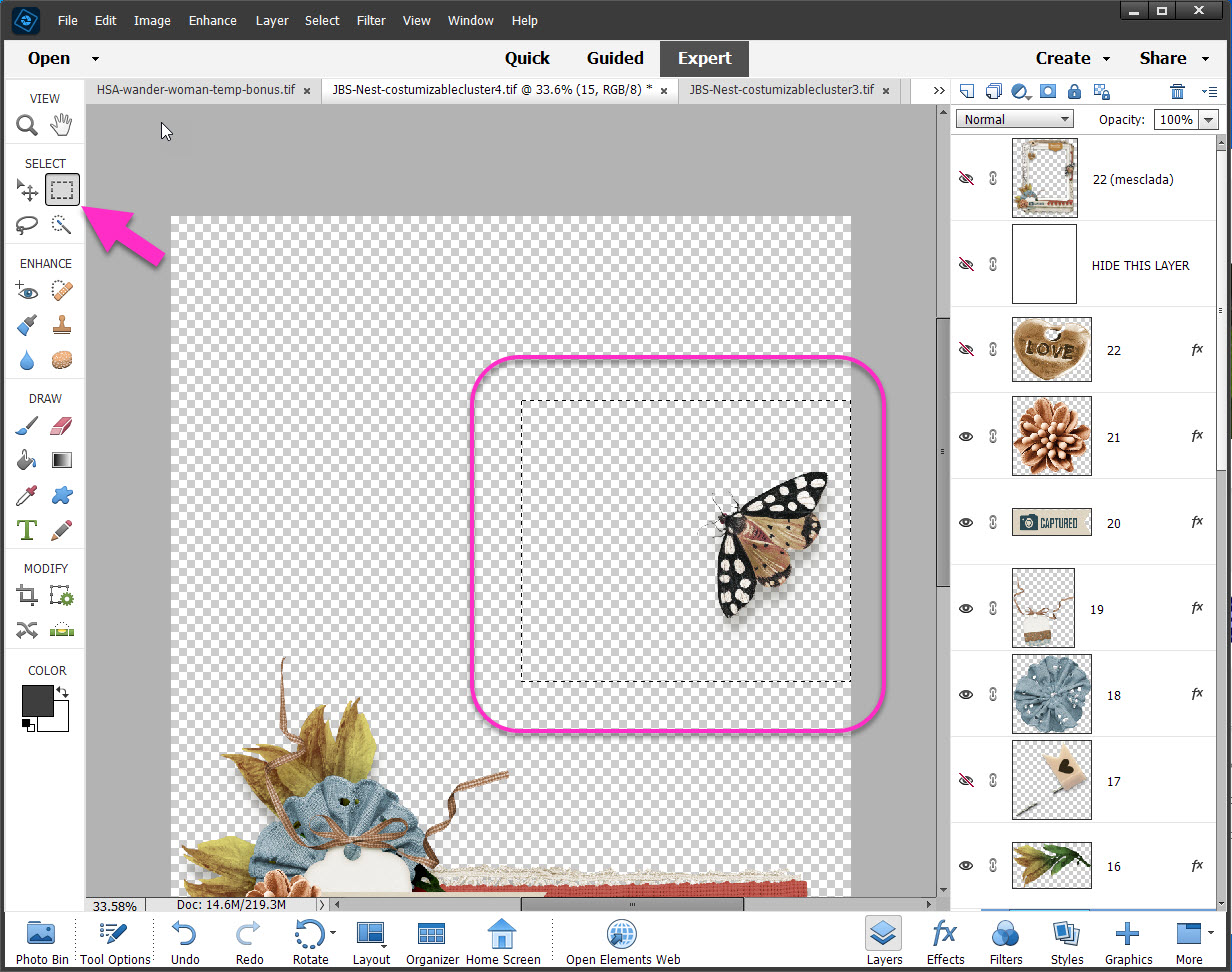
I love the look that pattern gives the text. It matches my layout perfectly. I just need one more thing. One more element. I want a butterfly I spotted in one of Dani’s customizable clusters.
- Go to the customizable cluster
- Click on the Butterfly Layer
- Use the Rectangular Marquee Tool to select the butterfly
- Copy using Ctrl+C or click Edit and choose Copy
Go back to the template to paste the butterfly and add a drop shadow:
- Go to the template
- Paste using Ctrl+V or Edit and select Paste
- Still on the Butterfly Layer, switch to the Styles Palette
- Click the teeny tiny dropdown arrow and choose Drop Shadows
- Pick your favorite Drop Shadow

That’s it! I’m happy! Another page done in my mom’s book in 10 minutes.
If you prefer, you can follow along with my YouTube video.
Please visit my other Photoshop Elements Tutorials to refresh any techniques I skipped this time:


Thank you so much Toiny for taking the time to do another turtorial, I also use PSE22 and always find new ways of doing things with these tutorials, I am an older model lady self taught any new ideas is always a bonus.
Do hope your health is on the improve now.
Once again thank you.
Thank you so much Toiny for another great tutorial. Wishing you and to your family a very happy holidays!