Shortcuts. I love them! Today I want to talk about a few favorite Adobe Photoshop shortcuts, and share my accidental find!
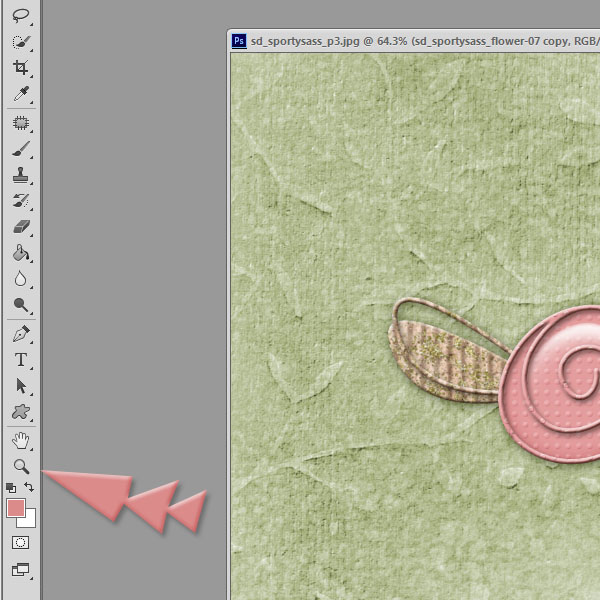
Both Photoshop and Photoshop Elements have a handy Zoom Tool. It is located in the Tools Menu Bar on the left of workspace, and it looks like a magnifying glass. (Screen shots are from Photoshop CS6).
To use the tool, click on the magnifying glass to make the tool active. You will know the tool is active when your cursor changes into a little magnifying glass with a plus sign inside the glass area. Left click on an image, and without letting go of your mouse, drag to the right to magnify your image. Drag to the left to decrease the size of your image.
You probably all know this!
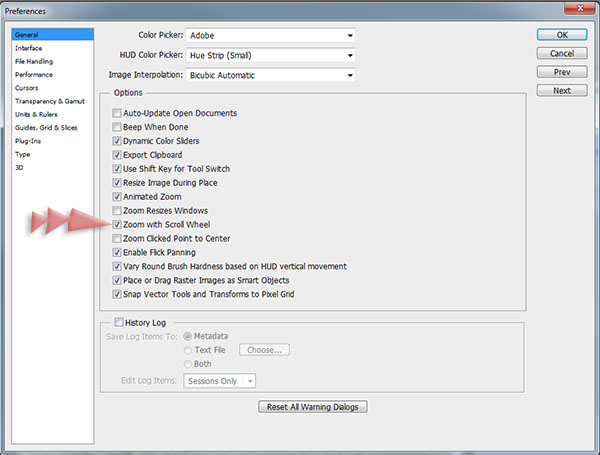
My mouse has a scroll wheel on it. I prefer to use that wheel to zoom in and out of an image. I just find it faster than having to go over to the Tool bar, click on the Zoom Tool, then go back to my image. (I know that sounds incredibly lazy.) To use the scroll wheel as a Zoom Tool, in Photoshop I went to Edit > Preferences, then under the General Tab, put a check mark in the “zoom with Scroll Wheel” option.
I’m betting a lot of you already know how to do that too.
To pan around in an image, we can use the Navigator Tool. (Read more about the Navigator tool: Changing your View Size with the Navigator Tool.) And I do use that method at times. But one of my favorite keyboard shortcuts is to hold down the Space Bar, and then click inside my image. The cursor will change to a hand icon, then I can just move my image around inside my document to get a different view.
And, yes, I’m betting most of you know this as well. So what is my point today?
By accident I found out that we can put these shortcuts together to make things even easier for us!
It was late at night…. I was tired…. I was holding down the spacebar to move an image around in my document. All of a sudden my image became magnified. I stopped what I was doing, but without letting go of anything, I looked down at my keyboard. I was holding down the space bar, but my tired fingers were also resting on the Alt key. After a few minutes of playing around, this is what I discovered we can do!
- Hold down the Spacebar and click in your document to move your image around.
- Without letting go of the Space Bar, take your finger off of your Scroll.
- Click on the Alt Key, this will turn your cursor into the Zoom Tool so you can quickly and easily zoom into your image.
- Let go of the Alt Key, and your cursor turns back into the Hand Tool, and you are seamlessly navigating your document once more.
Using these shortcuts in combination with each other makes zooming and navigating your document so quick and easy. I have used these shortcuts in combination numerous times now, and am glad I was tired enough “that night” to have heavy hands!
The hardest part about this all is actually remembering the shortcut combination! (Or any keyboard shortcuts!) Consider using Digital Sticky Notes to jog your memory, until they become second nature to you!
If you enjoy reading quick tutorials, you’re at the right place! But if you want to learn even MORE, here’s how:
Sign up for theStudio’s Commercial Use (CU) Newsletter, which is totally separate from the Personal Use (PU) Newsletter. If you are signed up for the PU newsletter, we thank you! If you want to receive the CU newsletter, and aren’t yet, you can sign up for it here. The CU newsletter hits mailboxes every Monday. It features all of the new CU products in the store (which, of course, are great for the personal use scrapper as well!)… BUT it also includes a Tip, or Trick, or Tutorial… in EVERY newsletter.
Once you have signed up for the CU newsletter, why not pop into the CU store and browse around. You will find some great sales going on, and new products to make your scrapping even easier!
Boop (Boop Designs) has given me permission to share with you the awesome tip she included in last week’s CU newsletter!
This quick tip is for you Photoshop and PSE users out there.
Right Click – RESELECT:
I am a right click FREAK!!! I found out some time ago that right clicking on my mouse in Photoshop and in PS Elements, gives me so many more options without having to stop what I am doing and go looking for them in the menu area. One of my favorites is when I am using the Marquee Tool.
Many times after making a selection from the marquee tool I will have to deselect (CTRL D) so that I can do a step before finishing working on that selection. But once you deselect you have to go back and recreate that selection. NOT!!!! Guess what? If you deselect your selection (CTRL D) and then need it back again simply right click anywhere on your layout and you will see the option to “re-select”. Click this and your selection automatically returns!
CREDIT: The flower and paper visible in my screenshot are from SnickerdoodleDesigns Sporty Sass, currently being offered at a 40% savings to you!


Now that is the handiest new shortcut I ever saw. Thank you for all these great tips, Karen. BOY! that Alt key is a silent giant isn’t it!
what would we do with out our short cuts…I even try to use PS ones at works whilst using excel or word and they don’t work 🙁
Thanks karen
[…] Zoom around Photoshop – 1 freebie(s)? […]
Love, love, love this one. Thanks so very much. When it comes to tutorials you are truly a guru. Can’t believe how much you have enriched my life with your designs and your tutorials.
Many thanks again.
Thanks, ladies! I’m so glad this was helpful for you. Will we EVER know everything there is to know about Photoshop???