Last week, we looked at how to “Tone an Image using Gradient Maps.” Today, let’s explore Gradient Maps just a little more and look, specifically, at one way to easily “hand-tint” an image. This method works equally well in Photoshop and Photoshop Elements.
As a refresher, to add a Gradient Map, we need to:
1. Be sure our Foreground/Background colors are at the default setting of black and white.
2. Click on the last icon in the Adjustments Panel to “Create a new Gradient map adjustment layer.”
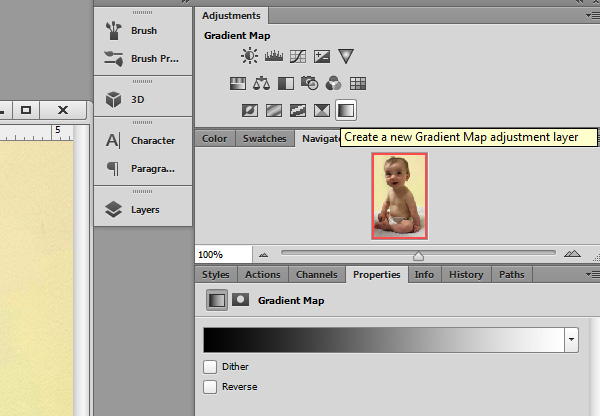
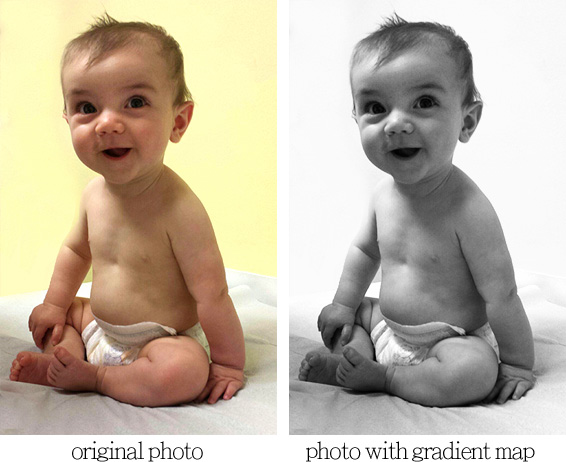
This is the result:
Now let’s make some adjustments to the Gradient Map to get the look we want.
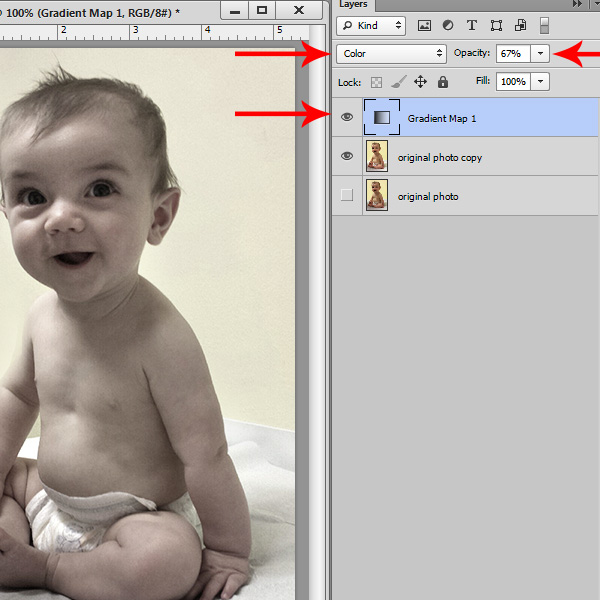
In the image below you will see that I reduced the opacity of the Gradient Map to 67% and changed the Blending Mode to Color.
Often times leaving the Blending Mode set to Normal will work just fine. But for this image, the Color blending mode looked best. When you are trying this technique, try different modes to see which gives your image the best result.
The baby in the photograph, is my grandson, Owen. I wanted to see a little more color in his face. To do this, making sure my Gradient Map layer was selected, I clicked on the Add a Layer Mask Icon (dark gray rectangle with a light gray circle in the middle) at the bottom of the Layers Panel to add a Mask to the Gradient Map.
![]()
I next selected a soft round brush, just about the size of Owen’s face, and reduced the opacity of the Brush to 11%. I clicked on the Mask on the Gradient Map to make it active. Making sure that my Foreground color was set to black, I brushed over Owen’s face to bring back a little color.
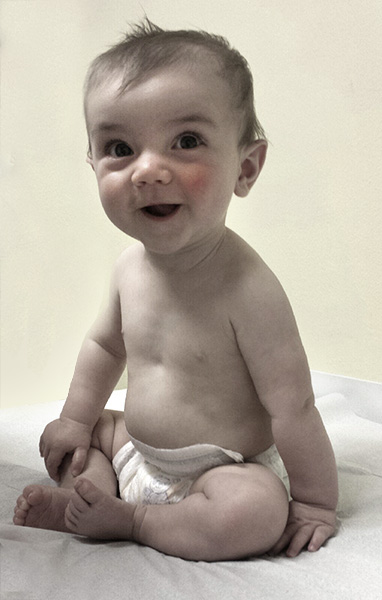
The difference is very subtle… but it’s there. See the slight rosy glow on his face?

I liked that… but one of my favorite things about hand-tinted photos is rosy cheeks on faces. I decided Owen needed just a tad bit more color just on his cheeks. I added a new layer under the Gradient Map, chose a small, soft brush, and selected a rose-pink color for my brush. I clicked just once on Owen’s cheeks, then reduced the opacity of that layer to 85%. I changed the layer blending mode to Color Burn. This was a personal choice. Sometimes Overlay looks best, sometimes Soft Light gives a really nice look. Try different blending modes to see what works best work your own photo.

There is a way of hand-tinting photos in Photoshop using Channel Masks, but it can be a little complicated and requires a lot more effort than using a Gradient Map. I’m all for Simple! So this way works great for me!
I hope you get fantastic hand-tinted results using this method on your own photos!


[…] Hand-Tinting Photos in Photoshop and Photoshop Elements – 1 freebie(s)? […]