Are you a photographer who knows the ideal camera settings to use for every lighting situation you are in? Or do more often rely on your camera presets to make those decisions for you? Wherever you find yourself on this spectrum, Photoshop has multiple tools that can help with changing your photo’s exposure after the fact, if it is needed. Today, let’s take a look at a simple way to make a quick-fix using the Exposure Tool.
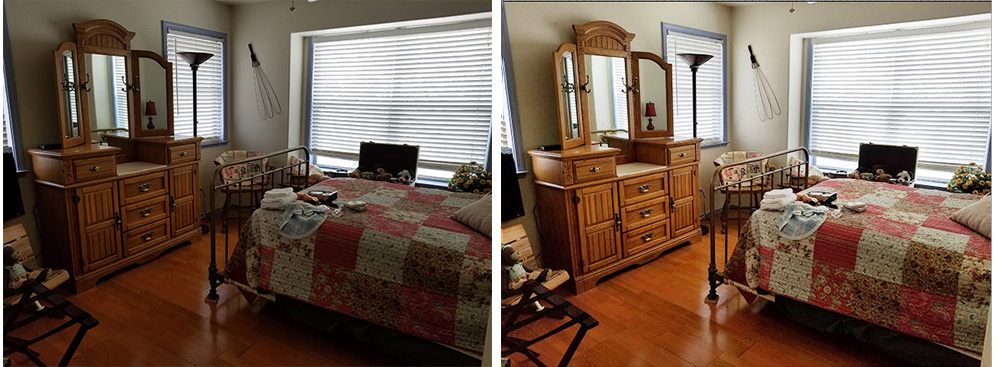
Here is a before and after shot I took:
 Using Photoshop 2017, here is the process I used:
- I duplicated the image so I was not working on the original.
- In the top Menu Bar: Image > Adjustments > Exposure. This will open an Exposure window with options:

Exposure Options
- There are several pre-sets for you to choose from in the Preset Dropdown box, or you may experiment with the Exposure slider. (The Offset and Gamma Correction sliders are designed to work with high-dynamic-range images, so you may ignore those unless that is the type of image you are working with.)
- With my original image, I dragged the slider to the right until it looked good to me (+1.31). However, this “blew out” the windows a bit losing some detail.
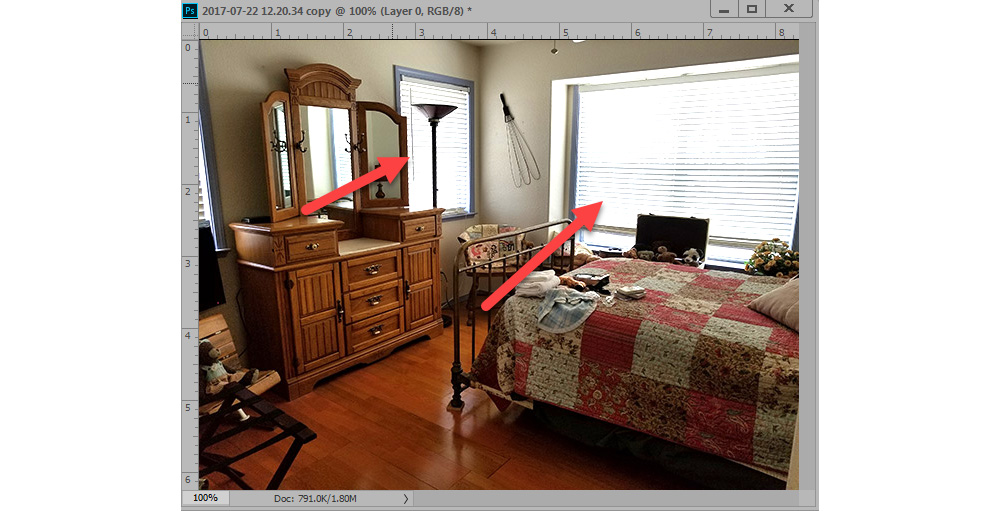
Exposure adjust to +1.31 but windows are blown-out a bit (lost detail).
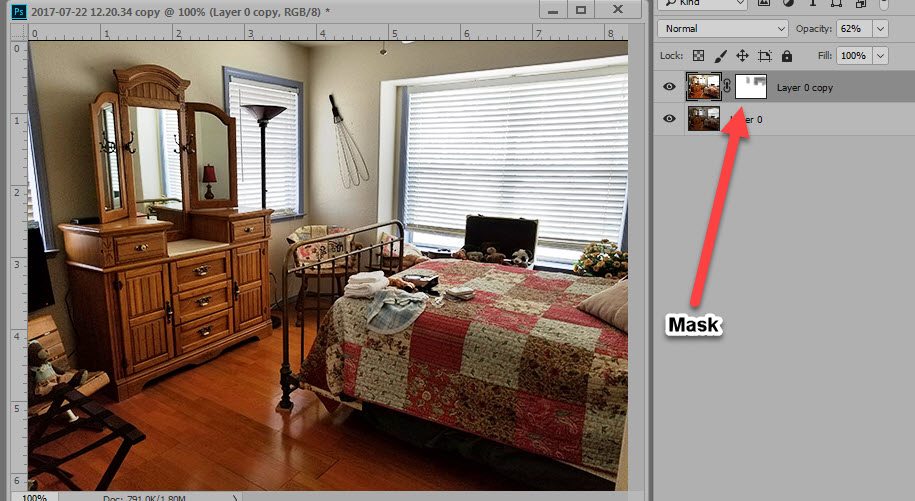
- I added a mask to the duplicated image, chose a soft, round brush, lowered the brush opacity to 50%, and brushed away some of the exposure effect on the windows.
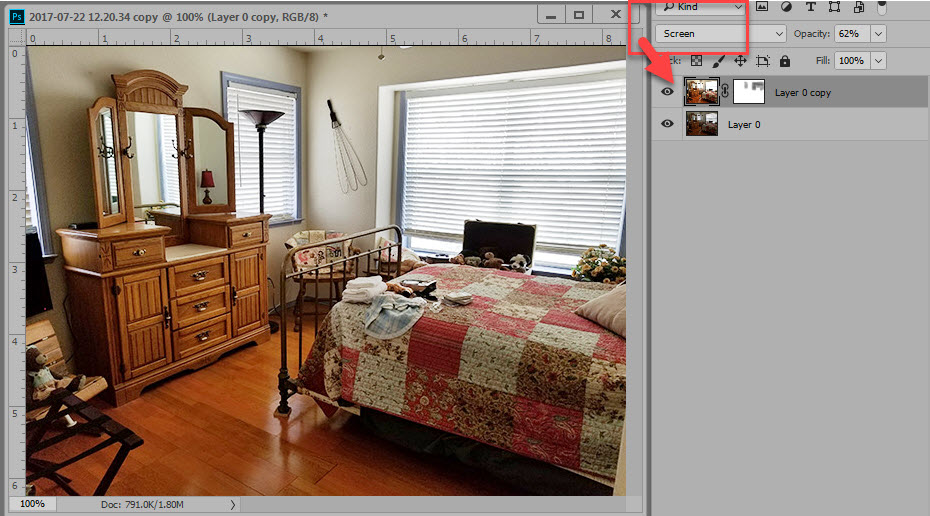
- This was much better, but I wanted it just a tad brighter, so to experiment, I changed the Blend Mode of the duplicated/masked image to Screen.
- (Tip: When experimenting with this photo, when I increased the exposure any more than +1.31, the windows lost all detail. Keeping the exposure at +1.31 for this image allowed me to regain some of that detail using the masking technique.)
I was happy with this image. It more accurately represented the color in the room, and the highlights and shadows were more balanced.
Many images simply need the Exposure Adjustment for a quick fix. But if you find yourself working with an image like this one, with large contrasts between the lights and darks, the additional masking and blend mode steps can help!
For today’s tutorial, I used Photoshop CC 2017. This Exposure tool is not available in Photoshop Elements.
If you would like to download a PDF of this tutorial, you may do so here: Adjusting Exposure in Photoshop


Leave A Comment