Sometimes we want to tell a story on our layouts. Sometimes, for whatever reason, we want this story to be there just for us. There, but not there. A fabulous way to do this is with Full Page Journaling. Here, let me show you.
I’m starting out with the Bonus Paper from Manu Scraps (manu-b-LADbeachcombing-bonuspaper.jpg), this came with The Bucket for all of you that posted a layout for: PROMPT 01: Beachcomber July 10, 2019
note: You can still get The Bucket! Post a layout on make-up days (there are two left: July 21 + july 28)
I am also using this text from my blog post: One Ray of Sunshine
The font is Dream of Spring, currently free at fontbundles.net!
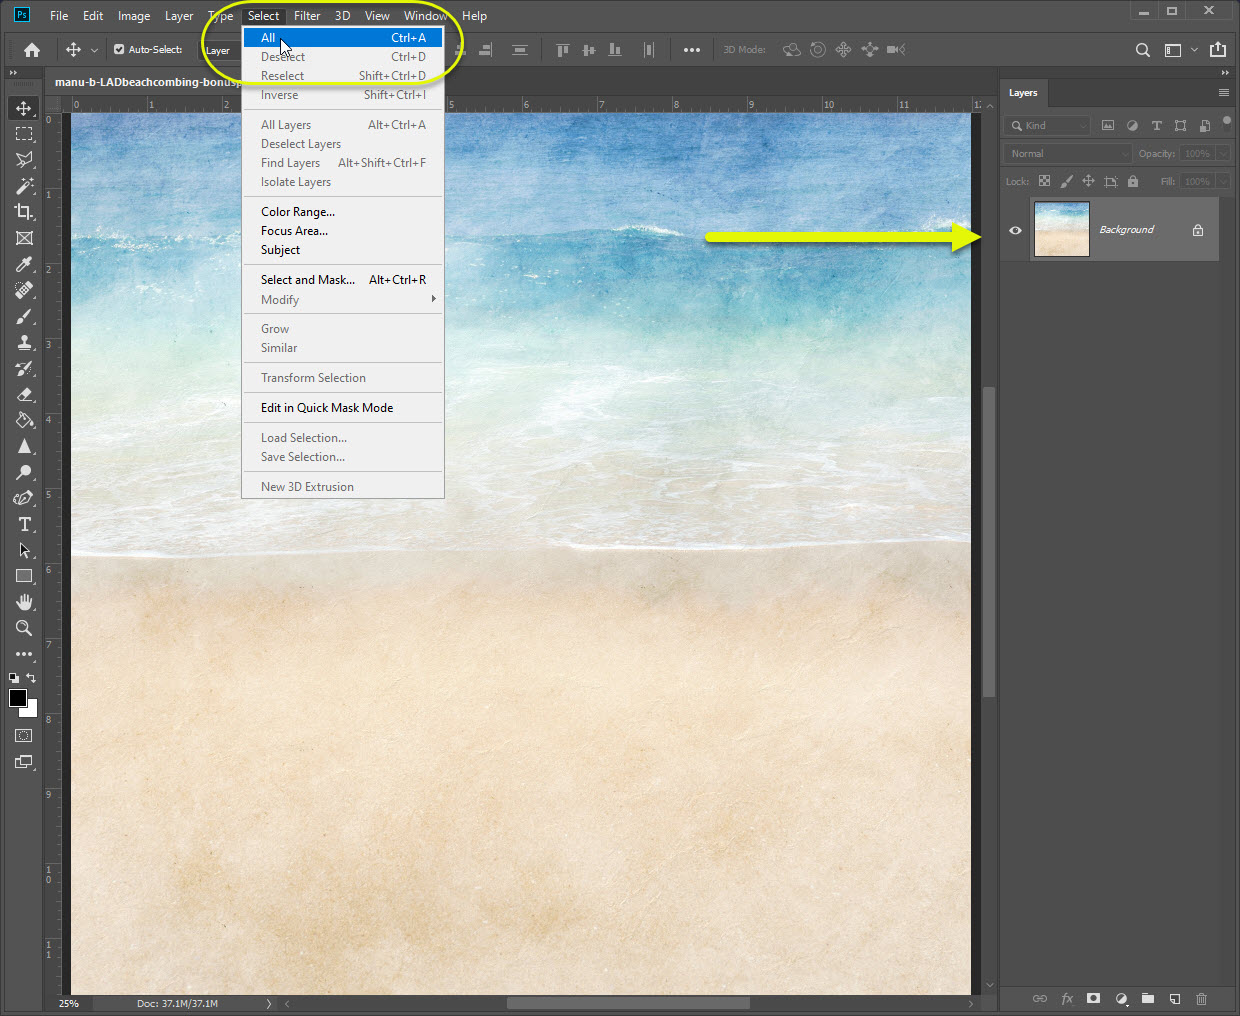
- I open the Bonus Paper in my photoshop.
- Then I click on Select -> All
Once I see the marching ants, I right-click and choose Make Work Path:
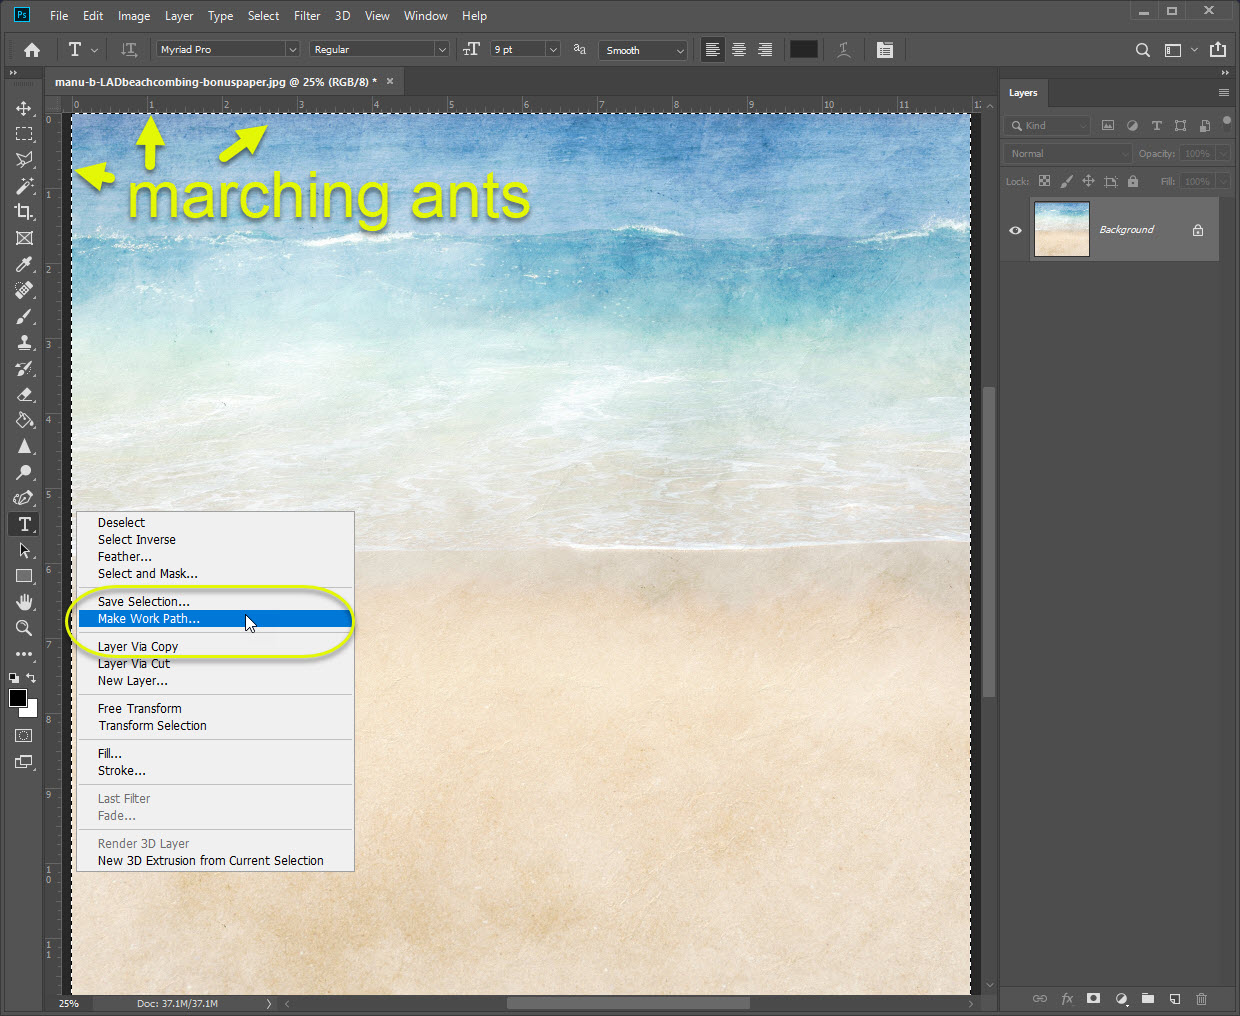
Because I created a Work Path for my text, I can now type away, or paste a story, and it will stay within the bounds of my paper. The Work Path set a boundary for my text.
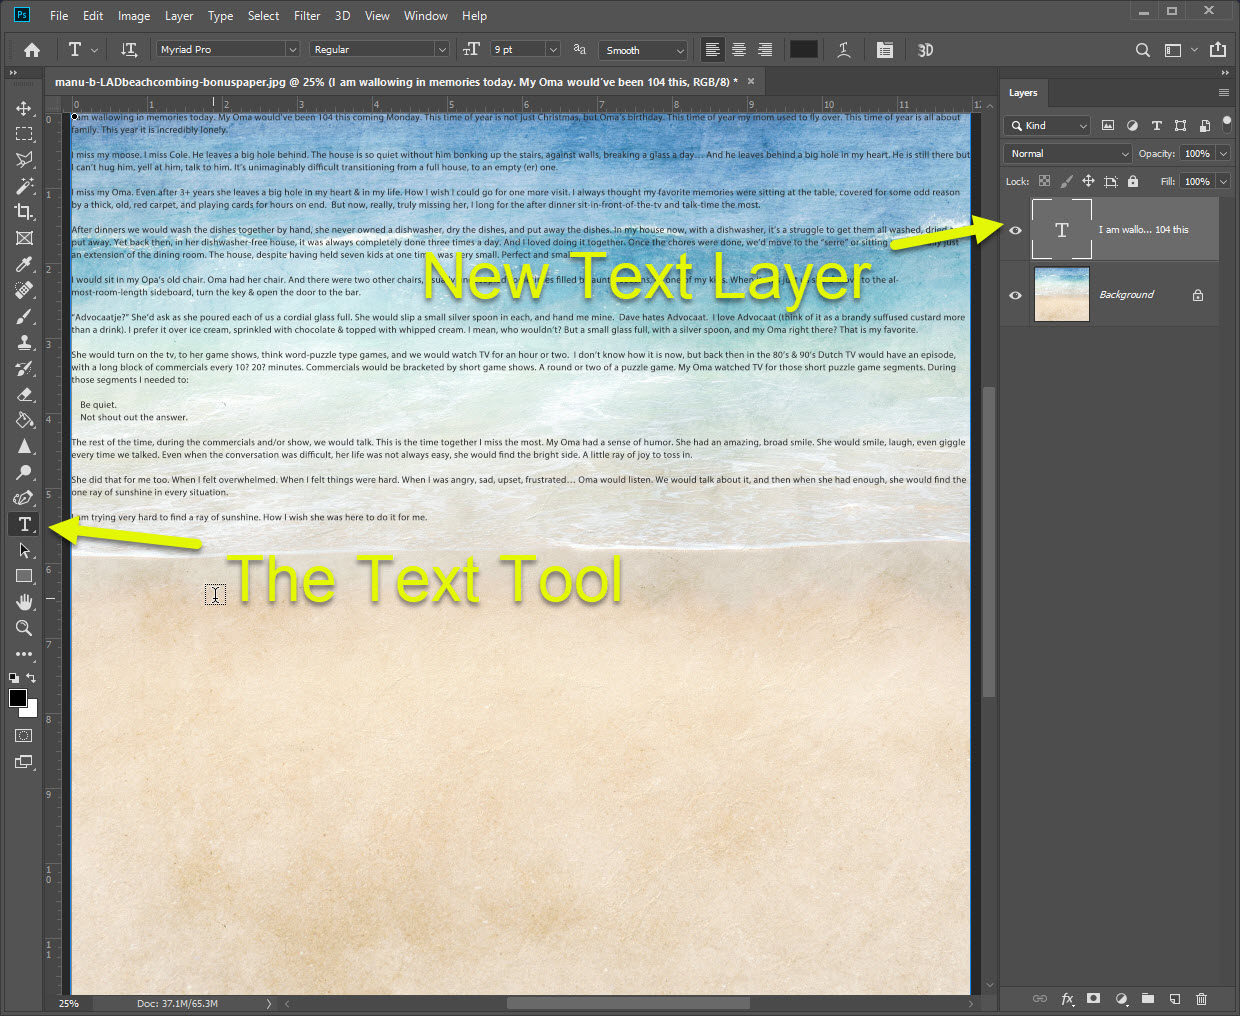
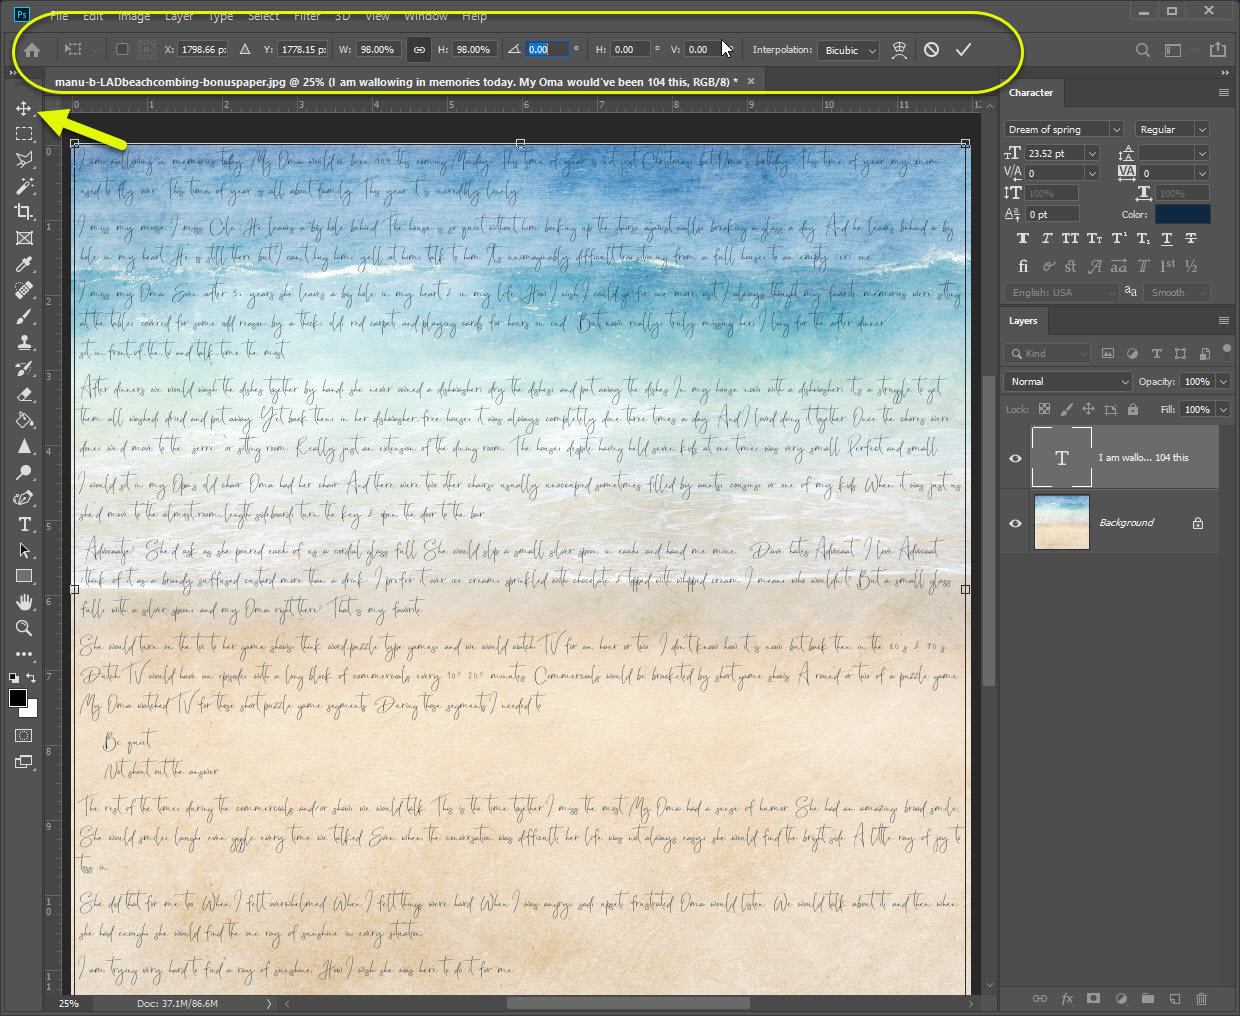
Next I click on the T for Text and I paste (CTRL + V) my story into the New Text Layer above my background paper. Alternatively, you can also type your story and tell it as you go.
Once my text is on my page, on it’s own layer, I can change the Character properties. I can do this by clicking on the Text Tool and updating settings in the top menu or by opening the Character Tab (click on Window->Character) to get more control over my text options.
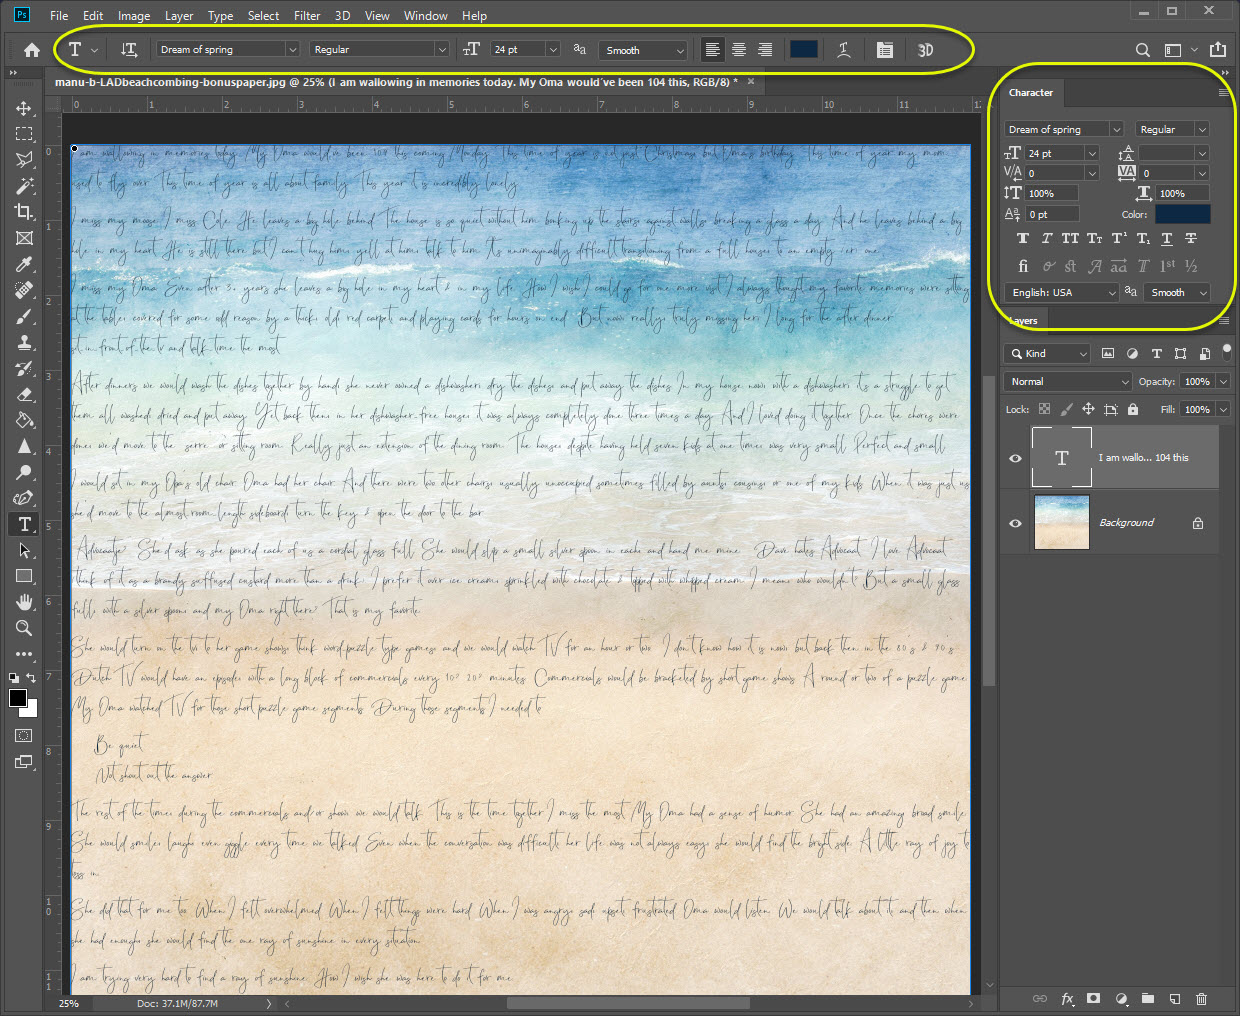
I set my Text, or Character:
- Font = Dream of Spring
- Font Size = 24 pt
- Spacing = Custom, I have slightly more space between the paragraphs
- I changed the color from black to a deep blue, to better match the page: Hex #173143
Feel free to experiment & choose what is right for your page!
I tend to be a little nit-picky and I’m not a big fan of the edge-to-edge journaling I’ve managed here. I set some faux margins by scaling the text layer slightly.
- Be sure you are on your Text Layer
- Click on the Move Tool & then the tiny squares selecting your Text; or
- CTRL + T this brings up the Text Box Properties
- I scaled mine down to 98% W by 98% H
- Click the √ and you are done
You can also do this by dragging the corners of your Text Box.
As a final step, I add a quick style to my Text Layer to blend it into the paper:
- Layer Style = Color Burn
- Fill = 88% Opacity
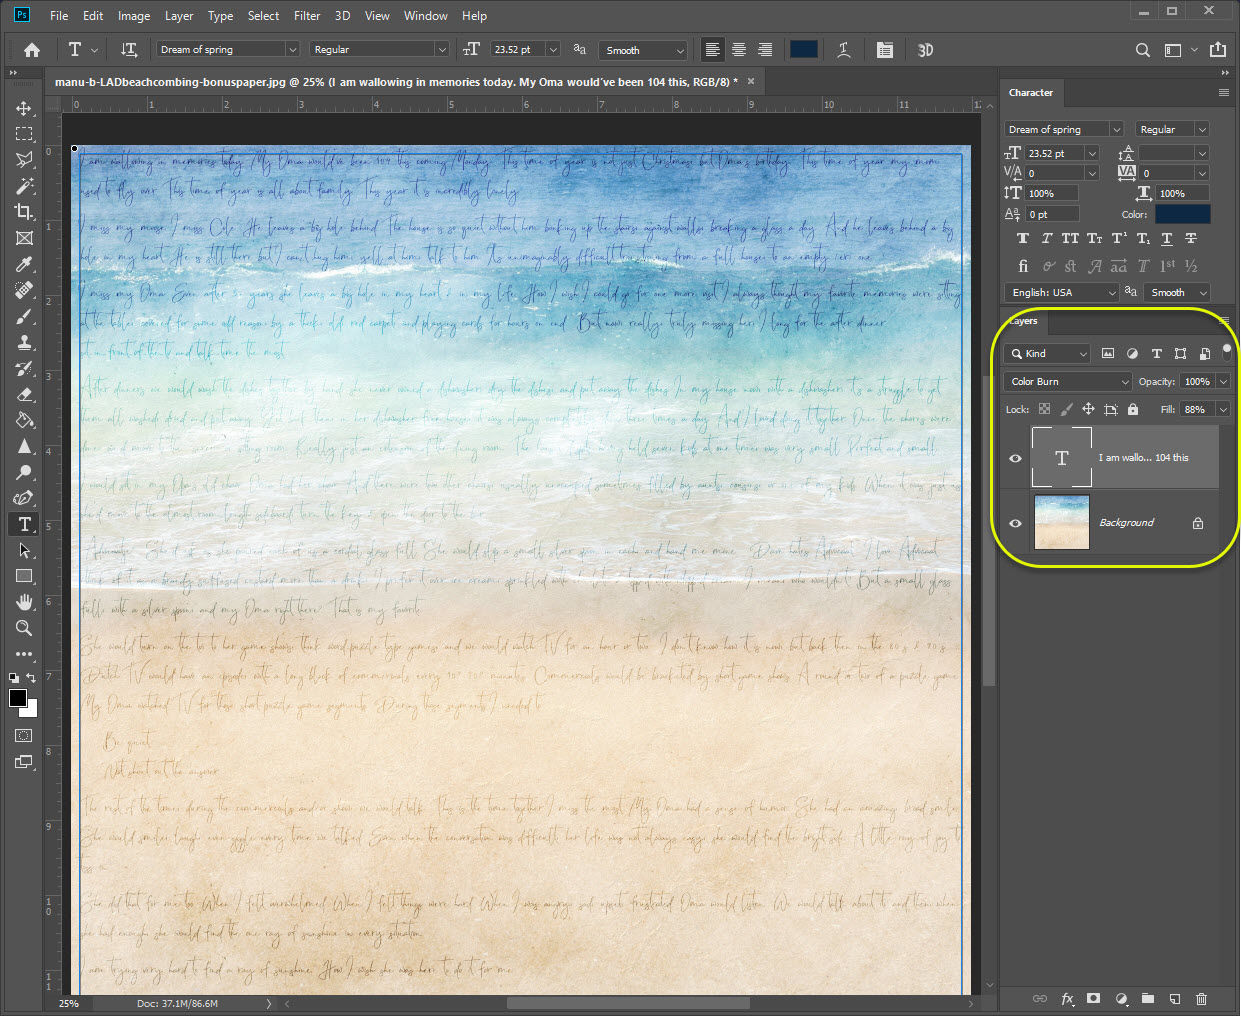
And that’s it! I have a full page journal that looks like it belongs on my background paper. Now I can scrap away to my hearts content knowing my story is told.


Thank you very much 🙂