There are a million & one ways to align things in photoshop. Most of us just use the move tool, or click & drag things around in our workspace. But. Sometimes. Things need to be aligned perfectly. This is where the align tool comes in handy.
Today we are going to create a Gradient Arrow Element using text, the align tool & some fabulous cardstock by Carin Grobe Design. Ready? Let’s go!
- Create a new work space. Mine is 3600 X 3600 px @300 dpi
- Type the letter “V“
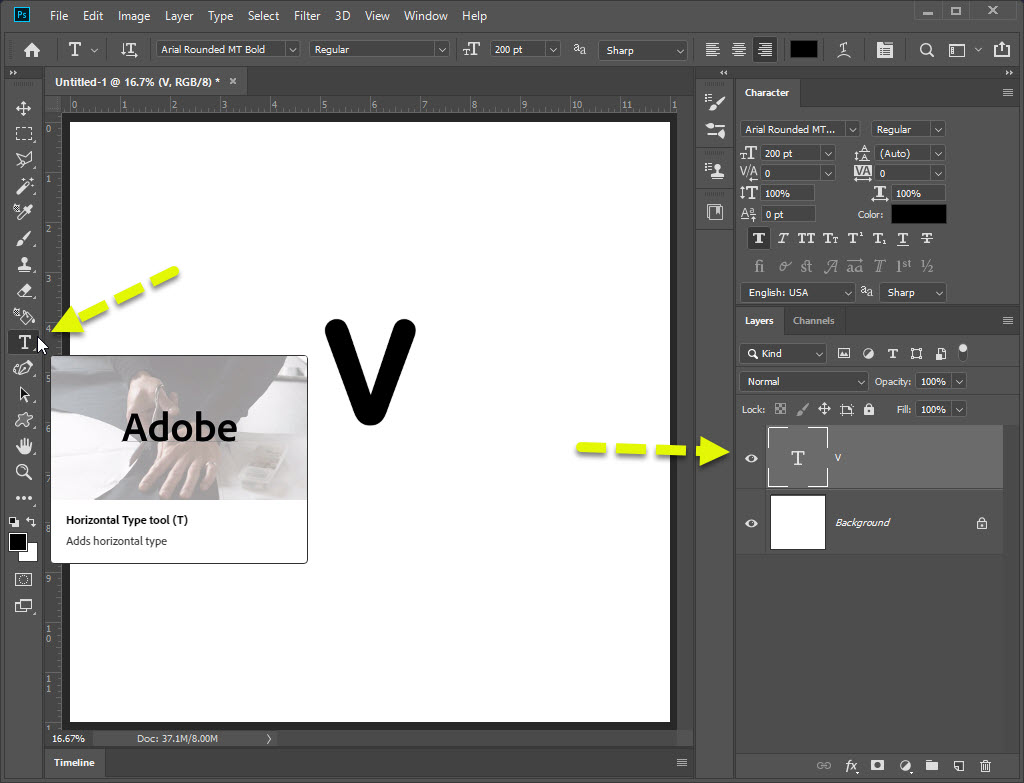
I picked Arial Rounded Bold for my font. This is standard with Adobe products. However, you can pick any letter V that strikes your fancy.
My V is a little too narrow. I can easily change the width in the Character palette. I find that 300% is a better width:

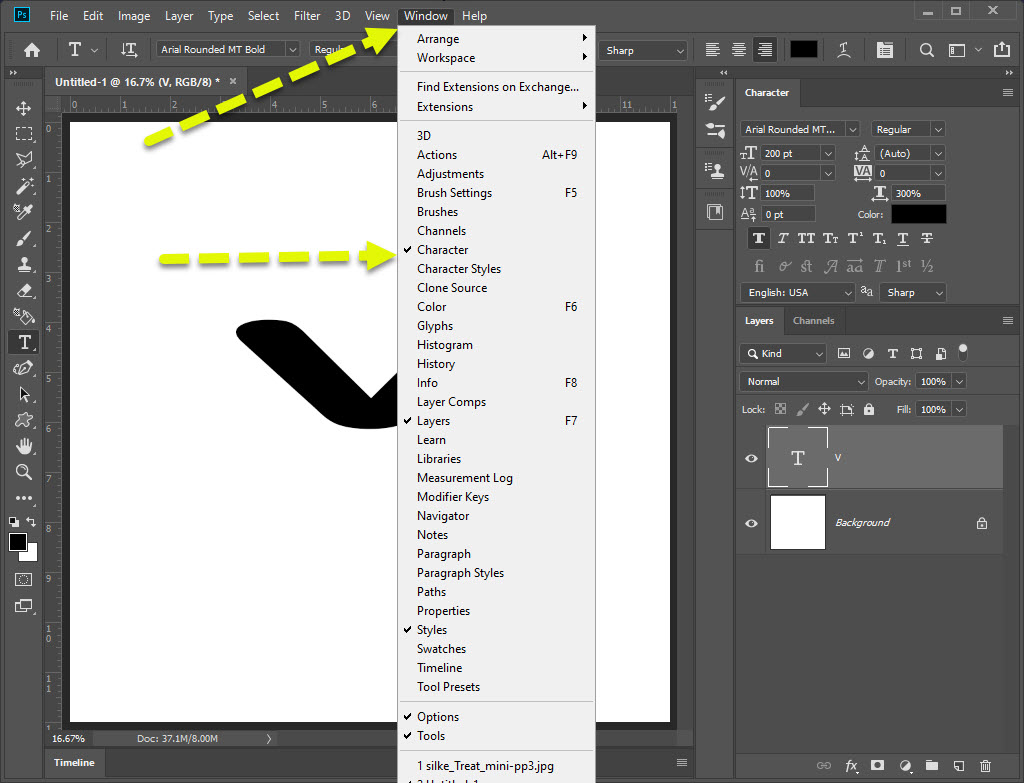
Note: If your Characters Palette is not showing up in your workspace, simply click Window — Character and it will appear:
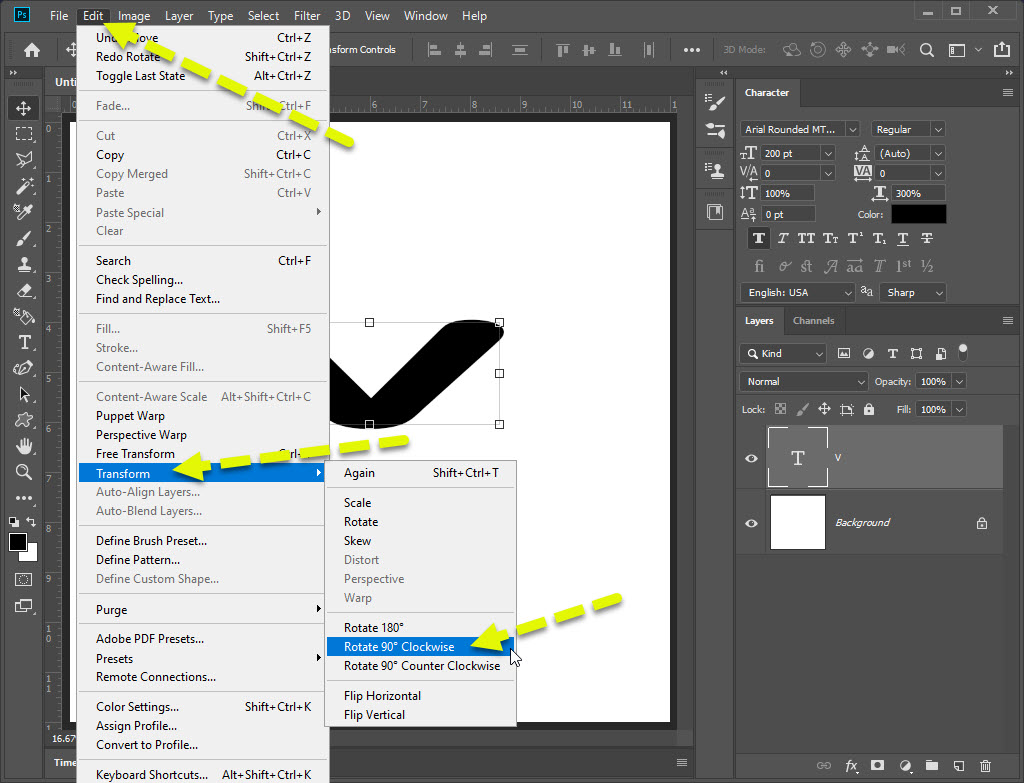
Now that my V is wide enough, I can rotate it to begin creating my Gradient Arrow Element. This is easy & quick. Be sure you are on the Text Layer in your Layers Palette. Click on: Edit -> Transform -> Rotate 90° Clockwise
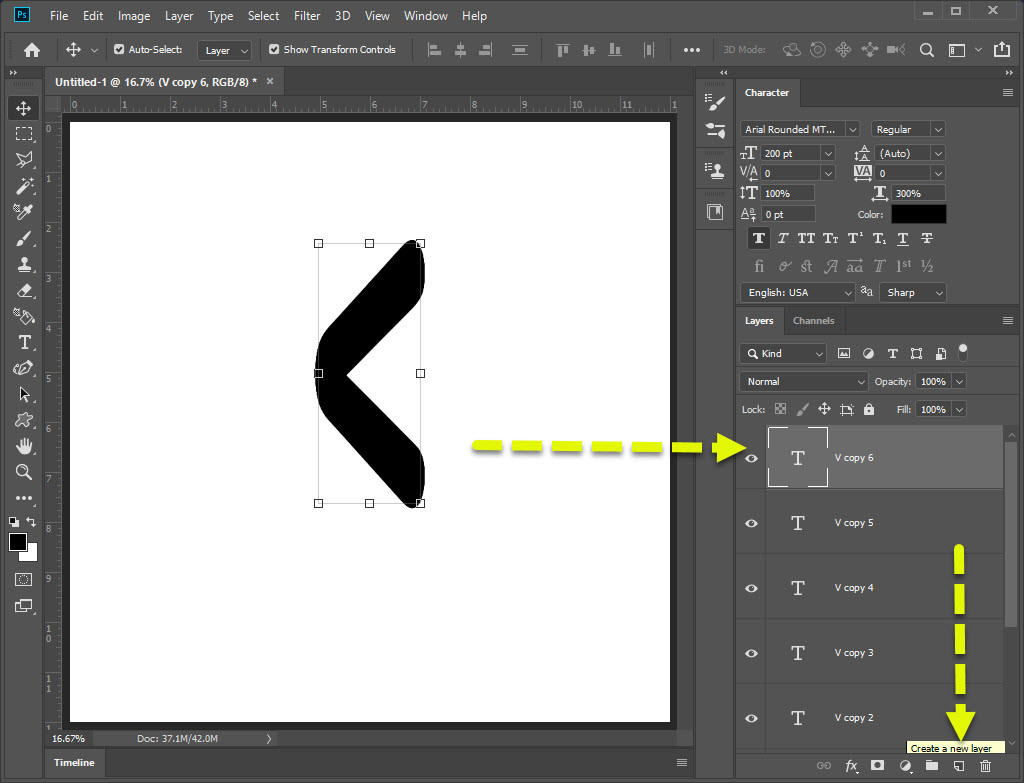
Now duplicate the V as many times as necessary. I know that I will be using six gradient cardstocks to complete my element, therefore I will make 5 duplicate layers. There are several ways to duplicate a layer:
- Click on Layer -> Duplicate Layer
- Right click on the layer you want to duplicate in the Layers Palette, and click on Duplicate Layer
- Or, my favorite, simply Grab+Click the layer and drag it to the Create a New Layer icon in the Layer Palette:
Note: The next how-to is for arrows pointing left. You can of course have your arrow point any way you like.
Take your bottom layer (this should be just V) and use the Move tool to move it to the left edge of your workspace. Likewise, take your top layer (this should be V copy 6) and move it to the right edge of your workspace.
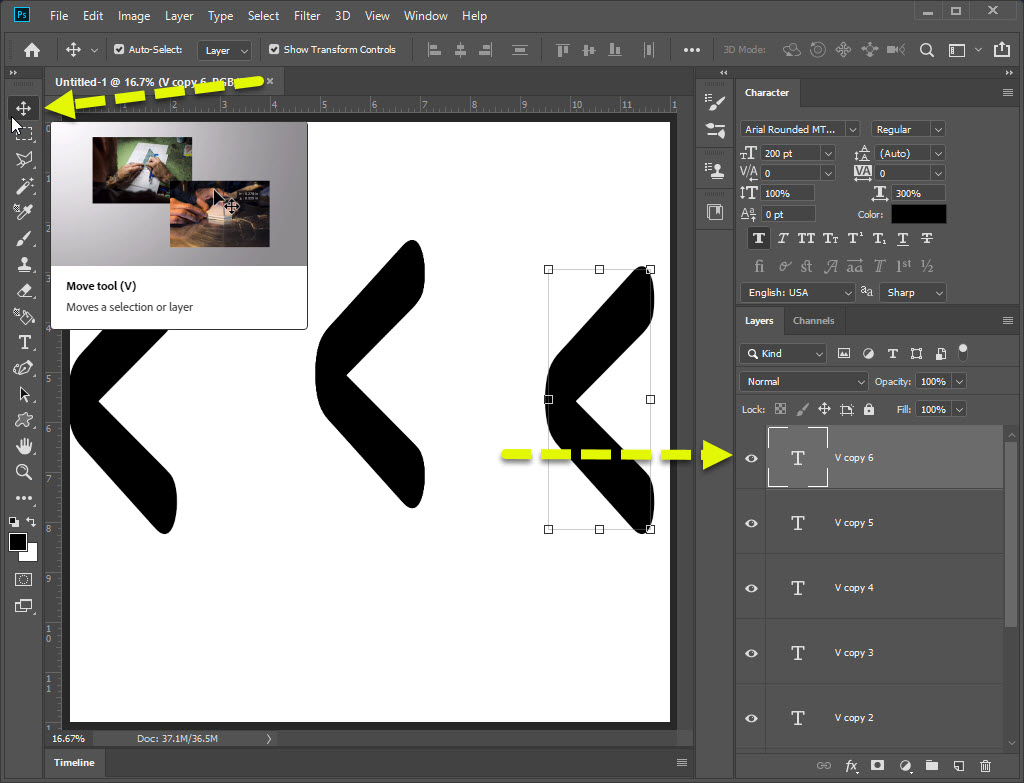
It looks like there’s only three arrow points. Let’s unhide them all:
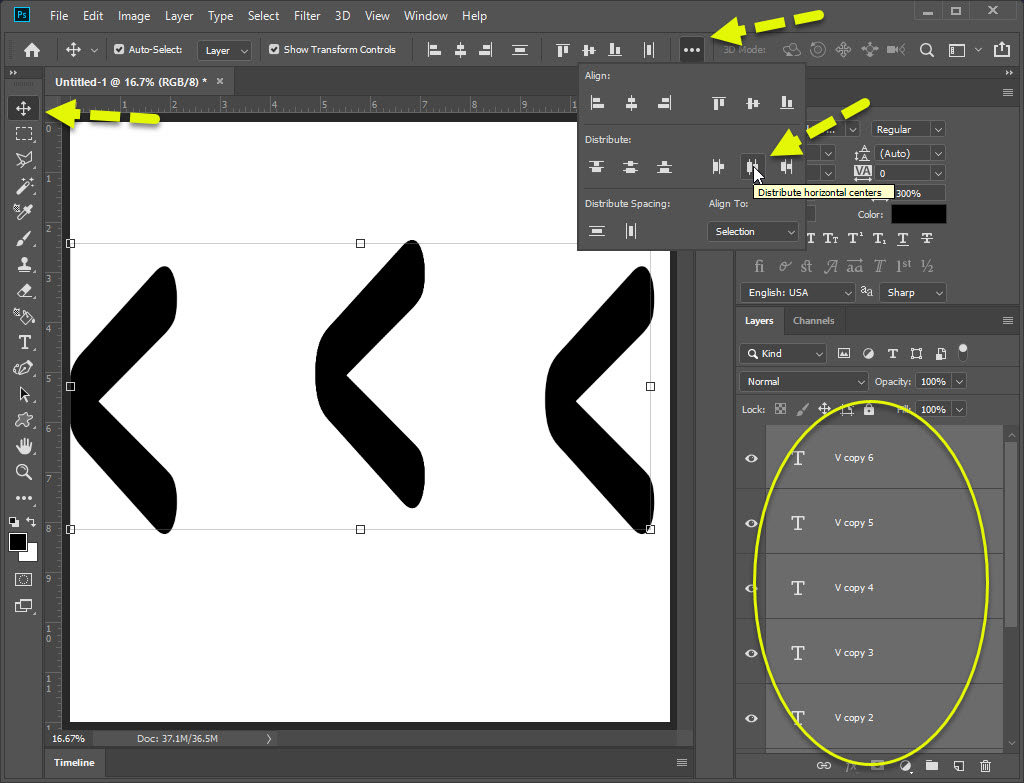
- Select all six V‘s:
- Make sure the Move tool is still selected
- Click on the top layer: V copy 6
- Hold down the Shift key and click on the bottom layer: V
- The alignment menu will be visible in the top tool bar if you have selected the Move tool
- Click the ellipsis (the three dots) if the Distribute horizontal centers is not available
- Click Distribute horizontal centers
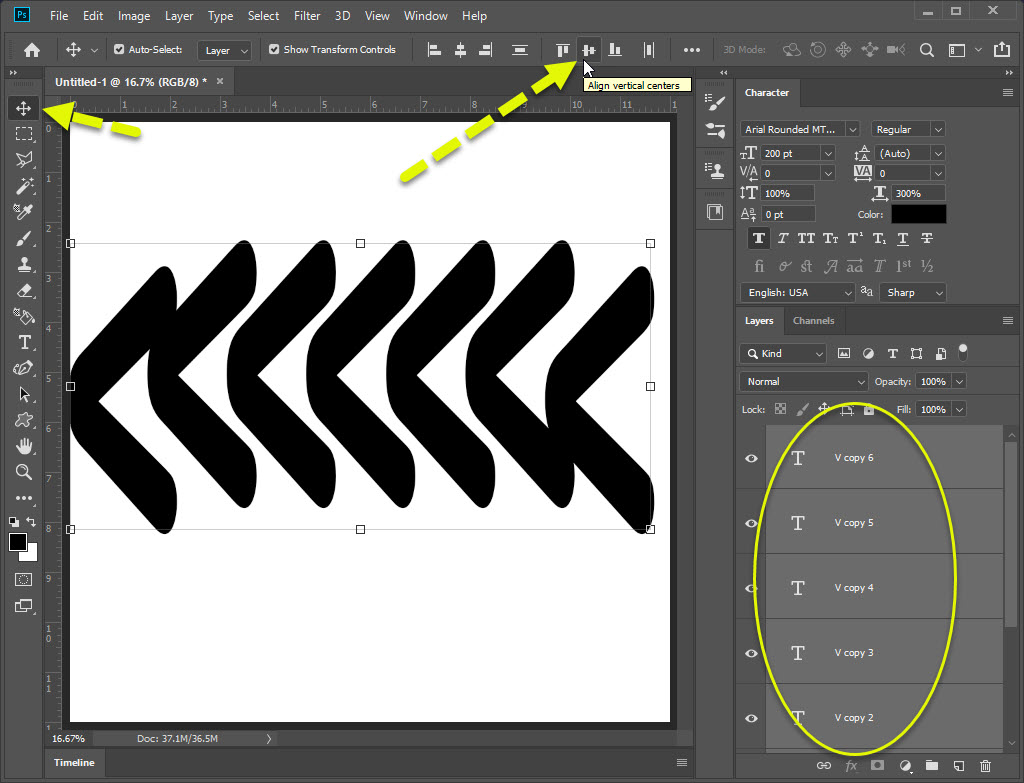
I wasn’t careful when I initially moved my top & bottom V‘s to the edges of my workspace. My V‘s are out of alignment. Simply reselect all six V‘s, make sure you are on the Move tool and click Align vertical centers:
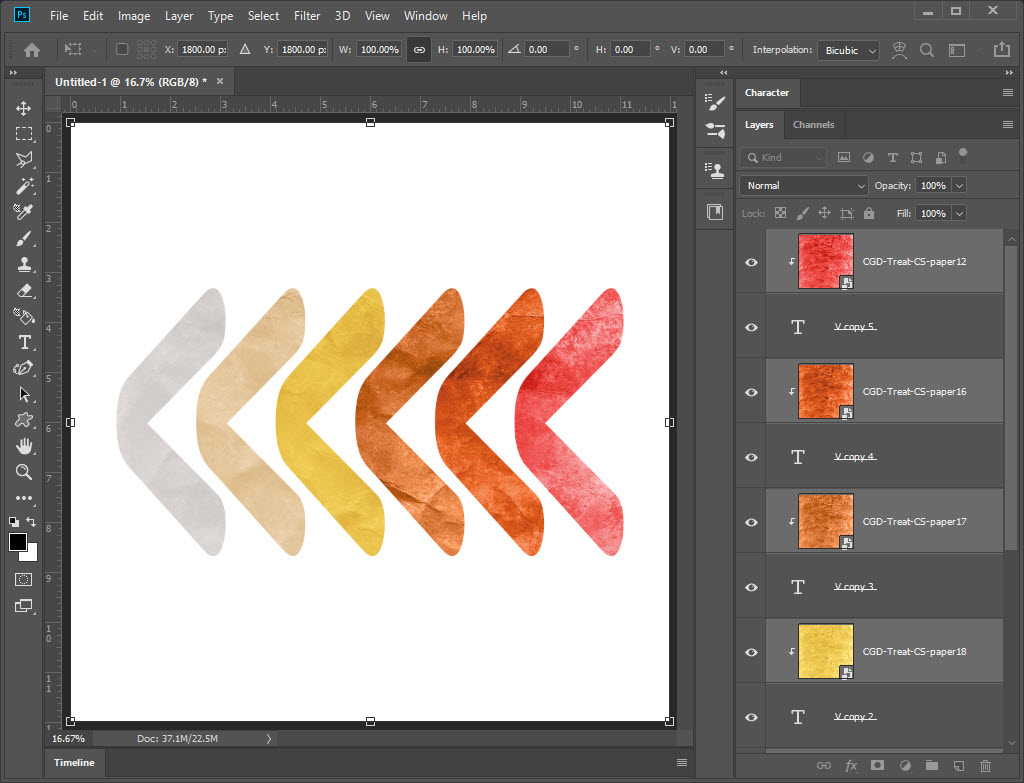
And that’s it! Now you can decorate your Arrow Element. I’m going to turn mine into a Gradient Arrow Element by taking the treat cardstock by Carin Grobe Design and clipping her papers onto my V‘s:
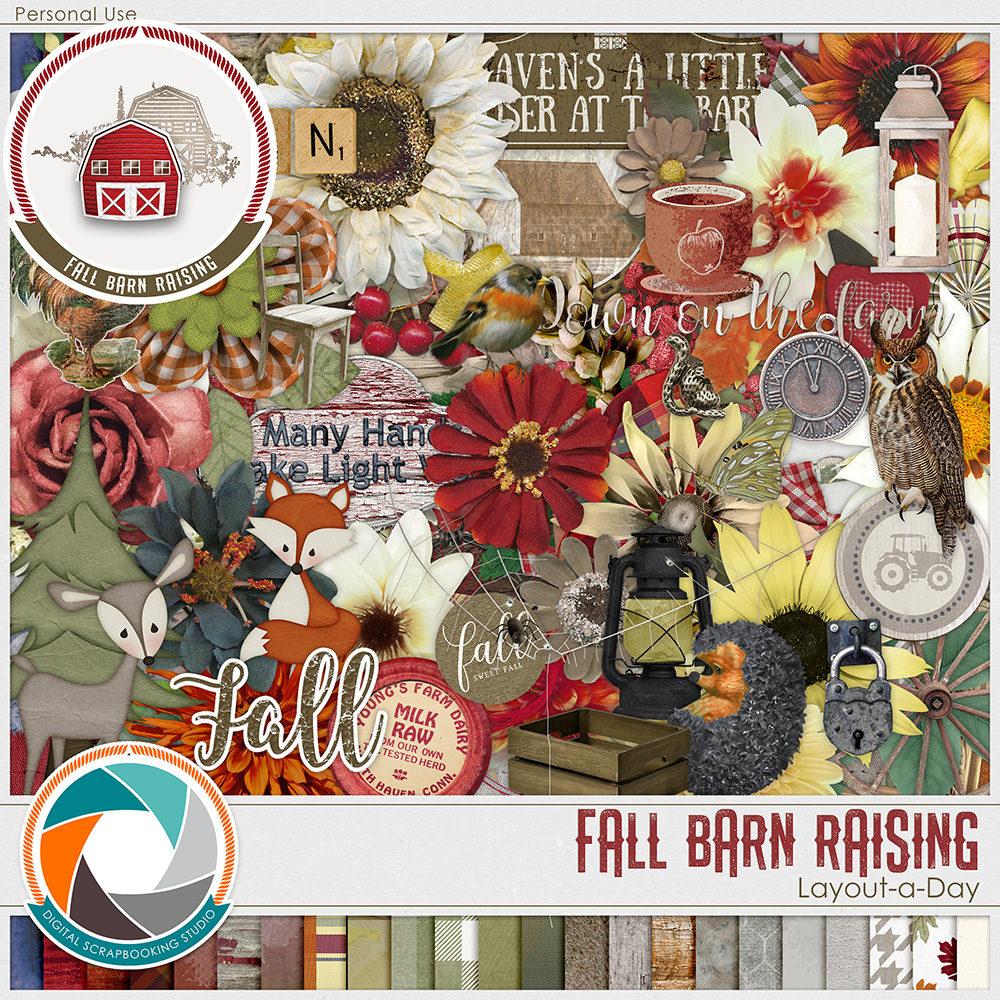
I know not everyone has the tools or time to recreate this Gradient Arrow Element. I have included the final element, as well as the simple PSD & TIF versions of the Arrow Template below. This will be critical for the Day 01 Prompt in our brandnew Layout-a-Day LAD: Fall Barn Raising kicking off tomorrow: October 9, 2019. Come play! Learn some new techiques and build yourself a gorgeous mega kit:
You can pick up the free Arrow Template (PSD + TIF) by clicking the image below:


Thank you very much <3
Thanks for the tutorial & the template!
Thank you
Thank you for the tutorial and template.
Thanks for the tutorial
Thank you for the template and the tutorial!
Thank you very much for the template
Wonderful tutorial! thank you so much for the template