It’s been a hot minute since we’ve talked about Lightroom. I still use it almost every day! It’s the only Adobe App I really love on my phone. It makes editing my photo’s quick & easy. This tutorial will work on the App but the screenshots are from my computer. It’ll be easier to see what I’m doing from a bigger screen.
I’m jumping right into the Dark & Moody part of the post. To review how to use Lightroom to get fantastic black & white photo’s, read my earlier tutorial on Lightroom: Black & White.
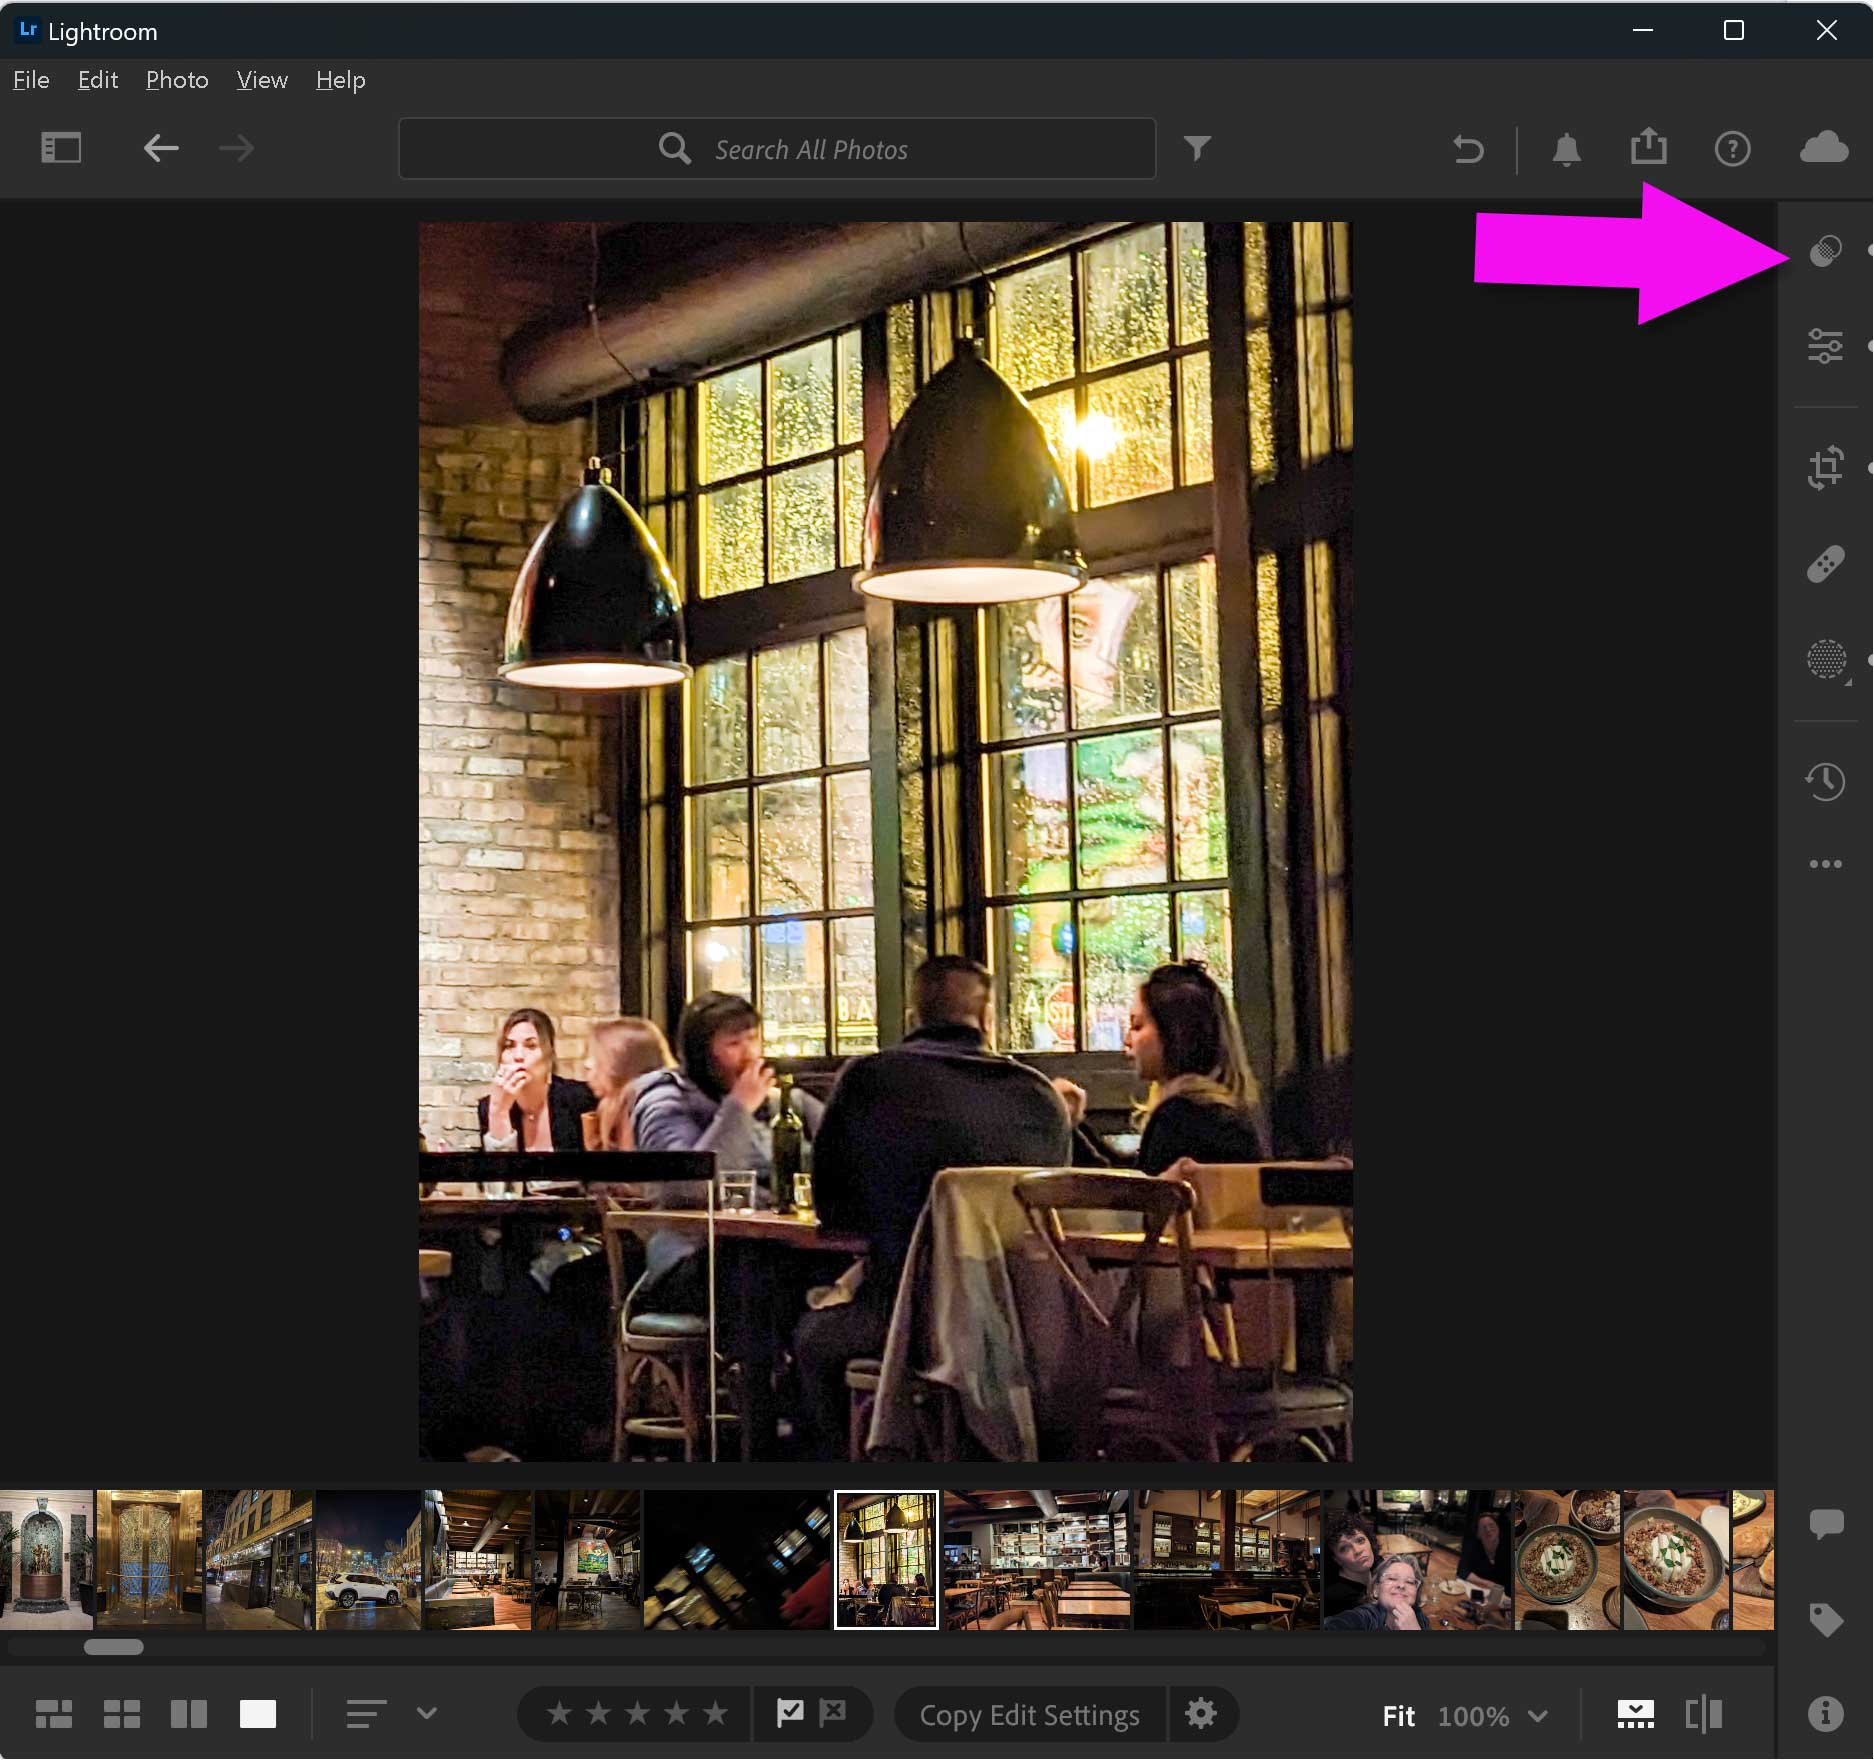
I’m starting with my original photo taking at Girl & the Goat restaurant in Chicago. If you ever have the opportunity to go, GO! Best meal of my life!
- Click on the Preset icon to get to the presets
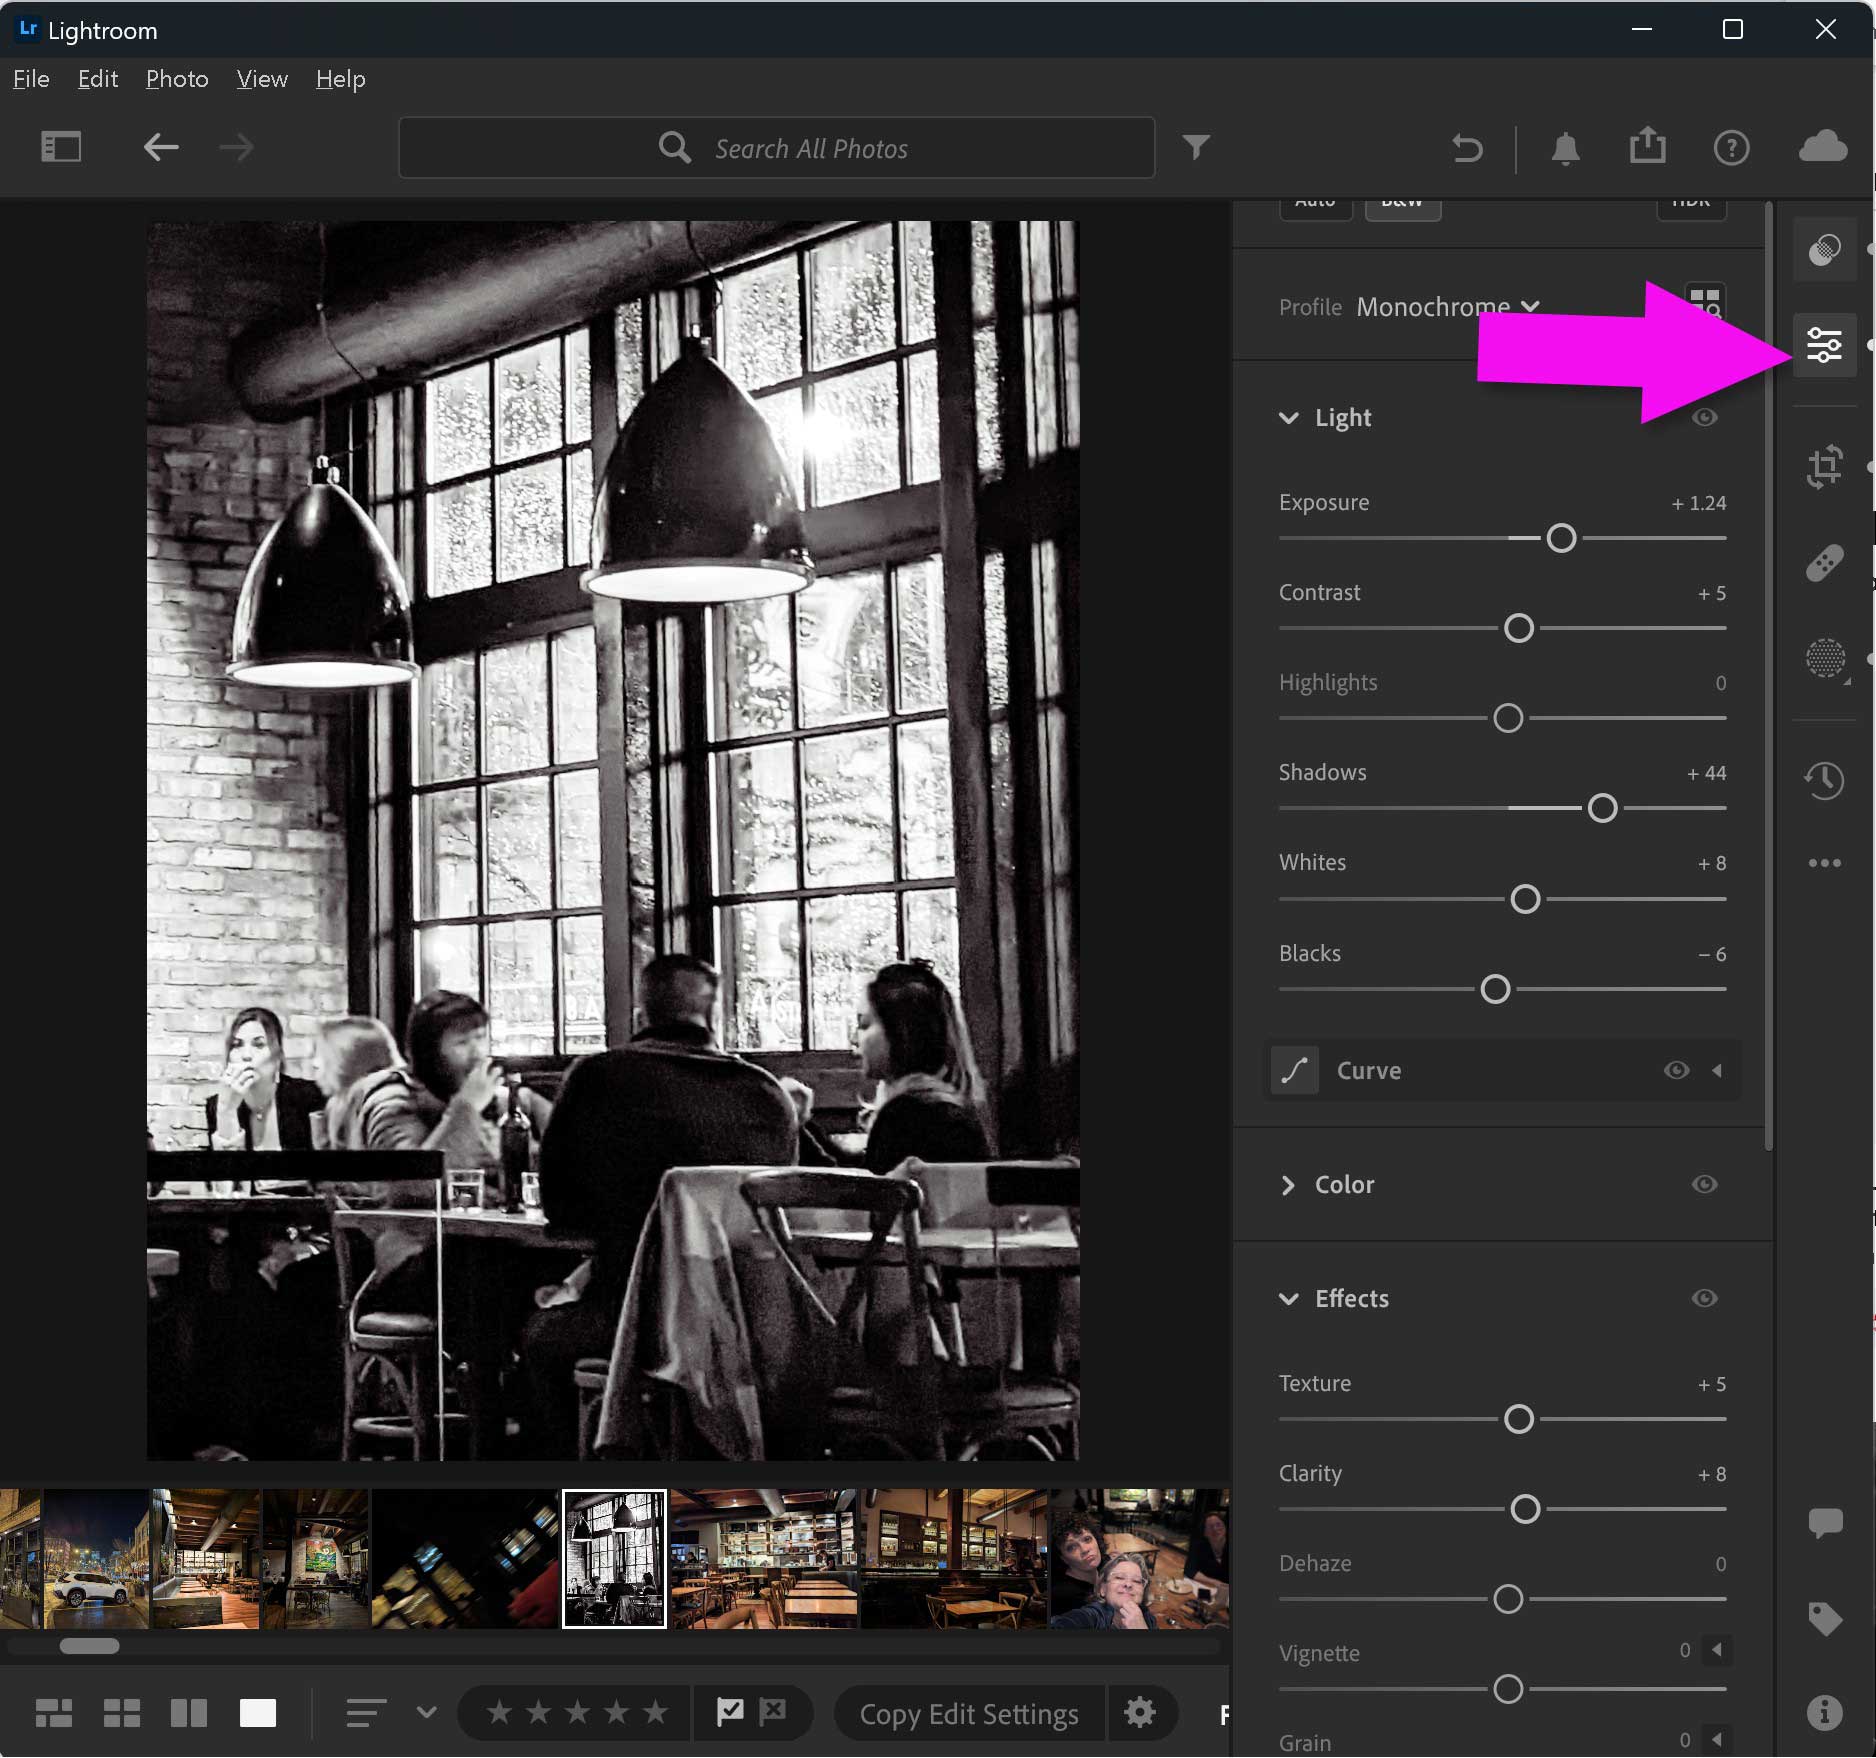
- I choose Premium, Portraits: Black & White (PB06) to start
I already like it but I really want to set a dark & moody tone.
- Click on the Edit icon to edit your photo
 I
I
I’ve changed my sliders to the following settings:
- Exposure = +57
- Contrast = +100
- Highlights = +16
- Shadows = -67
- Whites = -5
- Blacks = -55
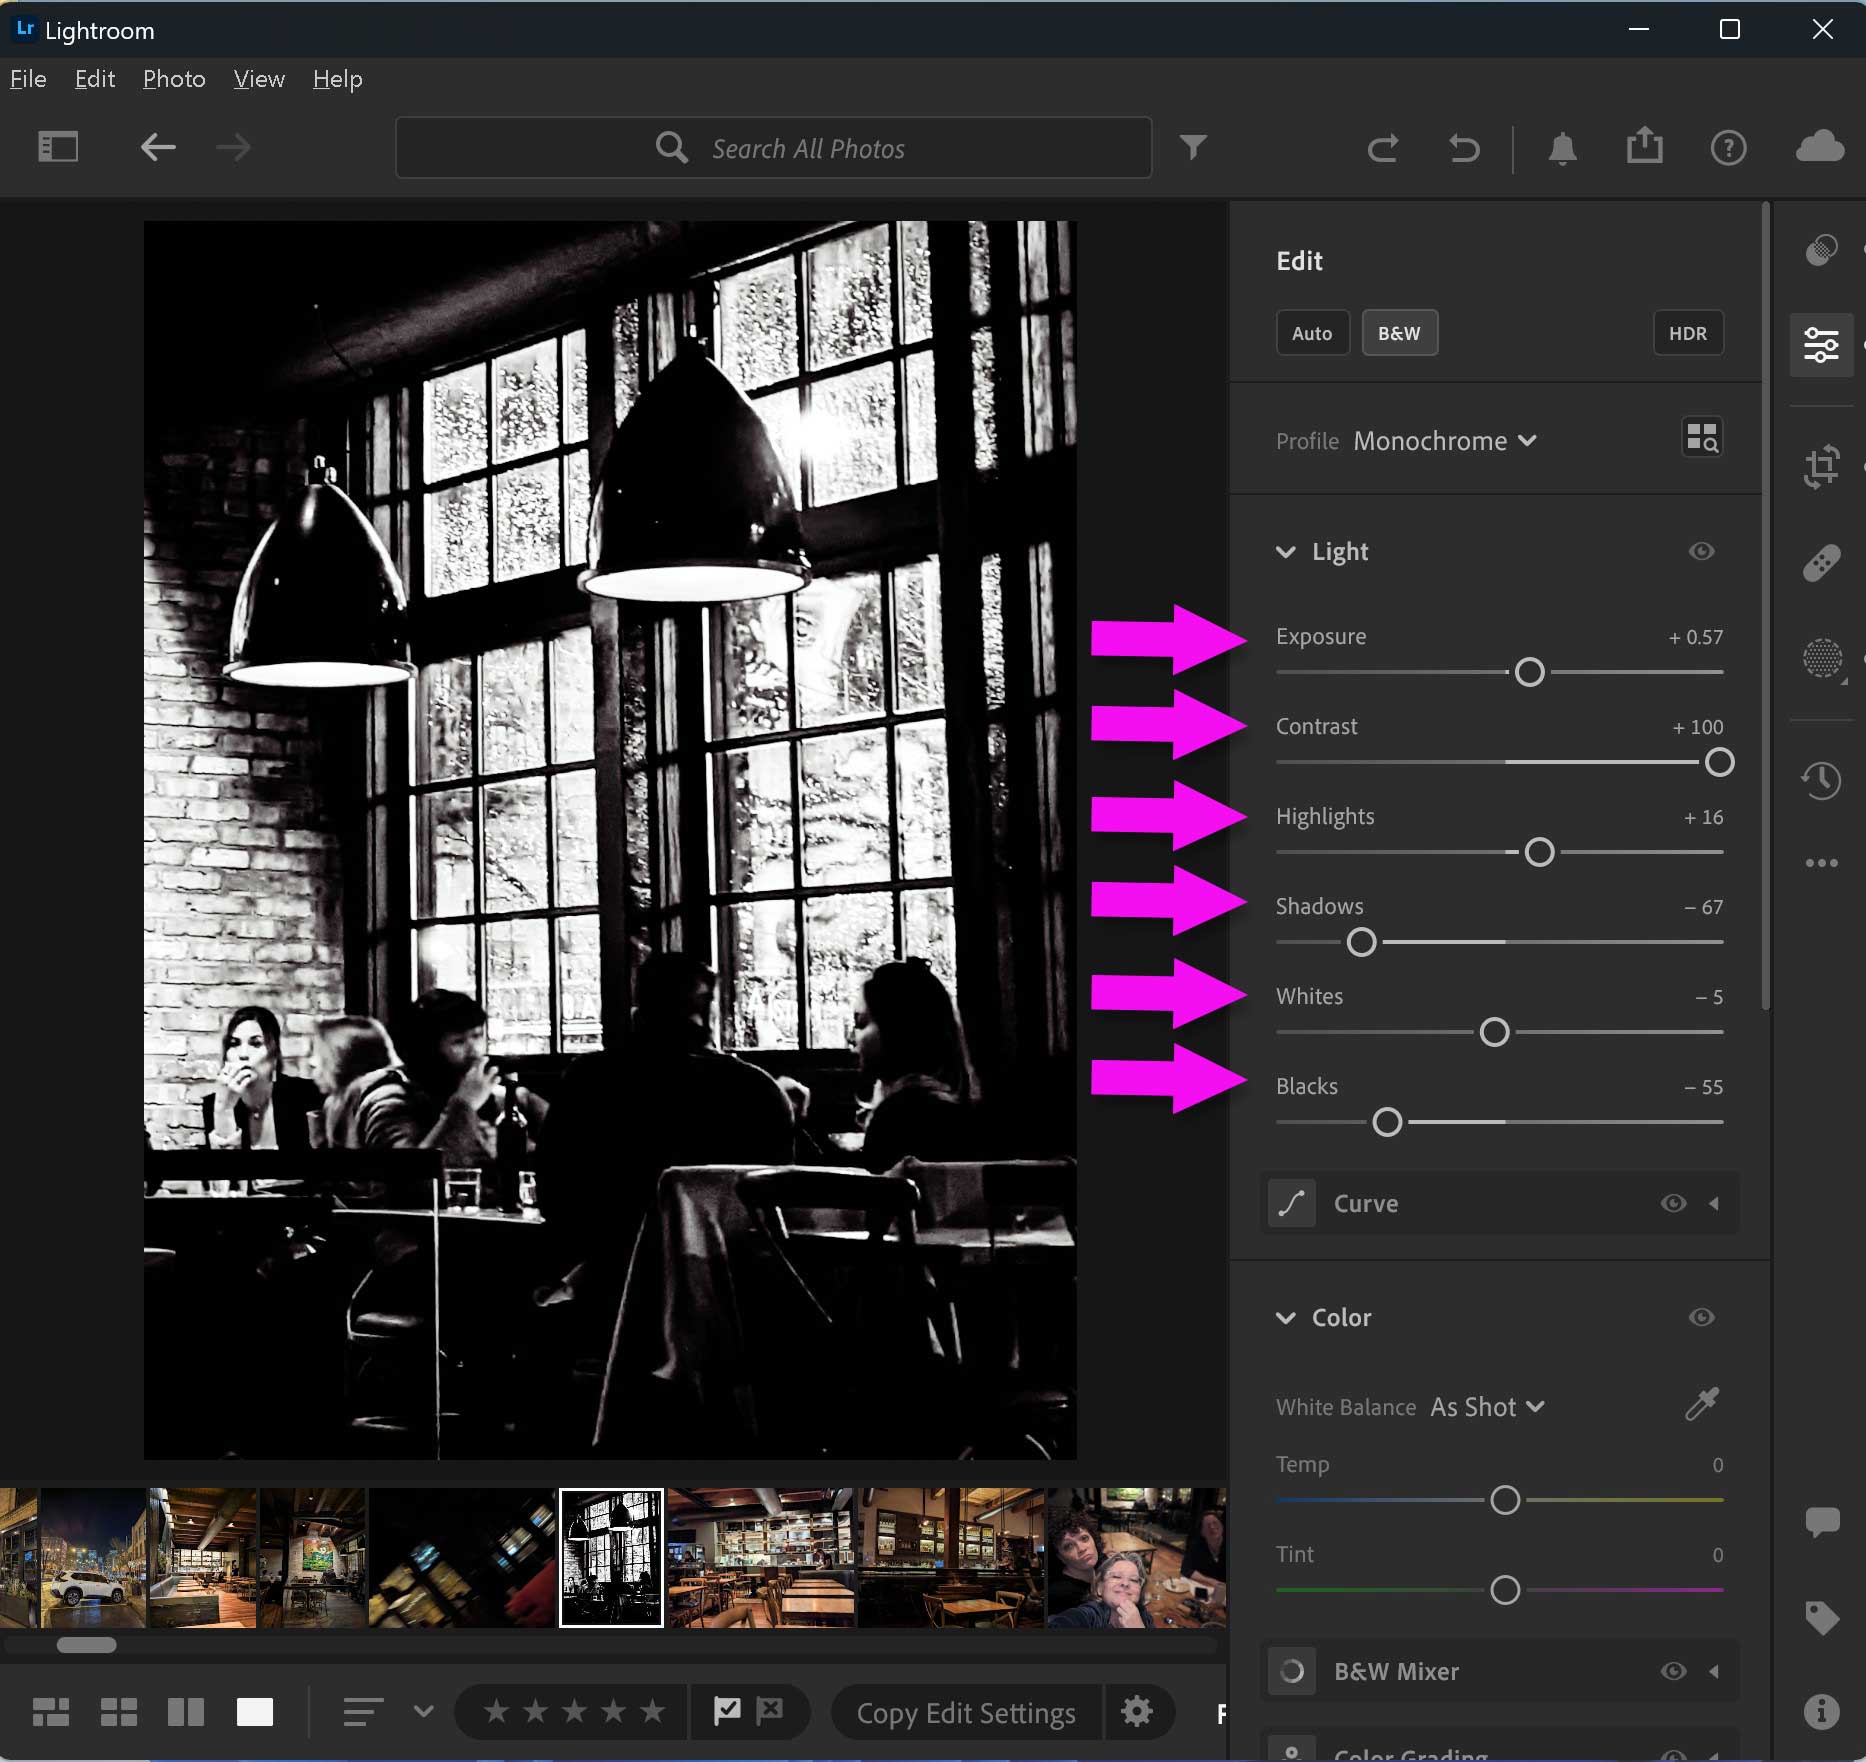
Now it feels moody! If you are following along, look at the changes each slider brings to your photo. You may need to increase or decrease each setting depending on the light in your photo and your preferences. Play around with it. Have some fun! Get dramatic with your photo.


Love that first photo – window setting stands out!
Thank you so much Toiny.