I can’t wind up the overview of using Pixelmator for scrapbooking without mentioning this – there’s also an iPhone version. I know, the screen real estate is precious-little on a mobile phone, but with Pixelmator the capability is (mostly) there. I find scrapbooking on iPhone is easy and fast with quickpages, pre-made clusters, page borders, etc. I can create quick, cohesive layouts, without touching the laptop or even iPad.

ML Designs’ Harmony bundle has a great mix of pre-made elements. It was a (beautiful) breeze making these layouts.
There are some limitations with Pixelmator on iPhone. Running on my old iPhone 6, Pixelmator allows two layers at 3600px. This changes depending on your device’s age and specs. I found that backing down the dimensions to 2400x2400px, I got up to 7 layers. This means that working in full resolution at 3600px, I can merge every two layers into one. Sounds like a pain, but it moves along pretty quickly if you want to work in full size.
In this post, I’ll show you 5 recipes for layouts with 5 ingredients or less, all done on iPhone with Pixelmator. Yield: 5 layouts, Calories: 0
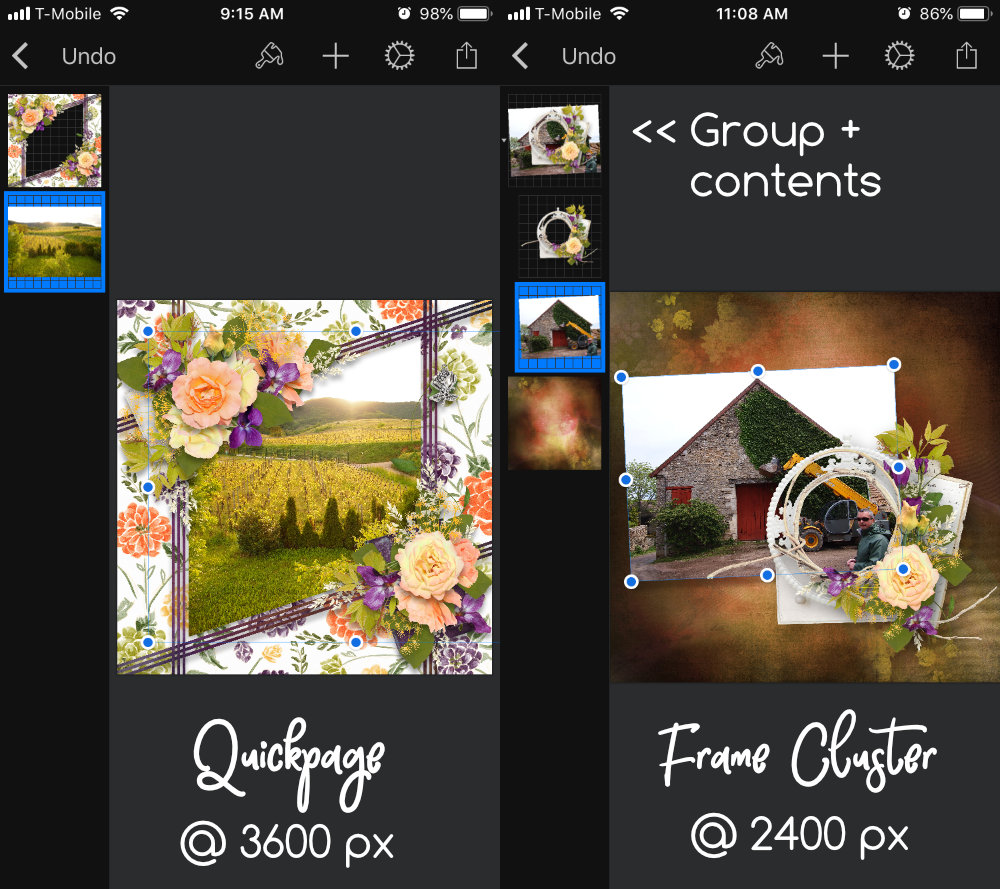
Quickpage
1 photo + 1 quickpage
Two ingredients!
Frame Cluster
(1 photo + 1 frame cluster) + 1 background
Still pretty quick.
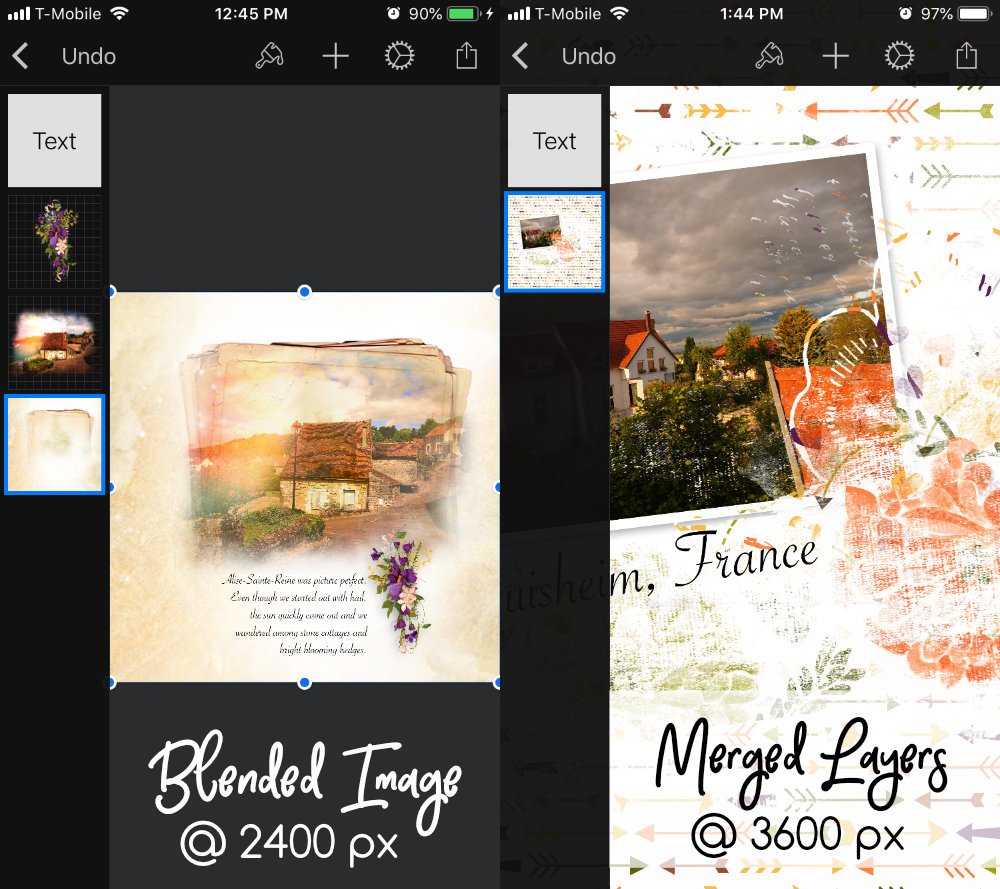
Quick, blended background
((1 background + 1 photo) + embellishment) + text
Add photo to background and blend your photo. Merge down. Option: Add a pre-made embellishment. Sprinkle with text.
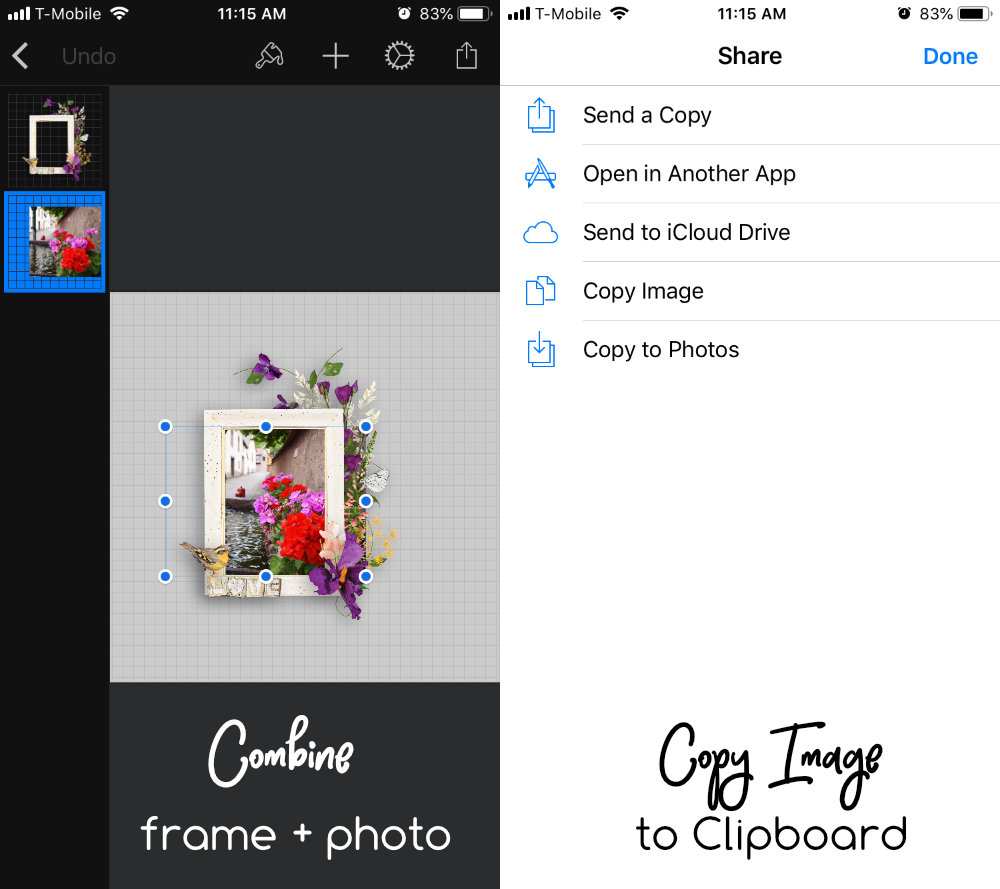
A little splatter as a photo mat
(1 background + 1 splatter with extra paint) + (1 photo + 1 splatter).
Combine separately, then merge in a layout.
A space for journaling
A few more steps but worth it.
((1 background + 1 notebook or journal page) + (1 photo + 1 frame cluster)) + 1 text)
Combine the background and notebook. Separately, combine the photo and cluster, flatten and copy to clipboard. Return to the background document, and paste.
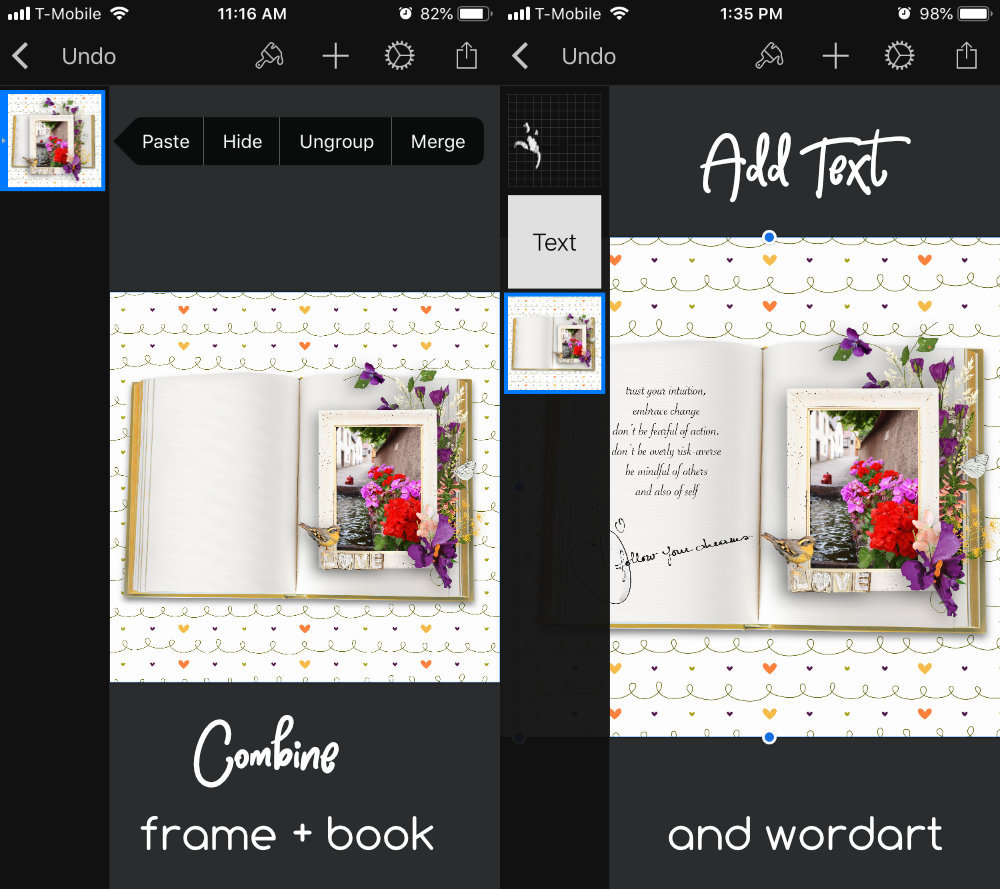
Merge the combined pieces together then add text. Tap the + and choose the T for the text. Customize your font’s style, and start typing.

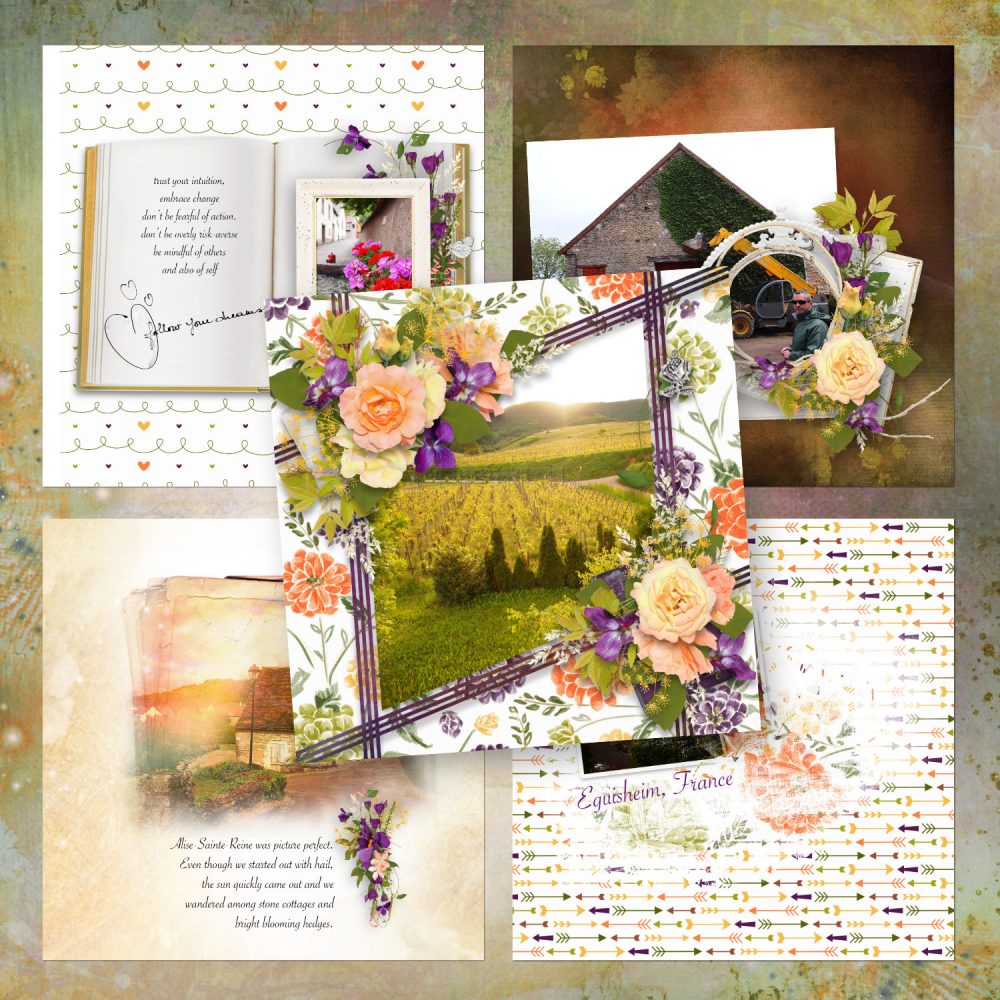
Here are the five finished pages I created in Pixelmator on iPhone:
I hope you’re enjoying my series about mobile scrapbooking. There’s lots to explore on the topic. I’ll be back soon.

[…] there! It’s Ann with another mobile scrapping post, and I’m back on iPhone again. This time, I used a built-in collage template in Pixelmator for iOS as a starting […]