Hello! It’s Ann with another installment of digital scrapbooking on iPad. Until now, I’ve been creating more realistic, paper-and-scissors-style layouts. This time, I have an overview on creating a blended layout (my favorite!) using Pixelmator. At the end of the post, we’ll cover getting your document saved as a flattened file and ready to post.
I used Jen Maddocks Bricolage Monthly February 2020 Bundle. She makes it so easy to blend!

For this post, we’ll be using the Eraser tool and experimenting with blending modes. Pixelmator for iOS, as I’ve mentioned previously, does not currently have non-destructive editing. That means that to blend, you erase parts of your image instead of masking it. Which means, you can back out of actions only up to the Undo button’s limit. We will get to masking in mobile digital scrapbooking soon!
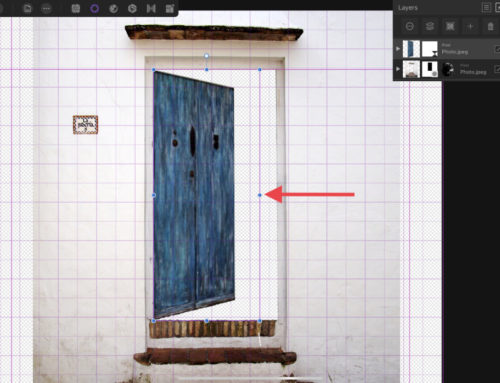
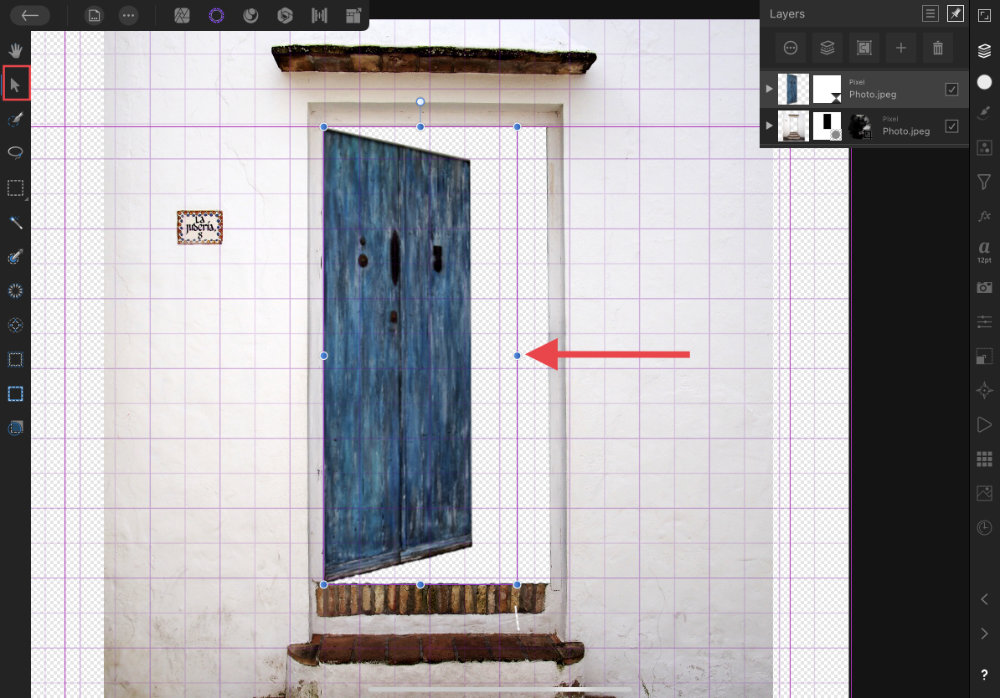
I created a 3600×3600 document, and imported my photo layer into it. I played with arrangement of the image by moving, resizing, and rotating it until it fit with the background.
To start erasing, tap Tools >> Paint and Erase, select the Eraser tool, and choose an eraser brush. I adjusted the strength (opacity) up and down as I went along, depending on how much I wanted to blend the image or soften edges. I love this part!
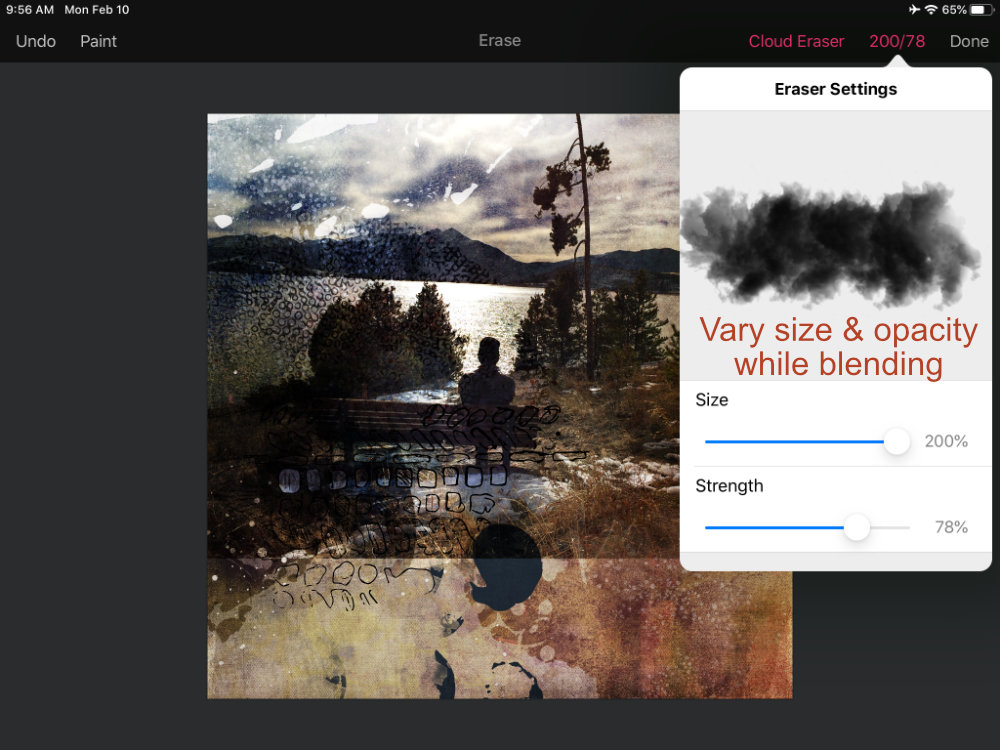
Next, I opened the Tools menu and tapped Format >> Blending, and started picking blending modes until I settled on one I liked. This time, it happened to be Hard Light. I may or may not let out a tiny squeal when I find one that works just right.
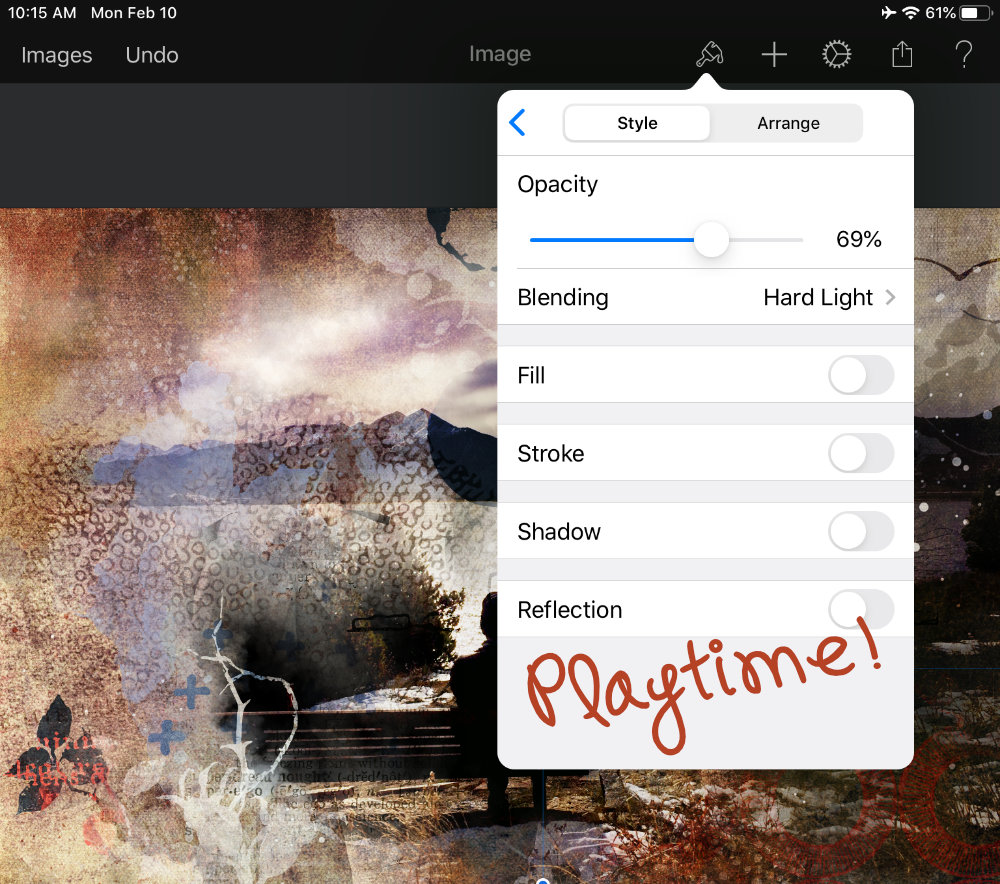
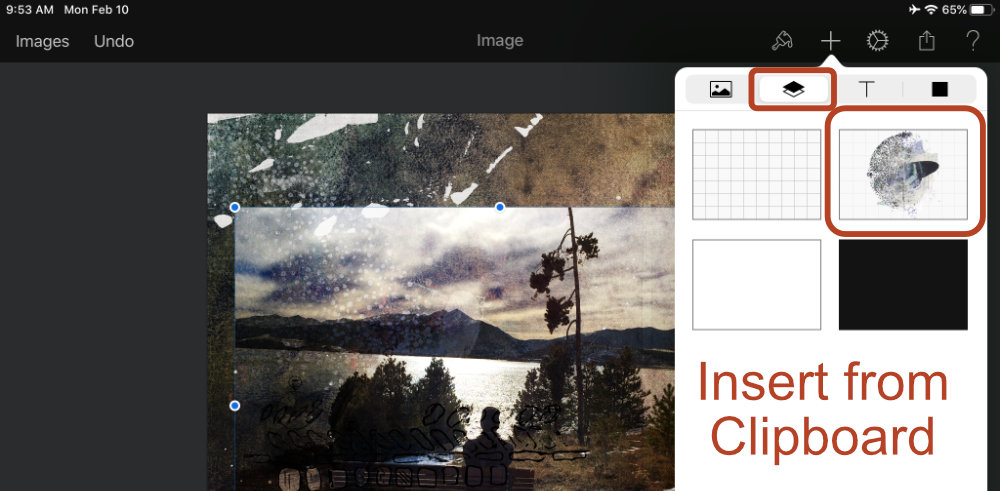
Use blend modes with both photos and elements. Play around and see what works! I imported various elements from Jen’s bundle, layering them both above and below the photo layer, then changing blending modes on these as well.
TIP: An easy way to get an element into the Pixelmator document is to copy the image to the clipboard from Photos or Files, then paste as a new layer into the document.
When my layers started piling up, I grouped, merged down and kept going. But before going any further, I needed to rename the file. To do this, tap on the Images menu to return to the Pixelmator main screen. Tap once on the default image name, then type in your title.

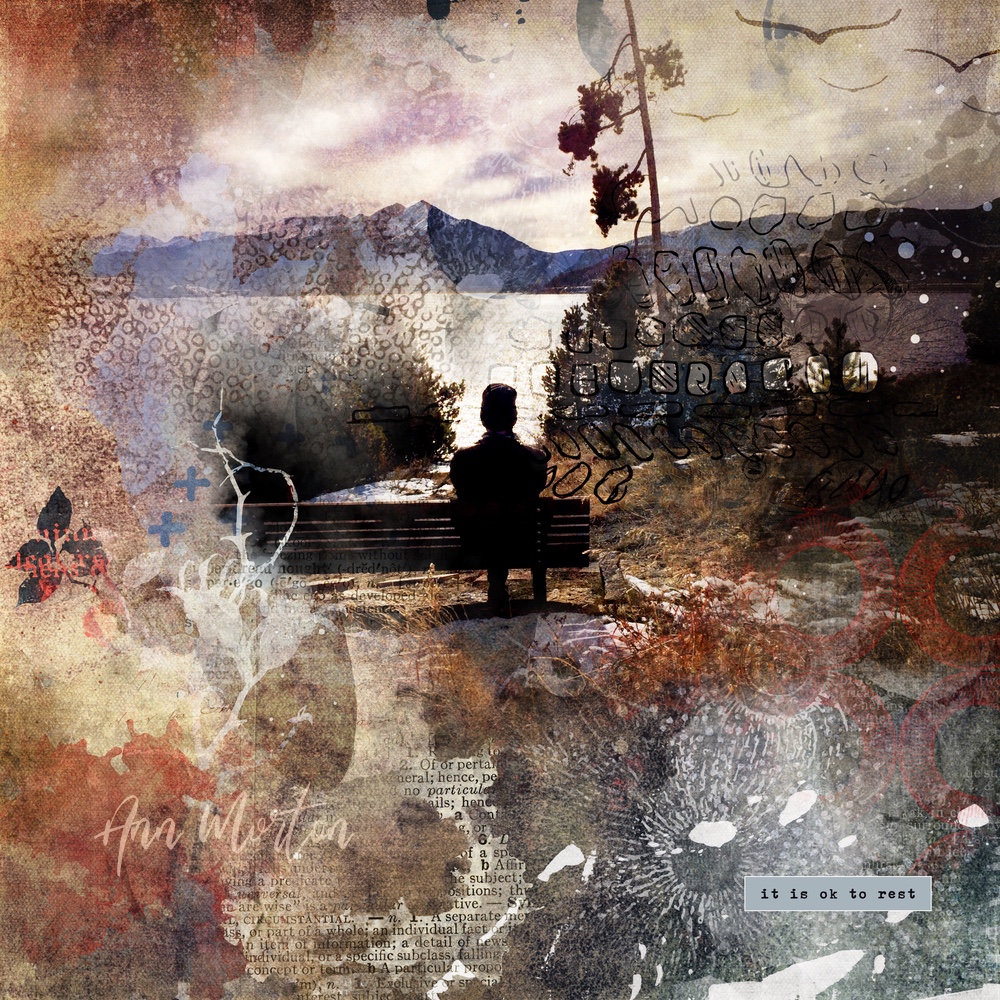
Once I felt like the layout was finished (for now, anyway!), I was ready to save a flattened image.
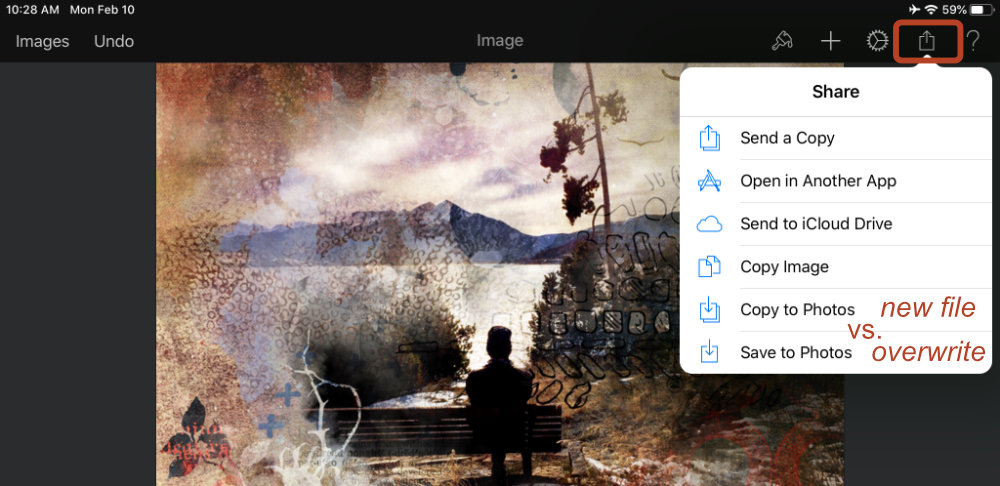
To save locally on my iPad, I tapped the Export button and selected Copy to Photos. This copies a flattened image file in .png format to the Photos app.
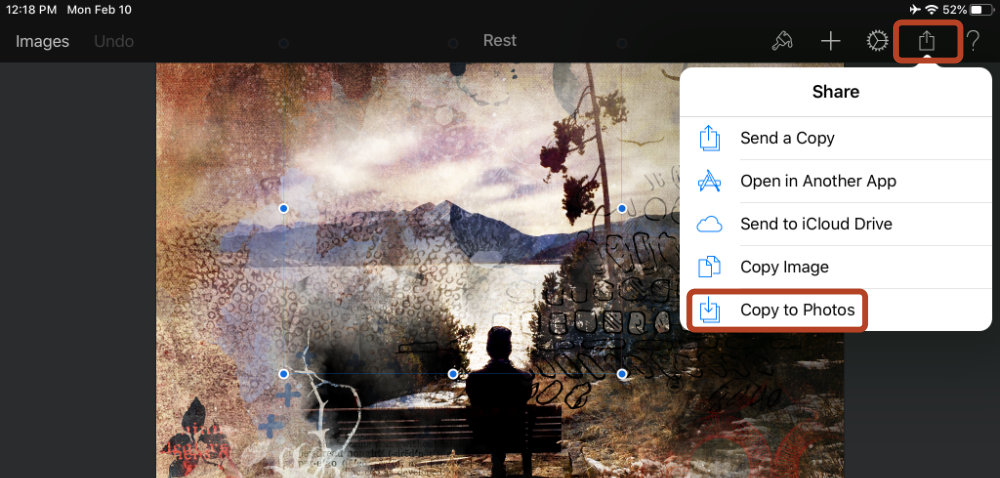
Both Send a Copy and Send to iCloud Drive open up other options for file types, (.jpg, .png, .psd, .pxm) and export locations.
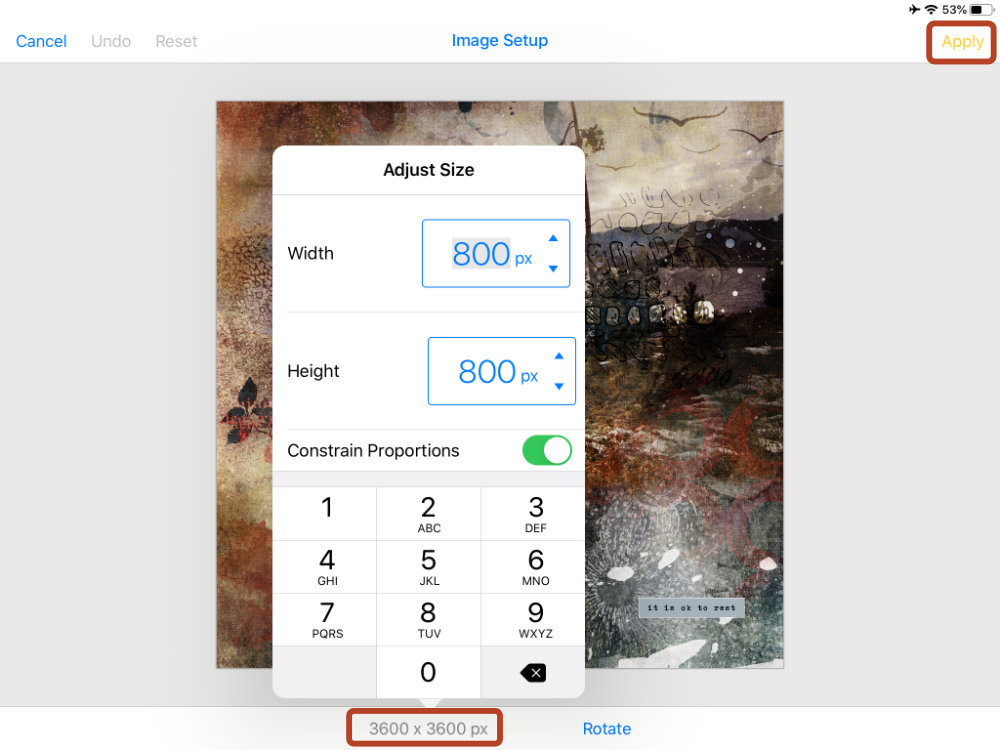
Now I was ready to create my photo for posting in online forums. Pixelmator already feels the strain of multi-layered documents of this size, so I don’t stress it further (or risk a mistake) and resize from the layered document, export, then undo.
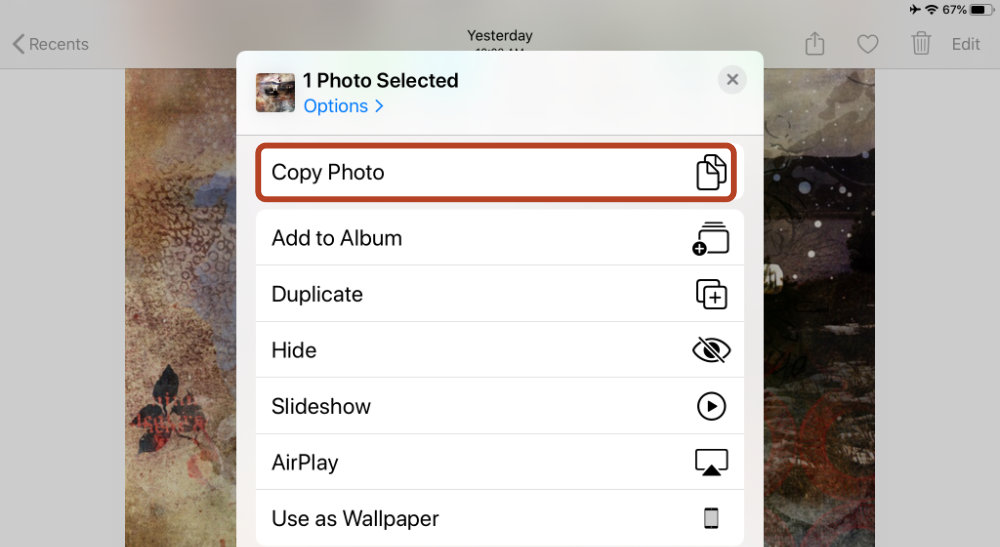
Instead, one option is to open the Photos app, and tap on the photo you just exported. Choose Export, then Copy Photo. This copies it to the clipboard.
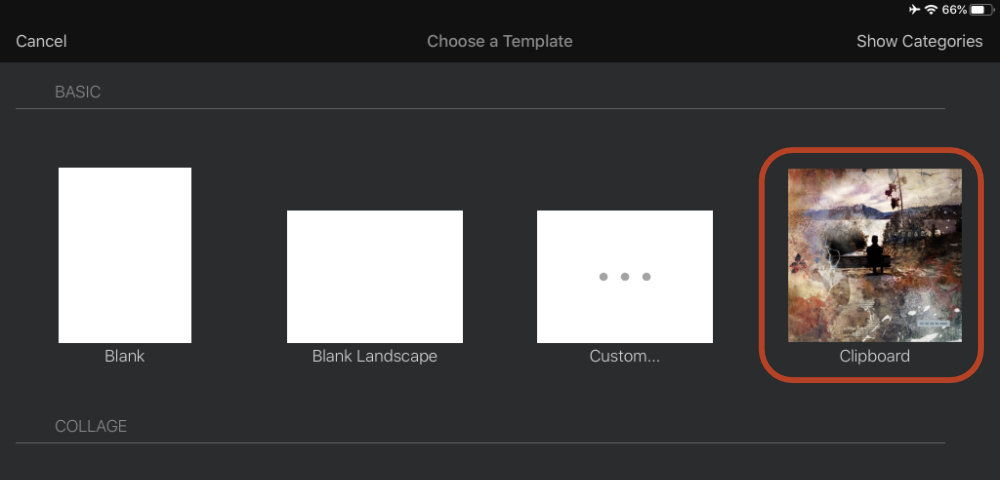
Next, open Pixelmator and tap + for a new document. Your clipboard item is ready to open.
From there, you can tap Settings >> Image Setup to resize. Type your size, Hit Apply, then tap Export >> Copy to Photos.
Another option option is to create a new, blank document and add the flattened image as a layer, or open the new, flattened image from Photos inside Pixelmator (from the + menu) then resize and Export >> Copy to Photos.
There is also a Save To Photos command available in certain scenarios, but be careful: Save To Photos overwrites your existing image. It’s not a Save As. If in doubt, choose Copy to Photos.
Thanks for following along with my series on digital scrapbooking on iPad. I look forward to sharing more with you soon!
Thanks so much for this pixelmator tutorial. I can now participate in challenges now that I know how to do blending masks and the resizing.
You are welcome! I’d love to see your creations from iPad!
Thanks for another segment on using Pixelmator! It was a lifesaver while I was on vacation and wanted to scrap the Progressive Scrap, having to use only my iPad.
[…] blended background ((1 background + 1 photo) + embellishment) + text Add photo to background and blend your photo. Merge down. Option: Add a pre-made embellishment. Sprinkle with […]