
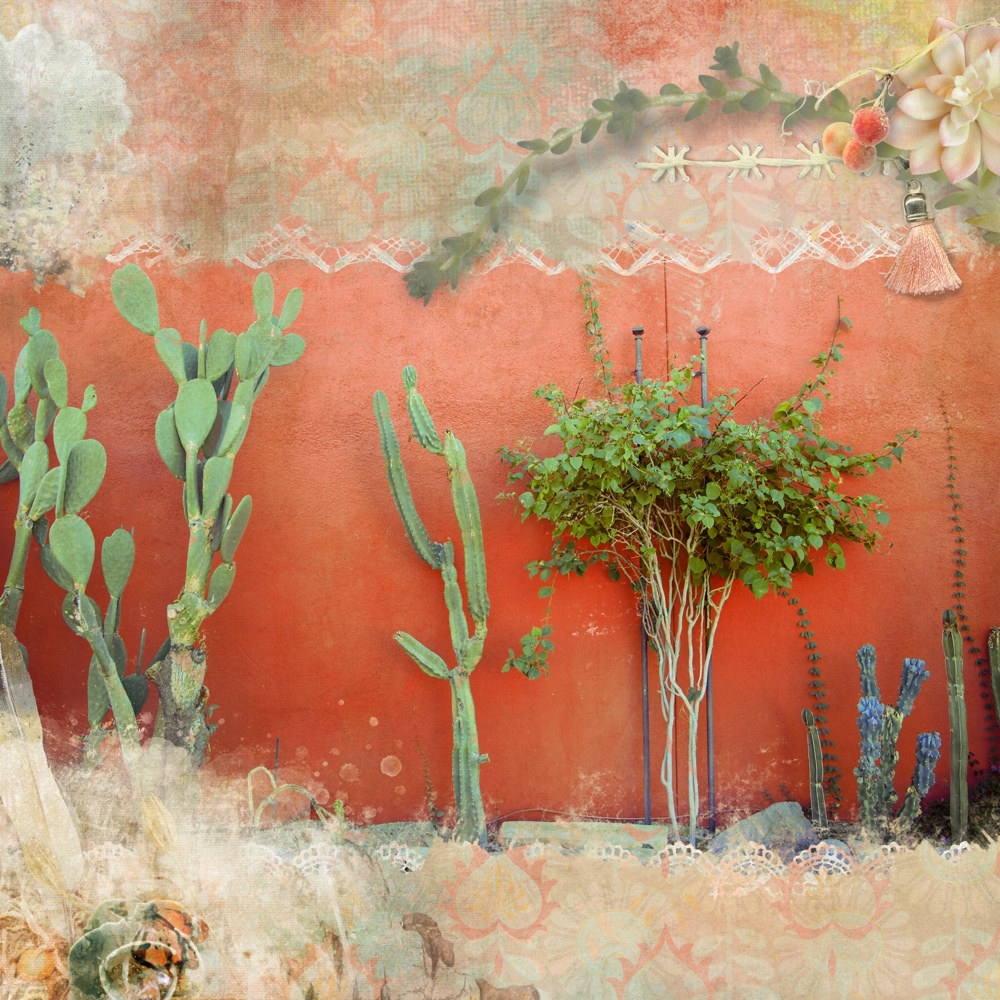
If you’re like me, you’ve been there too. You have a photo you like, and a kit you’re itching to use. But the color-coordination between the two? Not. Even. Close. Today, I’ll review using Procreate’s Recolor tool to make my photo work with Manu’s Boho Gypsy Collection (it’s on sale!).
Once you have your image open and placed in your document, duplicate the image by swiping left and tapping duplicate. Hide the top copy.
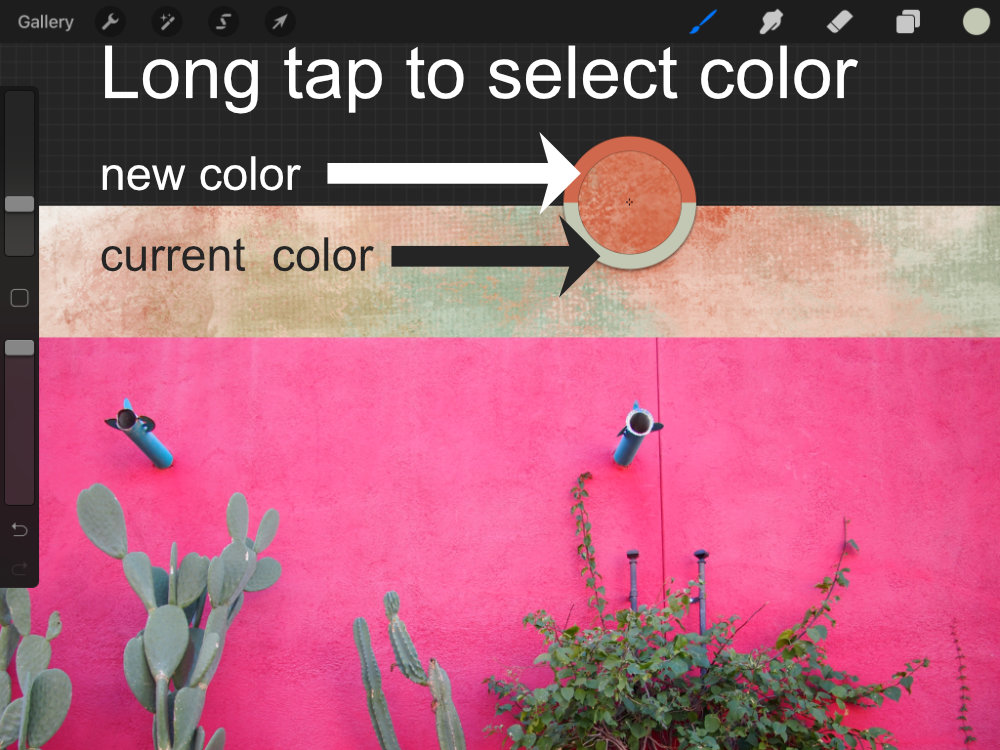
Next, choose the color you want your image to have. If the color you want to use already exists on the page, you can long-tap over the color, and it becomes the active color. You can also choose a color from the Colors menu or enter a hex value there.
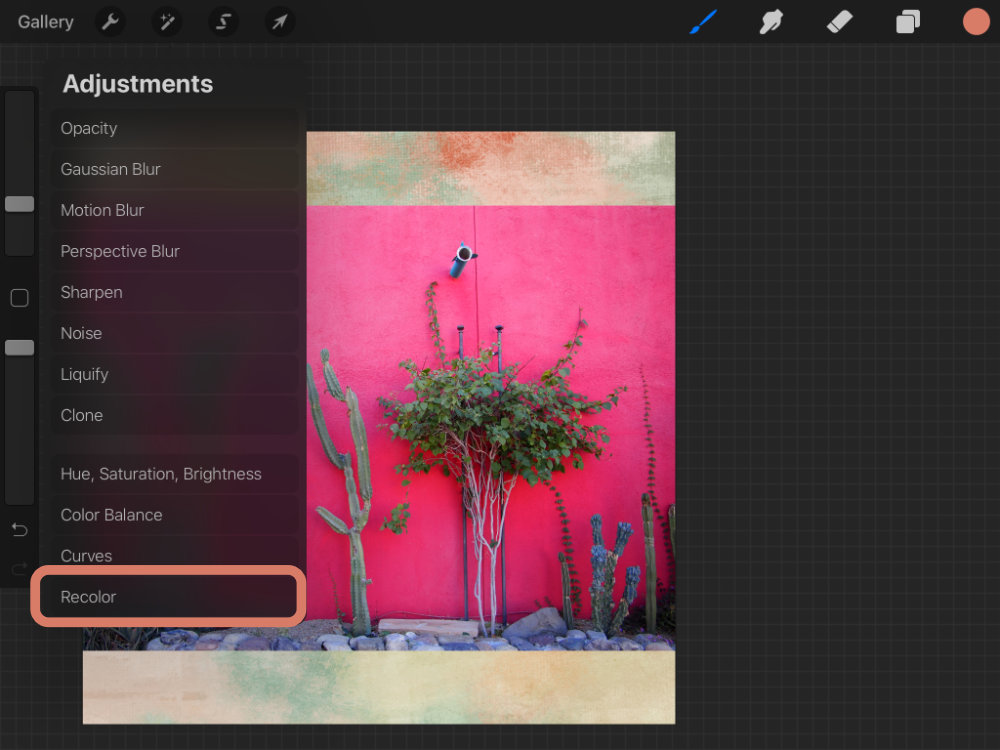
Make sure the visible image layer is selected in the Layers panel, then tap the magic wand, and select Recolor.
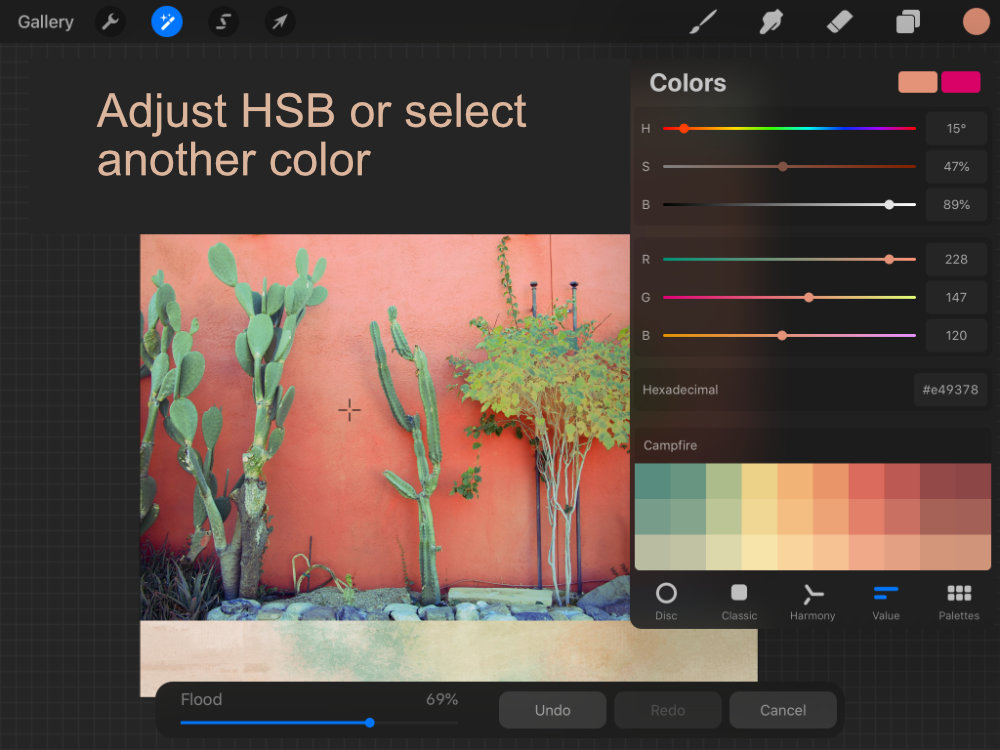
Now, find the tiny little cross hairs, and drag them to the section of the image you want to recolor. In this case, over the pink wall. Drag the Flood slider to the right to increase the threshold, or coverage, of your recoloring. You can also still drag around the cross hairs on your image to fine-tune how the recoloring is applied. Play around with the cross hairs – the positioning definitely made a difference for my page.

You can further adjust your color using the Hue Saturation Brightness (HSB) sliders or switch to another color altogether. To do this, open the Colors menu, and tap on Value.
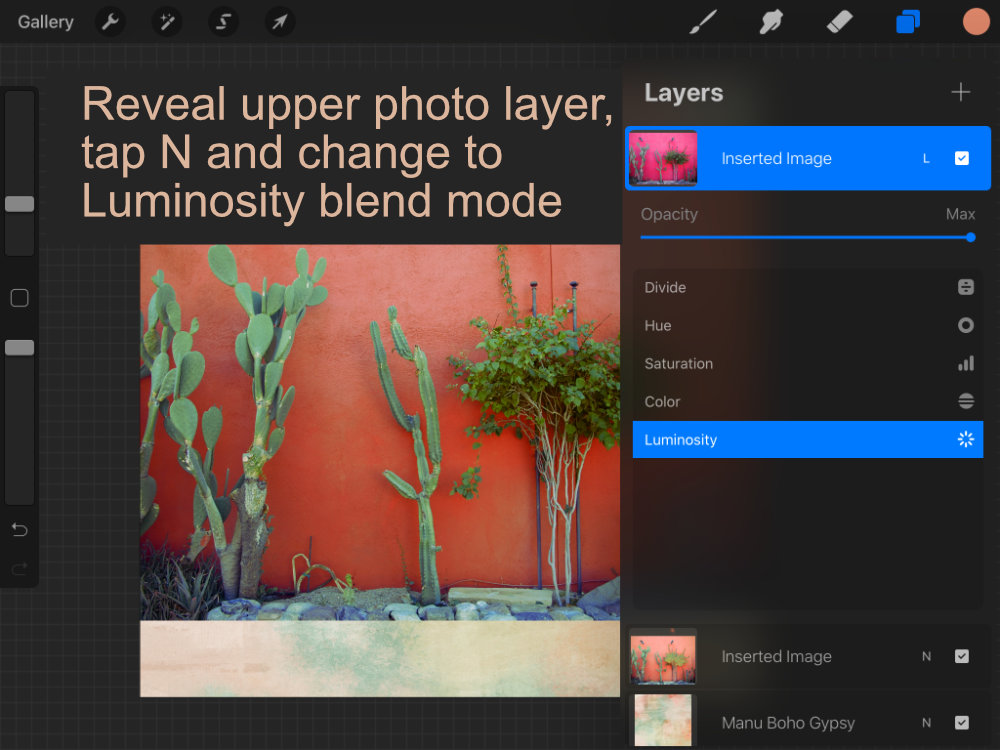
When you’ve finished, tap on the Layers icon to commit your color change. I’m not thrilled with what this recolor has done to the leaves on the tree in my image, but the duplicated photo will help. To fix, un-hide the top image layer, and change the blend mode to Luminosity.
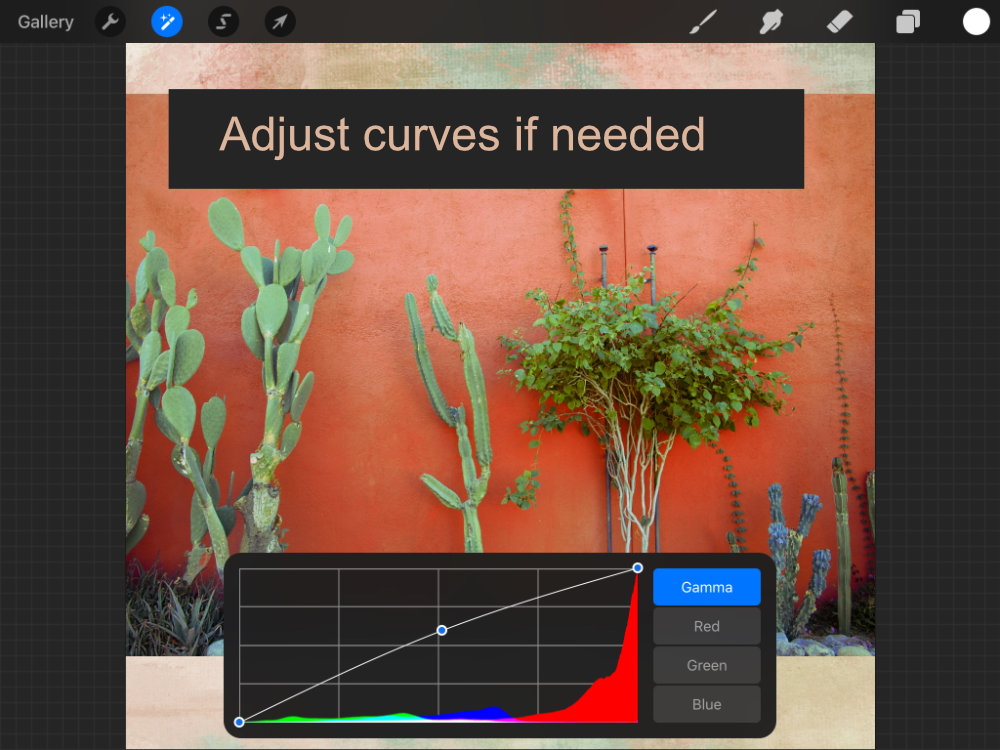
Ok. It’s pretty good, but still could be improved. Tap the magic wand again, and select Curves. For this instance, I left the Curves adjustment on the Gamma setting, and nudged up the center of the curves spline just a little, so it brightened the top, blended image layer.
Quick Tip: If you’re not happy with the change, you can always tap once outside the canvas bounds and hit the reset button that appears.
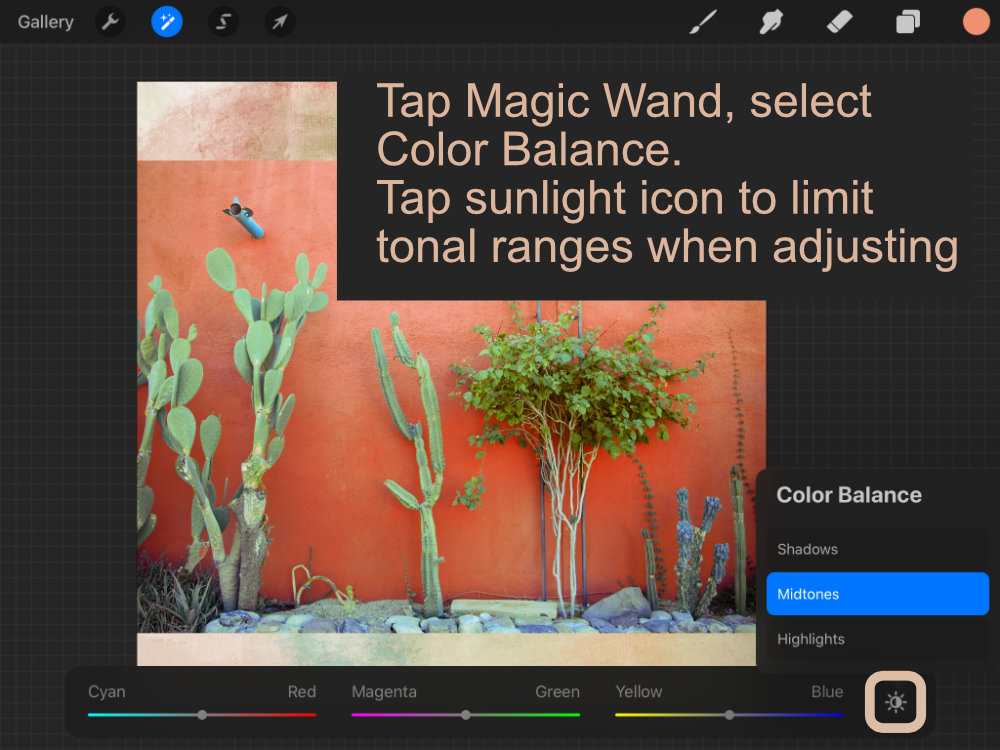
If you want to make any final adjustments, you can tap the magic wand again, select Color Balance, and adjust the colors there. Tap the sun icon to select Highlights, Midtones, or Shadows, and adjust each tonal range as needed.
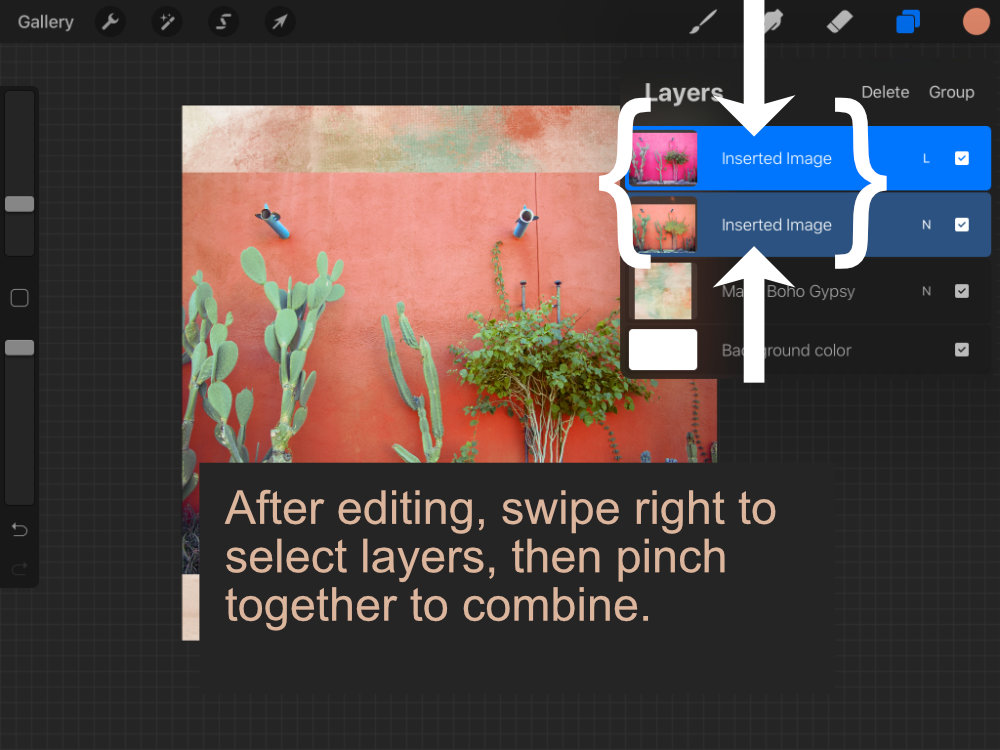
Finally, when you’re satisfied with your changes, you can swipe right to select both photo layers, then pinch together to combine into one layer.
All in all, I find Procreate’s Recolor tool and other color adjustments quick and pretty easy to use. The downside is that the changes are not adjustable once you commit your change. Next time, I’ll show how I use Affinity Photo’s recolor tools in comparison.

Are you creating layouts or art journal pages on your iPad? Share your layouts with us what apps you’re using. And if you want to jump in on this month’s mobile challenge, stop by the forum and join in!


[…] Last week I reviewed using Procreate’s Recolor Tool, so this week, I’ll go over a couple of ways […]
[…] over to The Studio where I share some tips on using the Recolor Tool in […]