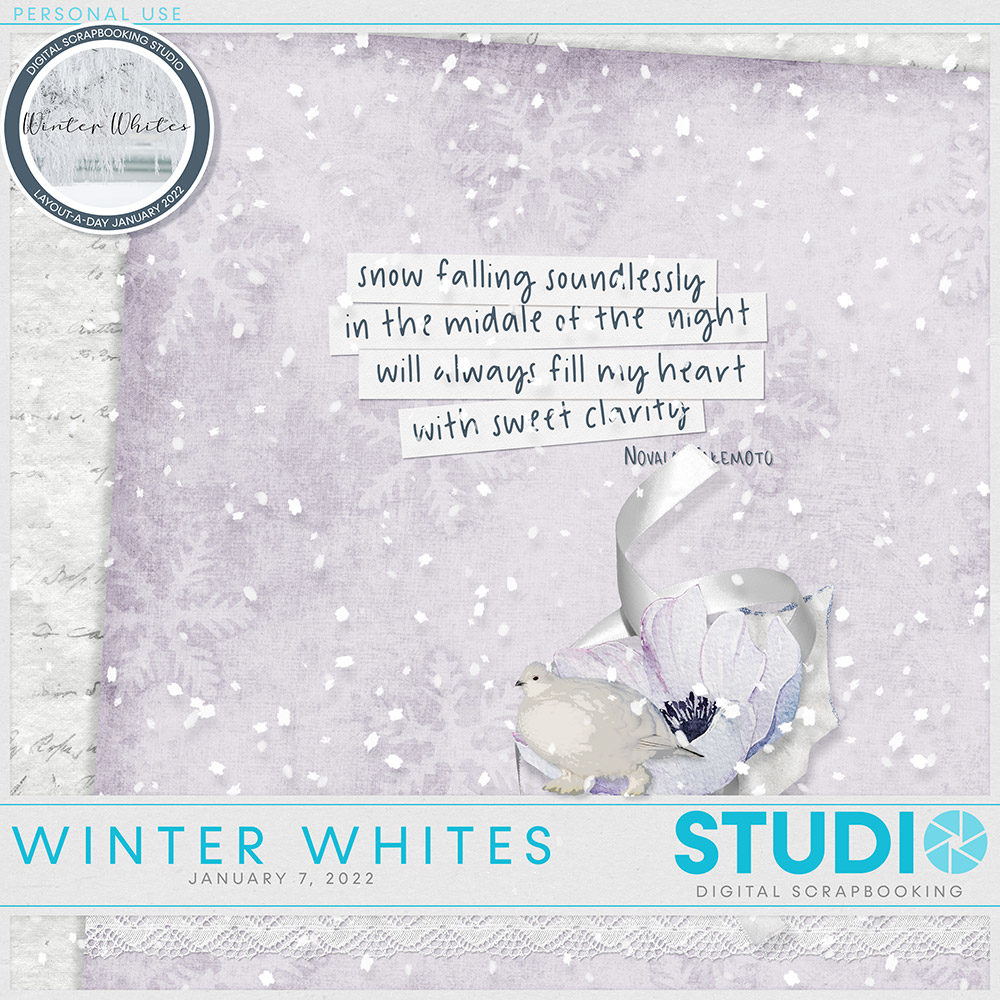
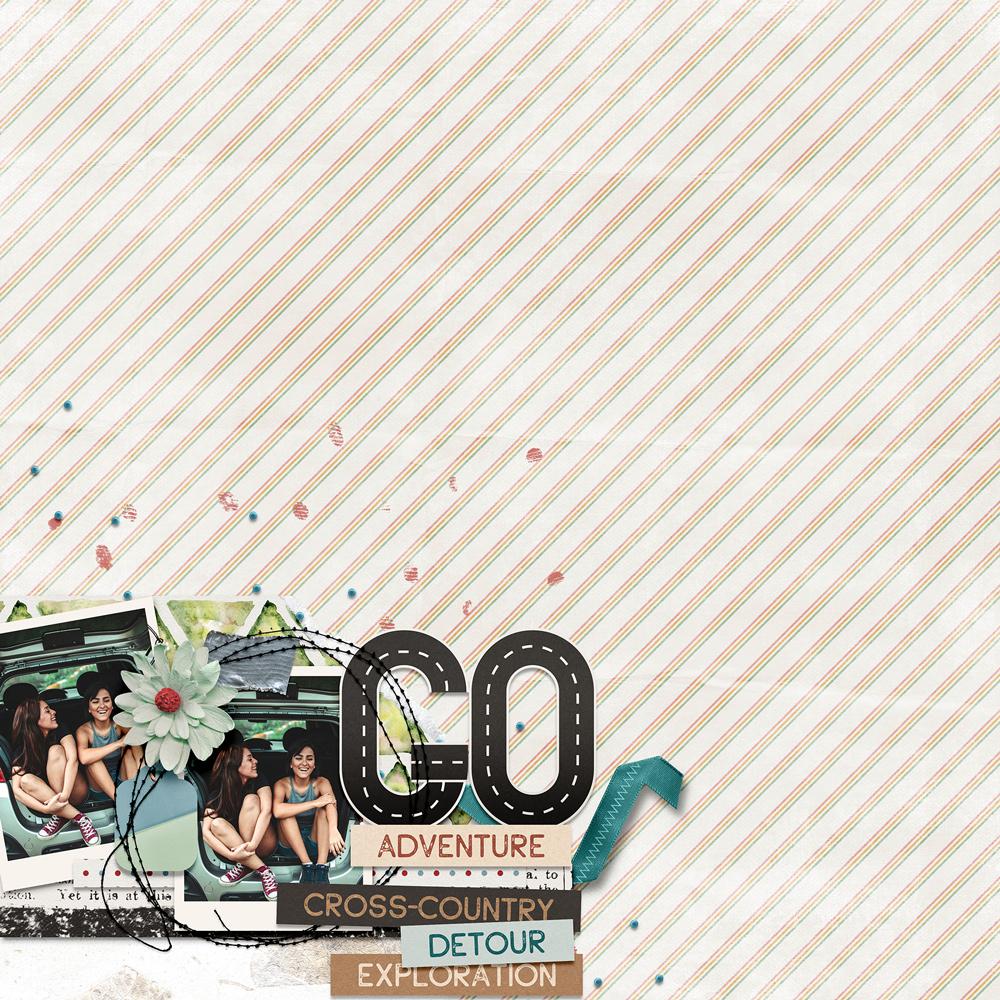
If you are playing along with our LAD (Layout-a-Day) Winter Whites, you’ve already received the first “Word Block” element in your January 7 prize. These are a great way to add journaling, meaning & tone to a layout. Frequently, though, they don’t say exactly what you mean.
It’s easy & fun to make your own! I’m using photoshop, but this technique can be adapted to almost any program. Give it a whirl & have some fun.
I start with a Custom Shape, usually a rectangle, and go from there. The benefit of a Custom Shape is that you can easily change the color simply by double-clicking.
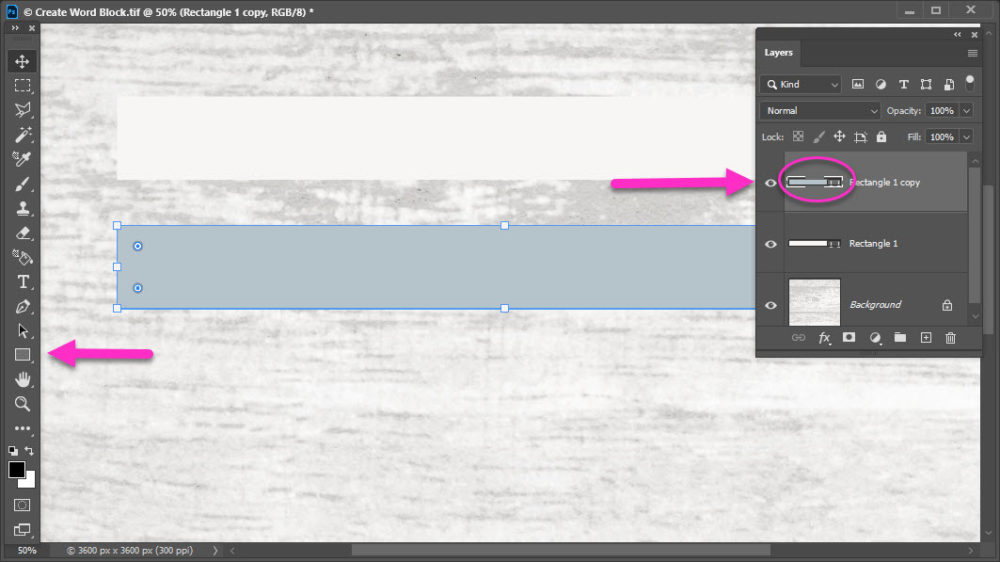
You can see where I picked the Rectangle Tool on the left (pink arrow).
- I drew my Rectangle 1 at 1647 px by 177 px.
- My original fill color is white.
- I duplicated the Rectangle 1 in my layers palette.
- I moved the Rectangle 1 copy down my screen;
- and double-clicked (on the layers palette thumbnail) to change the color to a light blue.
I don’t want just a plain box. I want a little texture, in photoshop this is easily accomplished my picking a Pattern. In other programs this may be different and/or you can simply clip a texture paper over your rectangle.
- Select layer Rectangle 1
- Click the little fx at the bottom
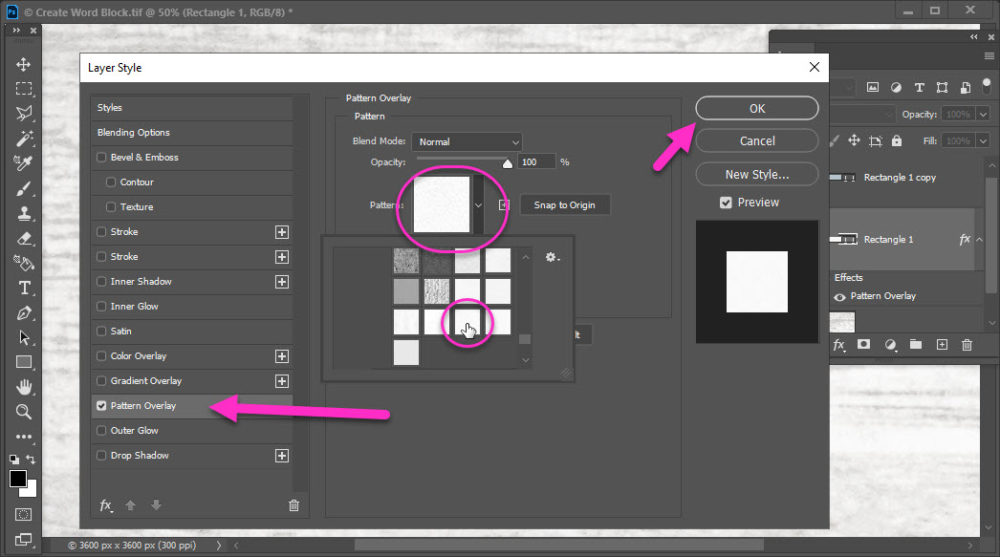
- Select Pattern Overlay
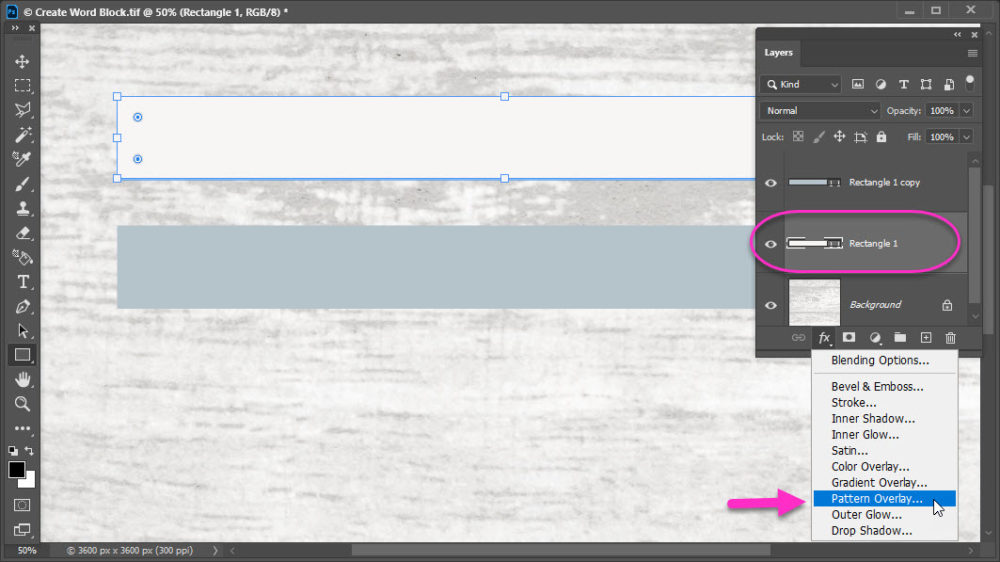
The Layer Style box pops up, I choose the Pebbled paper under the default Greyscale papers.
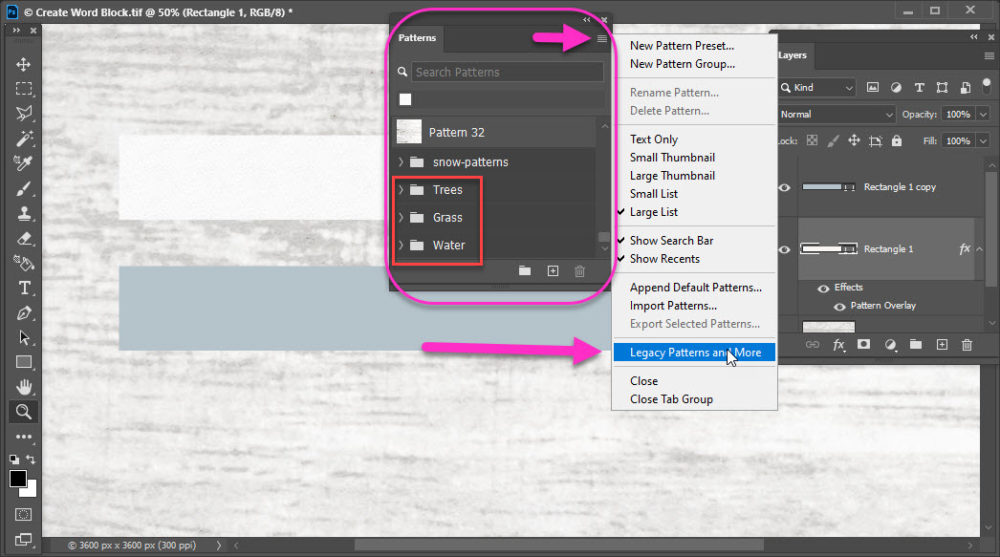
Quick note, the latest version of photoshop do not have the legacy patterns loaded. To get these patterns back:
- Open up the Patterns Panel (if it’s not open, click on top menu Windows —> Patterns)
- The only default patterns loaded will be:
- Trees;
- Grass; and
- Water
- To get the Legacy Patterns back, click on the tiny 3 lines at the top right
- Choose Legacy Patterns and More
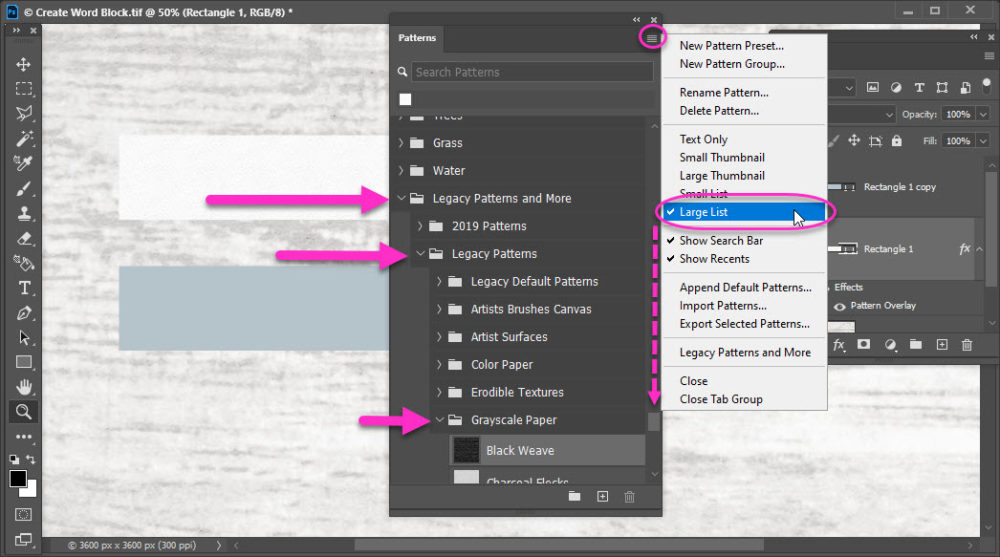
The Legacy Patterns are immediately added at the bottom of your Patterns Palette. You can apply the pattern from here or go back into the Layer Style and apply it from there.
- Click on Legacy Patterns and More
- Click on Legacy Patterns
- Click on GrayScale
- Click on Pebbled
NOTE: if the names of the patterns are not showing, you can change the way Patterns are displayed:
- In the Patters Palette;
- Right-click on the three tiny lines
- Choose Large List
Next apply a simple Drop Shadow, mine is:
- Color – HEX #3c4144
- Blend mode – Linear Burn
- Opacity – 40%
- Angle – 135
- Distance – 5
- Size – 5
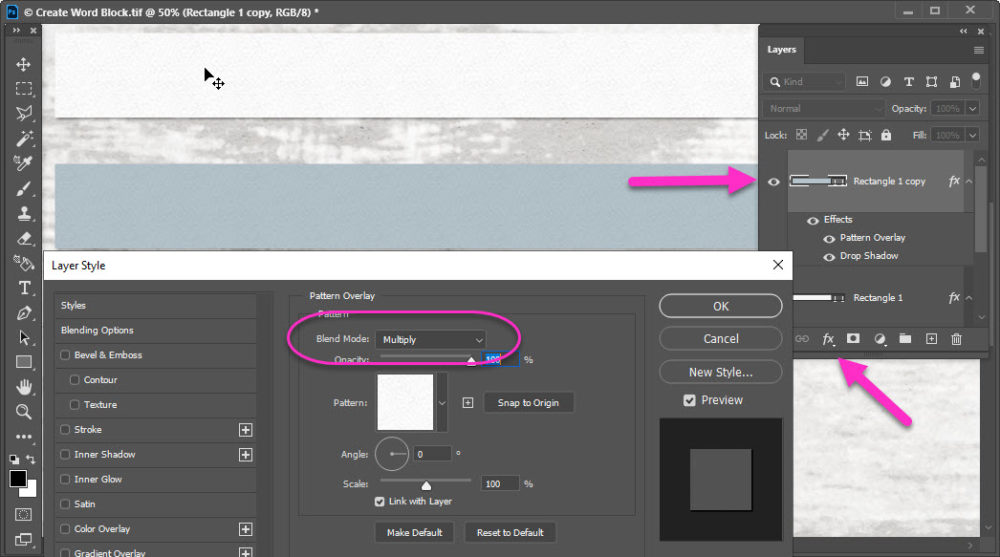
Copy the layer style from Rectangle 1 and paste the layer style onto Rectangle 1 copy. Since this one is not white, we need to adjust the blending mode.
- Make sure you are on Rectangle 1 copy
- Click on the fx icon at the bottom of your Layers Palette
- Change Blend Mode to Multiply
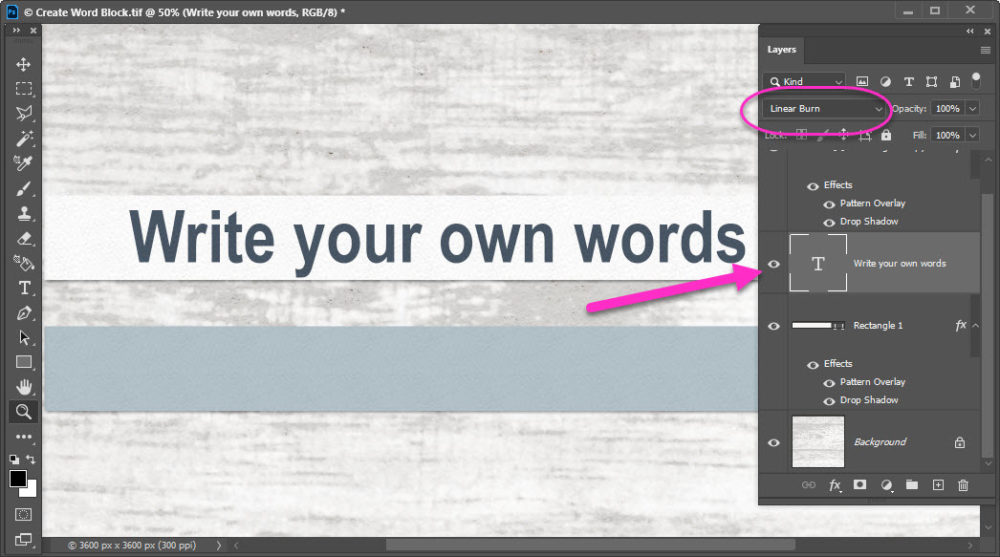
All that’s left to do is add text! Simply add text above your Rectangle Layer and type away. Once you have your words you can play with font & size. Here I’ve used:
- Font – Arial
- Size – 36
NOTE: You can get the texture to apply to your text as well by changing the Blend Mode to Linear Burn
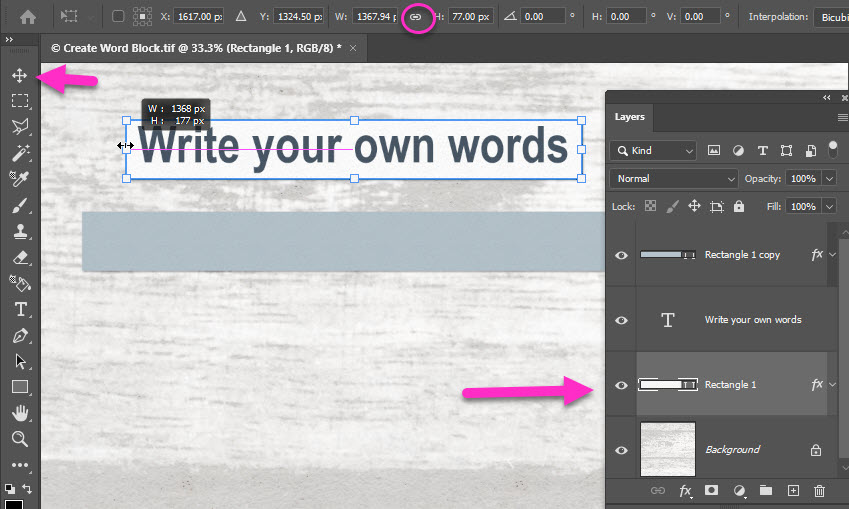
I’ve also centered my Text Layer with my Rectangle Layer this means I can change what I want to say, and the length & my words will be just right. I can easily trim or extend my word block by changing the Width only of my Rectangle Layer.
- Make sure you are on your Rectangle Layer only
- Click on the Move Tool
- Drag the sides of your Rectangle to fit your words
NOTE: make sure the Link between your Width & Height is OFF on your top menu
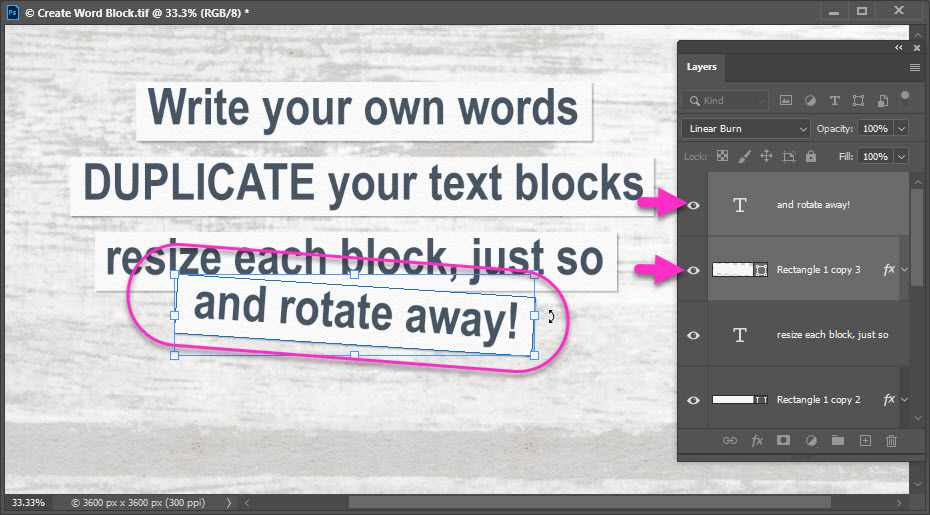
Finally, duplicate your Rectangle & Text block layers and create as many rows as you need. Play with your rotation, shadows, etc. until it’s just right for you.


Thank you so much.