Do you know that you can change the canvas size in Photoshop? Or perhaps you are aware that you can do it, but wonder why you would want to? Let’s take a look!
I am working in CS6, but I believe this works the same in most Photoshop versions.
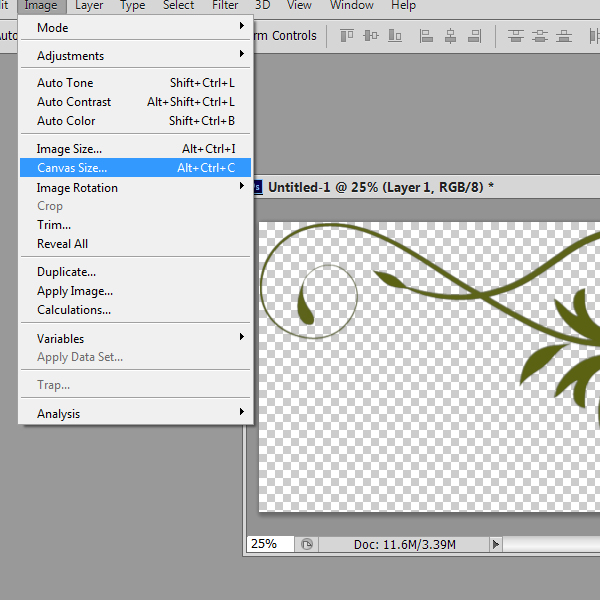
To change your canvas size, go to the top menu bar and select: Image > Canvas Size
(Alternatively, you can right click on the top of your document window to access the Canvas Size window.)
Once you do, you will see this Canvas Size Window open for you:
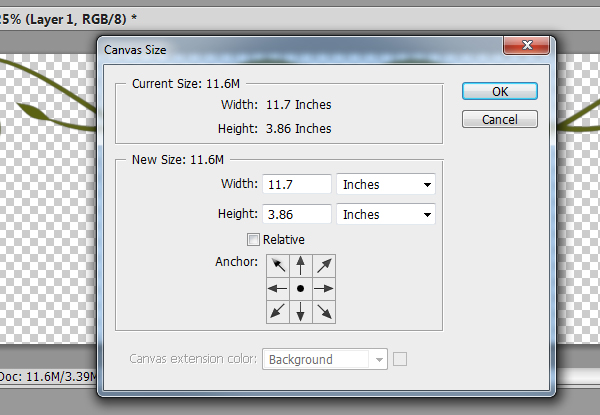
In the Canvas Size window, you can see that the canvas I am working on is 11.7 inches by 3.86 inches.
I have a flourish on my canvas and would like to apply a style to it. Because the style I want to apply has a drop shadow, and because the flourish is closely cropped on it’s layer, I am worried that part of the shadow might be cut off. (In some cases, with some styles, part of the style might actually be cut off as well.) The answer to my worry is to make my canvas size just a tad larger prior to applying the style.
I can do this in two ways:
- I can type the new, desired dimensions in the Width and Height boxes; or
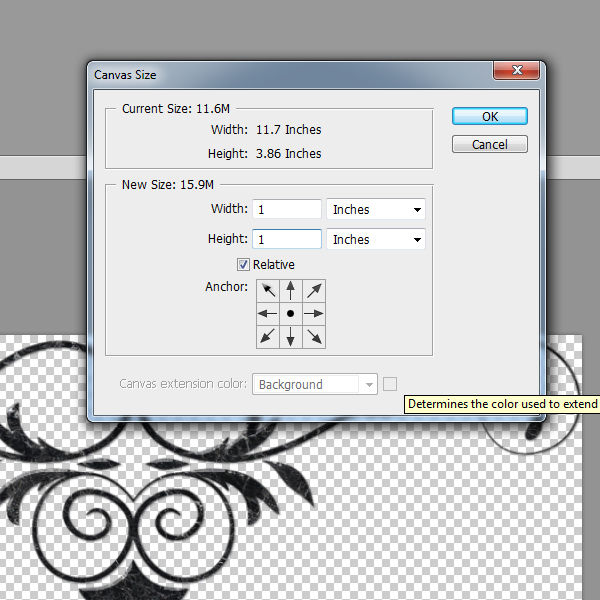
- I can tick the Relative box (this will clear the Width and Height boxes), then enter the amount that I would like to add to the current canvas size.
Here’s something else you can do in this window: Select an anchor square in the Anchor box to selectively position your image on the canvas. In most circumstances, we would want to center our element in the middle of the canvas. But try clicking in the corners, just as an experiment, to see what happens.
You can also resize your canvas in Photoshop Elements. The path is: Image > Resize > Canvas Size.
Now there is plenty of space to apply any style without worry! Expanding your canvas can also be helpful when you are working with a large brush along your document edges. Have you ever had a large brush “disappear” when it came too close to the edge of your document? Just increase your canvas size, and you won’t have that problem.
In the Canvas Size window, you also have the option of choosing the canvas extension color. If you are working with a file on a transparent background, this option will not be available, which is why it is grayed out in the image above.
Once you apply your Style, just remember to trim away the extra pixels. This saves space on your hard drive, which is a good thing.
I hope you find this little tip helpful!


Photoshop Users—TAKE THE KEYBOARD SHORTCUT. It’s super easy–and one you can set up in seconds. Go to Edit>Keyboard Preferences OR (Alt+Shift+Ctrl+K), then scroll to IMAGE (and turn down the widget so you can see everything) then continue scrolling until you see CANVAS SIZE…..Type in a keyboard shortcut (Mine is ALT+CTRL+ C (for canvas). Then click ACCEPT and OKAY. Now the next time you want to increase your canvas size REAL QUICKLY, just press those three keys (they’re so closely grouped–it’s easy0, Alt+Ctrl+C and up pops the dialog box and you can set those values Karen describes in this tutorial !
PRISS TIP—Set a quick keystroke the same way for adjusting the IMAGE SIZE. It’s right above canvas option–just type in there ALT+CTRL+I (for Image), and Accept and Apply. These are probably my most frequently used of all “set yourself” keystrokes for Photoshop CS, and it has been so long since I went to the menubar to resize canvas or an image, that I’d forgotten that!
Sorry, Elements Users, you can’t modify keyboard shortcuts.
[…] Changing Canvas Size in Photoshop – 1 freebie(s)? […]