I hate to admit it… I really do. This week I found a menu option in Photoshop that I didn’t know was there. It’s not like I think I know everything about Photoshop. Or even expect myself to know everything about it. But, well, I just feel rather silly that I hadn’t even considered the idea that Adobe had already thought of this and created a quick way for me to handle deleting hidden layers.
Here is a screen shot of a branch that I just finished creating. (You will find the branch in a new collaboration between KimberKatt and SnickerdoodleDesigns, “Chalk it Up,” release date July 20, 2013.) The arrows indicate layers that are hidden. During the creation process, I was undecided about the elements on those layers, so I clicked on the eyeball icon to turn them off, or hide them. Now that the branch is completed, I am certain I don’t want those layers. Before saving the file as a PSD (or TIFF) (in case I want to make changes later), I want to clean it up by removing any hidden layers.
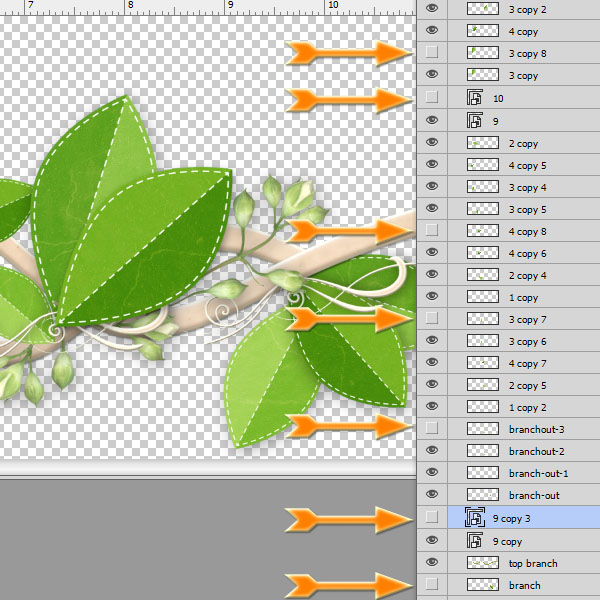
In the past, I have clicked on each hidden layer to select it, then clicked on Delete. Sometimes there might be just a few hidden layers, but sometimes there may be a lot!
Well, guess what. Photoshop includes a Menu Option that completes this process in seconds.
All we need to do is go to: Layer > Delete > Hidden Layers. No need to manually select each layer. And that’s it! Thank you Adobe!
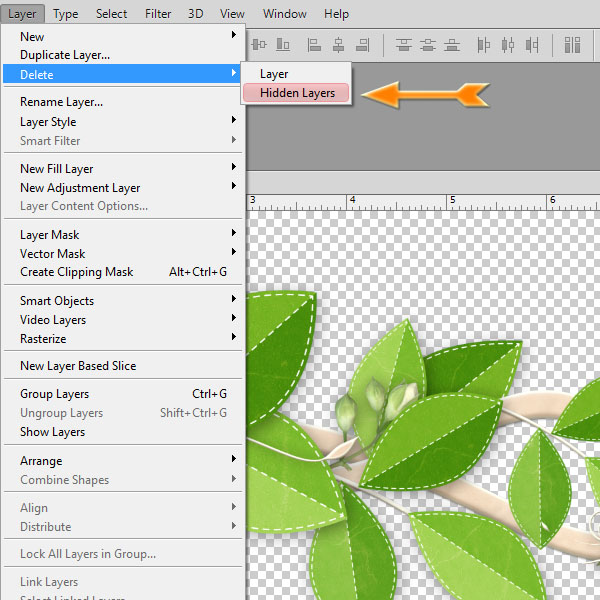
If you are wondering why my “Hidden Layers” option is colored, you can read why (and how to do it yourself) in my previous blog post, Customize your Photoshop Menu.
That’s it for today! I hope you find this simple tip helpful and useful!


Very hand tip Karen. Thanks!
WOW!!! I never knew that was there … what a great find!!! … and thanks for sharing it with us.
it’s also in my version PSE7