Last week we explored ways of Adding Shadows to Lace in Photoshop. Today let’s take a look at how to accomplish this in Photoshop Elements.
For the purposes of this tutorial, I am using Photoshop Elements 12.
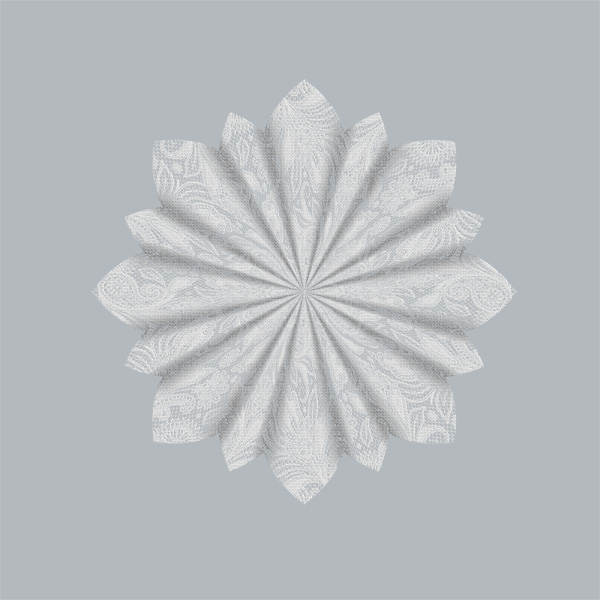
Pictured below is a lace flower template, which has been stylized with a lace style. (Flower Lace Templates, Set 1, a collaboration between Jilbert’s Bits of Bytes and SnickerdoodleDesigns; Irish Lace Styles by SnickerdoodleDesigns).
As Stash Empress noted in the “Warning, this action is addicting!” forum thread, PSE does not allow the user to use blending modes on drop shadows that have been applied to an element. So let’s separate our shadow from our element! That way we will be able to manipulate the shadow anyway we like.
There are several ways to do this, but let’s look at what I think is the easiest way.
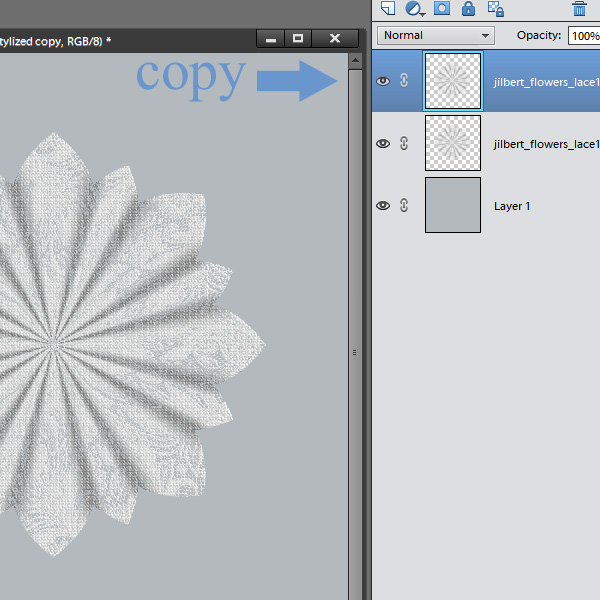
1. Duplicate the lace flower. You can do this in several ways.
- Go to File > Duplicate
- OR with the flower layer selected, click Control + J
- OR select the flower layer and drag it up to the New Layer icon at the top of the layers panel
(Don’t you love that Photoshop gives us multiple ways to do things?)
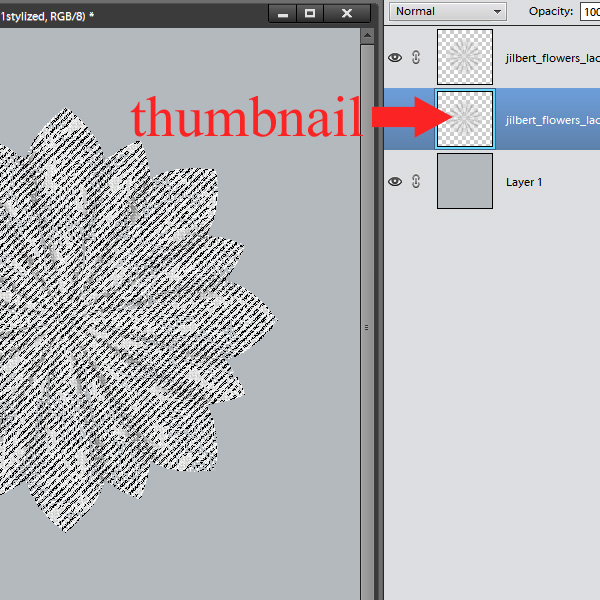
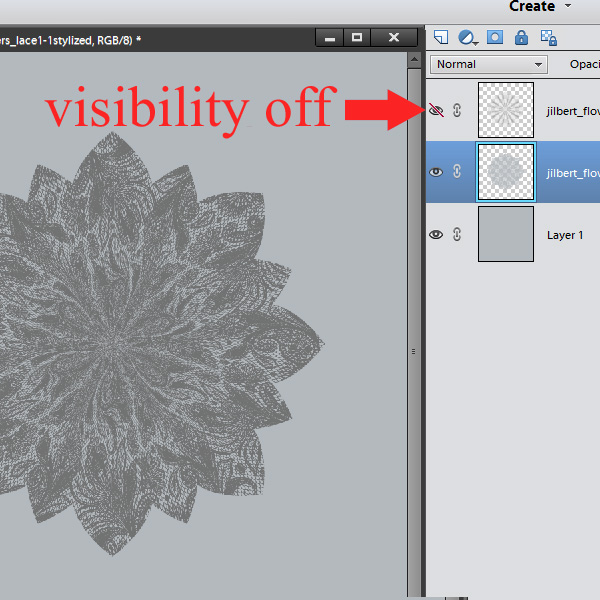
2. Click and hold down Control, while clicking on the thumbnail image of the bottom flower. This will select all of the flower pixels. You will see marching ants around the parts of the flower, indicating they have been selected.
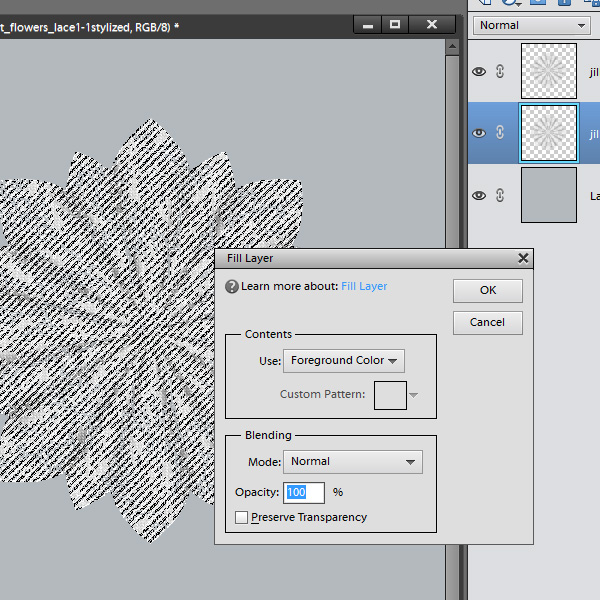
3. Click on the Color Picker to choose what color you would like your shadow to be. Since I am demonstrating this on a gray background for easy visualization, I will choose a gray color a few shades darker than my background. (Please see last weeks tutorial, Adding Shadows to Lace in Photoshop, for tips on how to choose shadow colors.) With medium gray selected as the Foreground Color, go to Edit > Fill Selection. The Fill Layer dialogue box will open. Select Use: Foreground Color, then click OK.
Turn off the visibility of the top flower, and you will see your “filled” layer. This is what we will use as our shadow. Because it is on its own layer, we can manipulate it any way we want.
4. Select the Move Tool (keyboard shortcut: Control + V), and nudge that “shadow” layer into the position you would like. I’ve moved mine a little to the right, and slightly down.
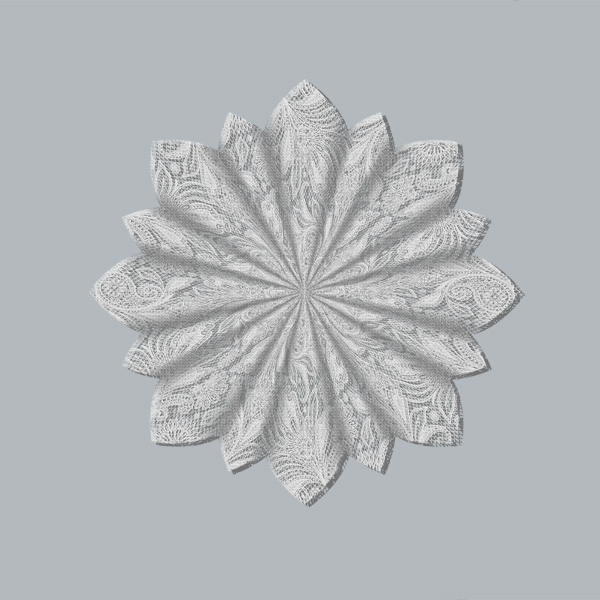
If you would like to play with Blending Modes, now is the time. Just stay on your “shadow” layer, and cycle thru the Blending Modes at the top of your Layers Panel until you find the look that you like.
The shadow is a little harsh for me, so I applied a Gaussian Blur of 10% to it. (Filter > Blur > Gaussian Blur), and I lowered the opacity to 75%. I also linked the lace flower and the lace shadow, so that they would move in tandem with one another when I moved them later. (To link layers, click and hold Control, select the layers you would like to link, then click on the chain icon to the left of the layer thumbnail images.)
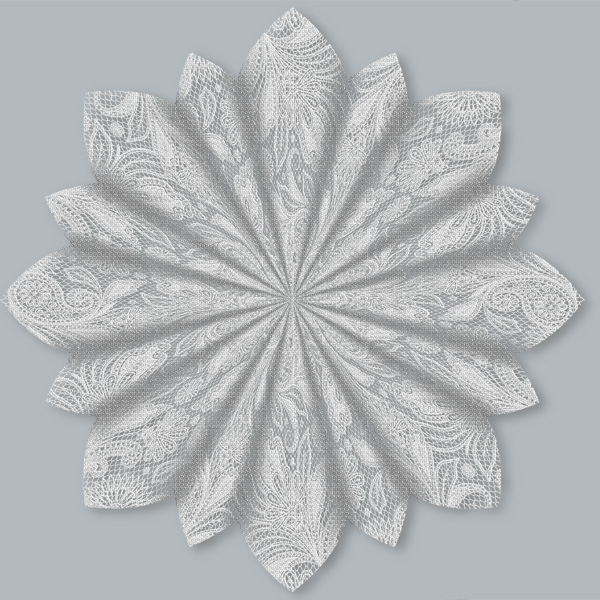
Now your lace flower is ready to use as-is or use in combination with other flower layers.
Check out the “Warning, Using this Action is Addicting!” thread for some AWESOME examples of flowers some of our Forum Members have created using Jilbert’s Paper Flower Action and our Irish Lace Flower Template Collection. (She has this in PSE and CSPS versions!)
Jill’s Paper Flower Action works on all kinds of flower templates. I just clicked on “Templates” in the CU Store and found multiple flower templates on the first page. There are three pages! So go browse thru all of the pages and see what treasures you can find. I have a feeling you might find some great sales on them too!


[…] Adding Shadows to Lace in Photoshop Elements […]
Thanks for this Karen! I’ve been down with stomach bug since Friday evening, just dragged myself to computer to see what I’d missed. But head & eyes hurting too much to make much sense of it so crawling back to bed now. Hope I’ll feel well enough to play tomorrow!
But could you tell me how to pick color for shadow when the layer underneath is striped or flowered? In real life, each of those sections would look like darker shade of that color — but obviously can’t do that in PS or PSE — you have to pick *one* color for shadow & stick with it.
So how do you figure it out?
Oh, dear.. I’m sorry you’re not well, Margaret….I hope it passes quickly.
In situations such as you describe, I will choose a medium gray, playing with blending modes to find what works best. See how that works for you.