Over the past 2 weeks, we’ve been exploring Layers Masks. As a refresher, or in case you missed those tutorials, you will find them here:
Using layer Masks in Photoshop
Stretching your Digi-Stash Using Layer Masks
Today, let’s take a look at adding the Gradient Tool to Layer Masks and see how that can be helpful.
1. Compositing Images:
Wikipedia defines this as “the process and the result of making a composite photograph by cutting and joining two or more photographs into a new image.” We see a lot of composite images in scrapbook pages today, most especially in art journaling. It’s a very simple technique and here’s how to do it!
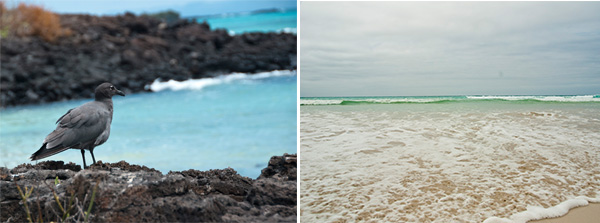
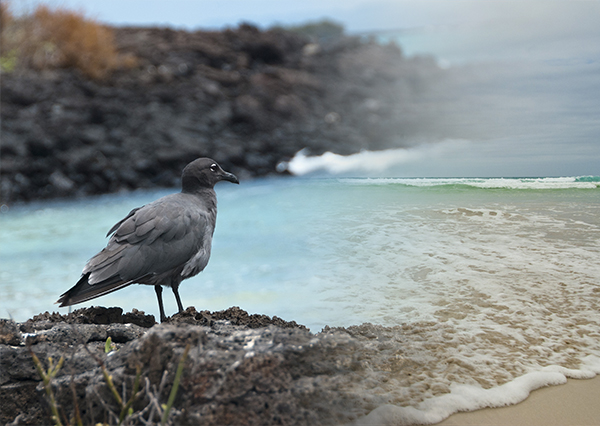
Below are 2 separate photographs that I would like to composite, or blend together.
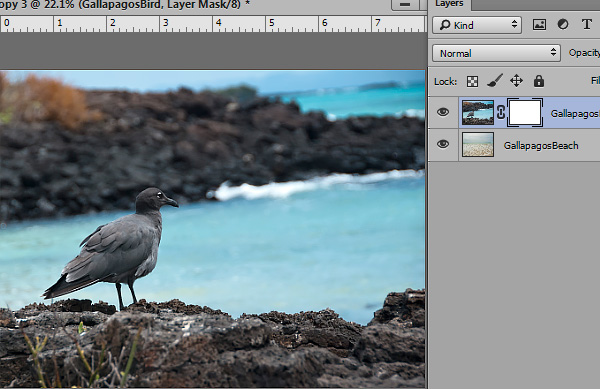
1. I placed the bird photo on a layer above my beach photo.
2. I applied a layer mask to the bird photo (Select the layer to make it active, then click on the Layer Mask Icon at the bottom of the Layers Panel.)
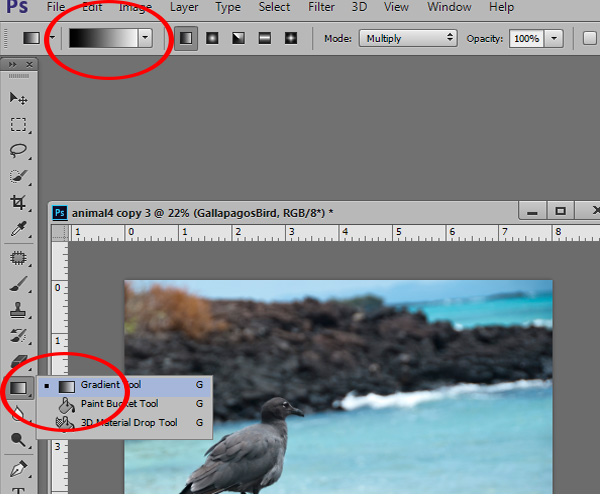
3. In the Tool Bar on the left, I selected the Gradient Tool, which is nested with the Paint Bucket Tool.
4. In the top Options Bar, I selected a black-to-white gradient. Click on the down-pointing arrow to find that option, if it is not currently set as your default.
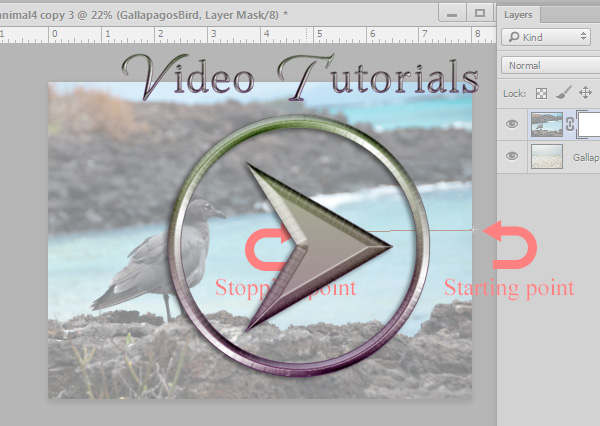
5. I next clicked on the Mask to make it active, then moved my cursor into my document.
6. I clicked on the far right edge of the photograph, and dragged the cursor to about the middle of the photo, then released.
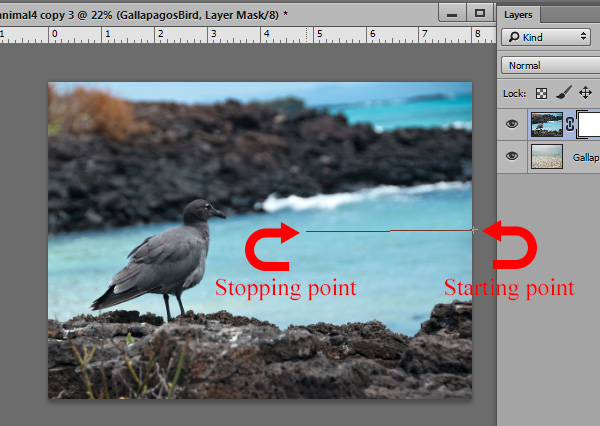
RESULT:
If I wanted more of the beach photo visible, I would drag my cursor further into the photo of the bird. If I wanted less of the beach to show, I would not drag it as far as I did.
When you practice this technique, experiment with how how far and from what direction you drag your line. Try dragging it from the top, bottom, or in a diagonal direction until you get the look you desire.
Also, you can keep adding to the effect by repeating this process on the same mask, until you are satisfied.
2. Creating layouts:
We can use this same technique to blend photos into scrapbook pages. Here’s one example from Norma, a member of my creative team.
Norma placed her photograph on a layer above the Follow Your Heart paper. then used the gradient tool, as demonstrated above to remove the defined edges of her photograph. Once the photo was as she liked, she continued with the creation of her lovely layout! (She also changed the Blend Mode of her black-and-white photo to Multiply, to allow the texture of the background paper to become visible.
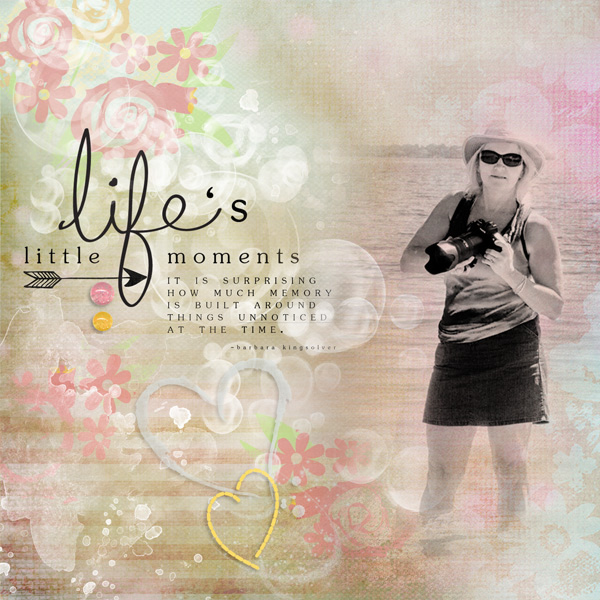
And here is one more example. This was created by MissPepper, using Follow Your Heart also. Beautiful!!!

Next week we’ll look at using Masks on Masks. That sounds funny doesn’t it?
Experiment and have fun this week using Gradients and Masks, and I’ll see you next week!
If you would like to keep this tutorial on your computer for easy reference, you may download a PDF here.
If you are a visual learner, you can view this tutorial on SnickerdoodleDesigns YouTube Channel and on theStudio’s YouTube Channel.
Please head over to YouTube and take a minute to Follow both channels. Each Channel will have some exclusive videos, so by following both channels, you will be sure not to miss a thing! Thank you!!


How cool is this 🙂 … I’ve never tried this …. thank you :), love learning something new
Something new to me too, thank you, it will be very interesting trying this.
You’re welcome, Su and Faith! It’s a fun technique. Sometimes it gives you just the look you want. If not, just add or subtract from the mask using different brushes.
Thanks Karen – so simple yet so effective. Another cool idea for me to try 🙂 The LO samples are beautiful.
It never ceases to amaze me, that after reading through one of your tutorials, that I have another “WOW” moment! Wow, that is so cool! Wow, I think I could do that! Wow, that was easy to understand! Wow, Karen just keeps finding another new technique to share! My Thanks!
Yes, you do provide lots of WOW moments. Thanks so much for taking the time to share your talent. One question – am I misunderstanding that you can use different gradients on the same mask? I am working in PSE 13 and if I try to do a second gradient at a different point, it cancels out the previous gradient.
Wow — this looks so simple; I hope it actually is. I work with PSE12; I’ll have to try this. thank you for the tutorial!