This post was originally published in September 2016. The tutorial is original to Karen of SnickerdoodleDesigns. She has many more amazing Photoshop and Photoshop Elements tutorials on her site: SnickerdoodleDesigns.
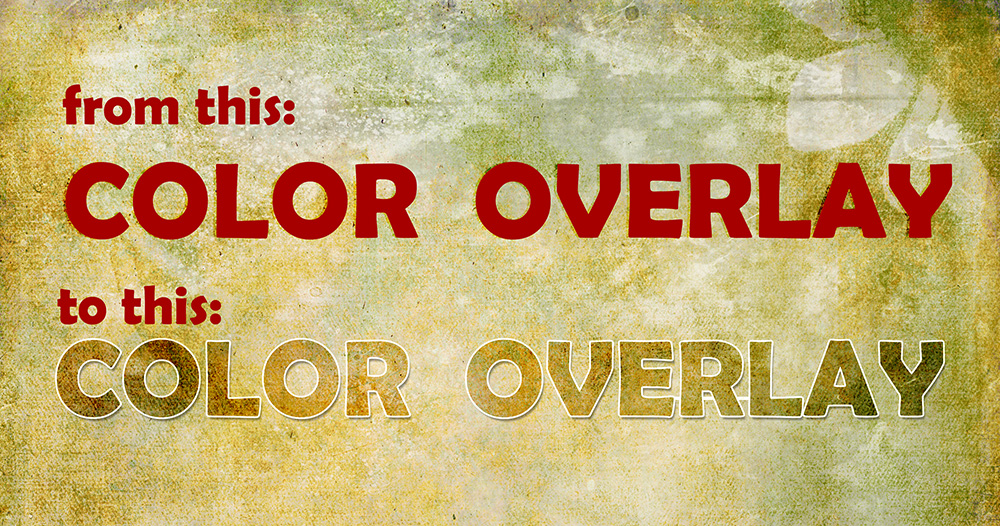
This month we are exploring Photoshop Layer Styles. (Photoshop Styles 101: The Stroke; How to Load Layer Styles) Today let’s look at the Color Overlay effect. It is simple to use and can be a lot of fun! Today we will go “from this” solid red text “to this” fun text effect. Wouldn’t this be great for a page title?
The Color Overlay options are few: Blend Mode, Color Picker, Opacity, and are self-explanatory. (Using Blend Modes in Photoshop.)
To achieve the effect above:
- Create a new document, and place a background paper on it.
- Create a new blank layer, and type your desired text.
- Double click on the text layer to open the Layer Style Panel
- If the Color Overlay Style on the left is not “ticked,” click in the box to select it. The Color Overlay options will open on the right.
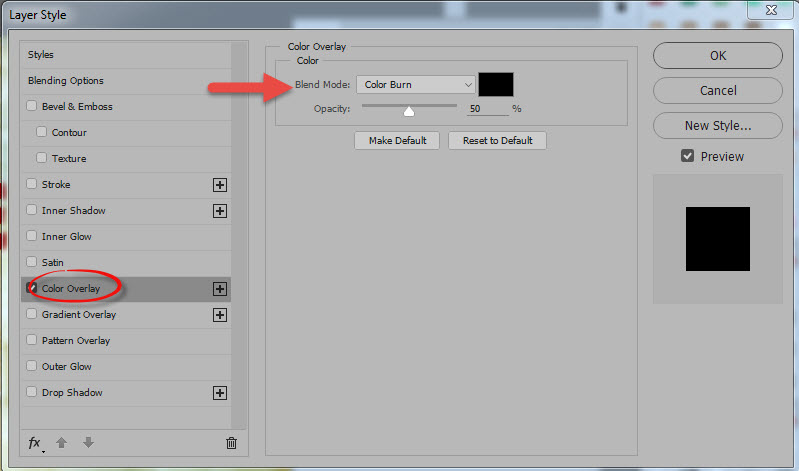
5. If the color in the color box is not black, click on the color that is visible to bring up the Color Picker. Select black as your color. Click OK.
6. Click on the down-pointing arrow to the far right of the Blend Mode option. Choose Color Burn.
7. Drag the Opacity slide, setting it to 50%.
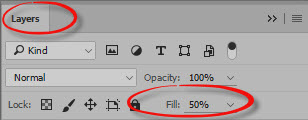
8. At the top of the Layers Panel, on the right, you will find the Fill slider. Set the Fill to 0% by one of these methods: (1) type in the number “0,” (2) click on the down-pointing arrow to access the slider, then dragging the slider to the far left, or (3) use the Scrubby Slider to set the Fill to “).” (Scrubby Sliders in Photoshop)
You should now have something like this:

It’s nice as it is, but let’s make it look better by taking what we learned last week, and adding a Stroke.
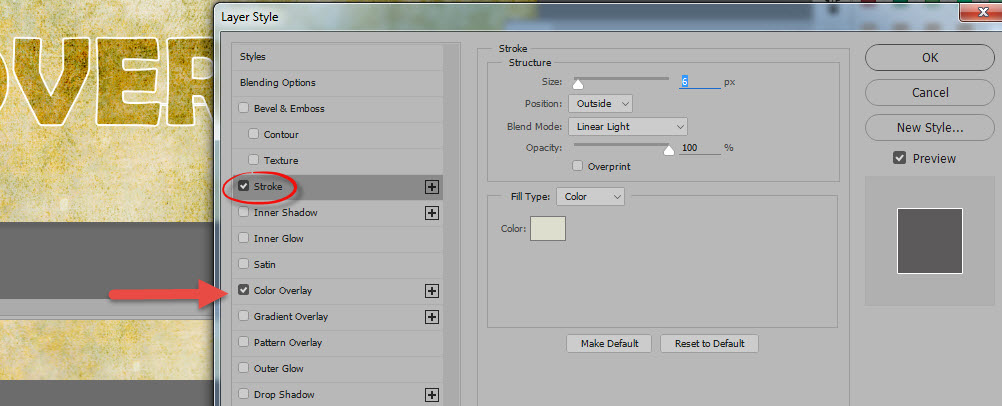
Note that the box in front of Color Overlay is checked, indicating that a Color Overlay has been applied to the text. Tick the “Stroke” Style on the left to open the Stroke options box on the right. I set the Stroke size to 6 px, the Position to Outside, the Blend Mode to Linear Light, and chose a light Ivory color. I left the Opacity at 100%.

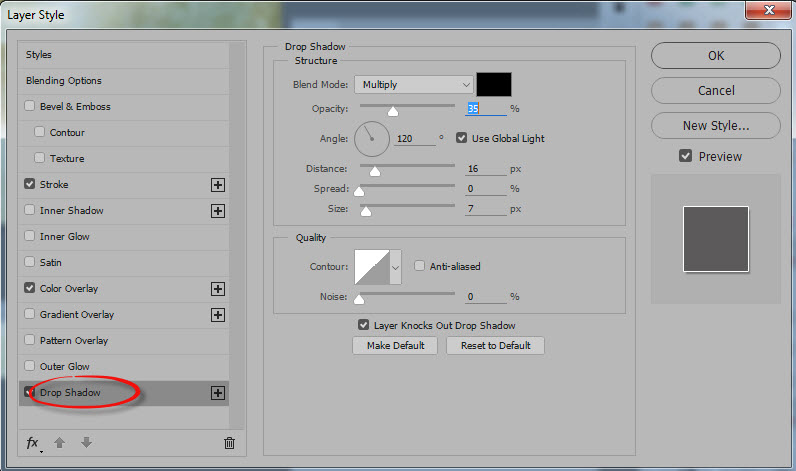
That’s better! We can still take this a step further by adding a Drop Shadow. We haven’t talked about Drop Shadows yet, but it’s easy. Tick the Drop Shadow Box, and experiment with the options on the right. These are the settings I used for this size text.

And here is the final result:

Next week, we will look at a way that Color Overlay will help speed up our work flow!
Photoshop Elements Users: The Fill Option is not available in Photoshop Elements.
Thank you for stopping by today!


Leave A Comment