Hello everyone! It’s Ann here for another post on digital scrapbooking using an iPad. So far, we’ve covered getting to your files, and adding photos and elements to a layout. Today, we’ll look at two tools: Selections and Arrangement.

For today’s layout, I wanted to create paper blocks from Antebellum Press’s Positively Happy bundle. To have a cohesive look, I used the Shapes tool in Pixelmator to draw a rounded-corner rectangle to use as a template for multiple scraps of paper in the layout.
To start, create the document, and import a paper you would like to use as a paper block. Now, hide the layer in the layers palette. Swipe right from the left edge of the screen to reveal the palette, then tap the layer, then select Hide.
Now, from the + Menu, select the Shapes tab. I chose a rounded-rectangle. Tap and drag on the document to create the shape.
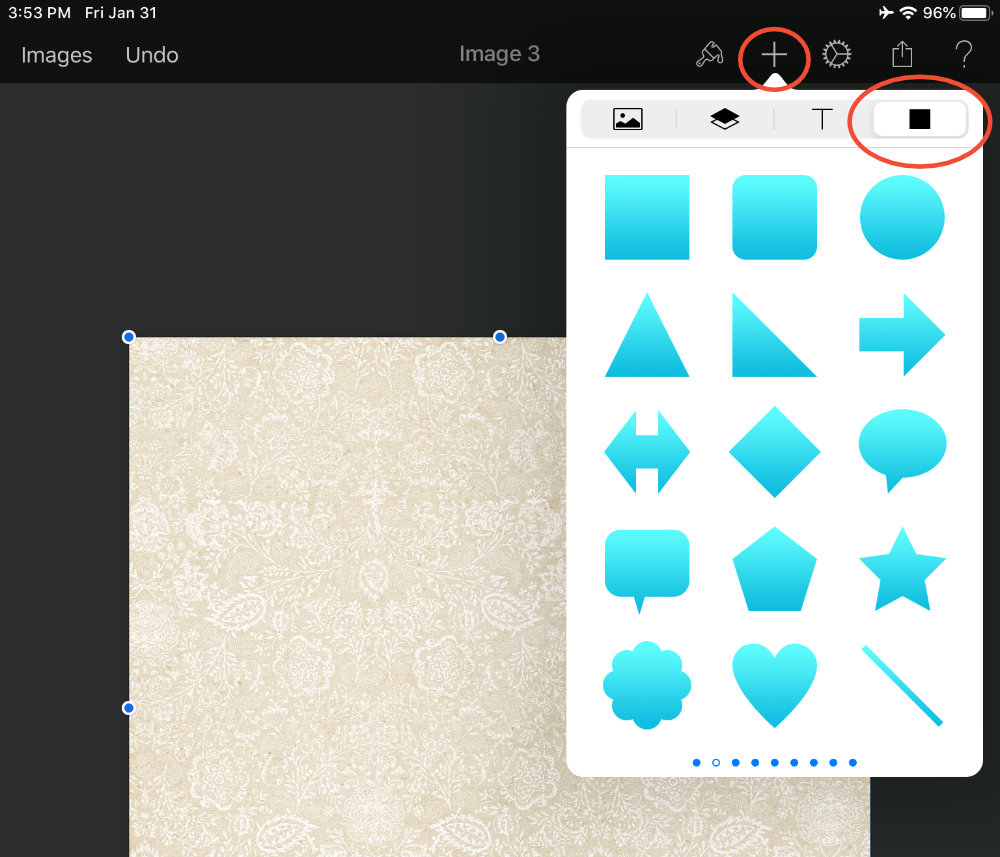
To constrain proportions when resizing, open Tools >> Format >> Arrange >> Size, and check on Constrain Proportions. You can also type in a specific size here.
From the Tools menu, tap Select and choose your selection tool of choice. My favorite tool for this is either the Color Selection or Magnetic Lasso. To use the color selection, tap and drag over the shape. For the Magnetic Lasso, trace along the outside of your shape. Pinch outwards on the screen to zoom in for better control. With the lasso tool, you can begin tracing the outline of the shape, then finish by connecting the round nodes to complete the selection.
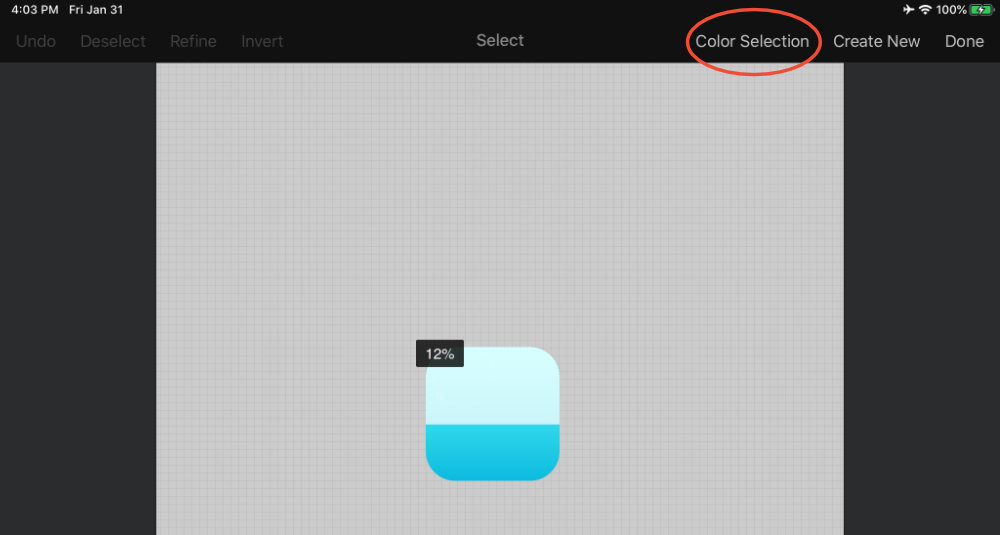
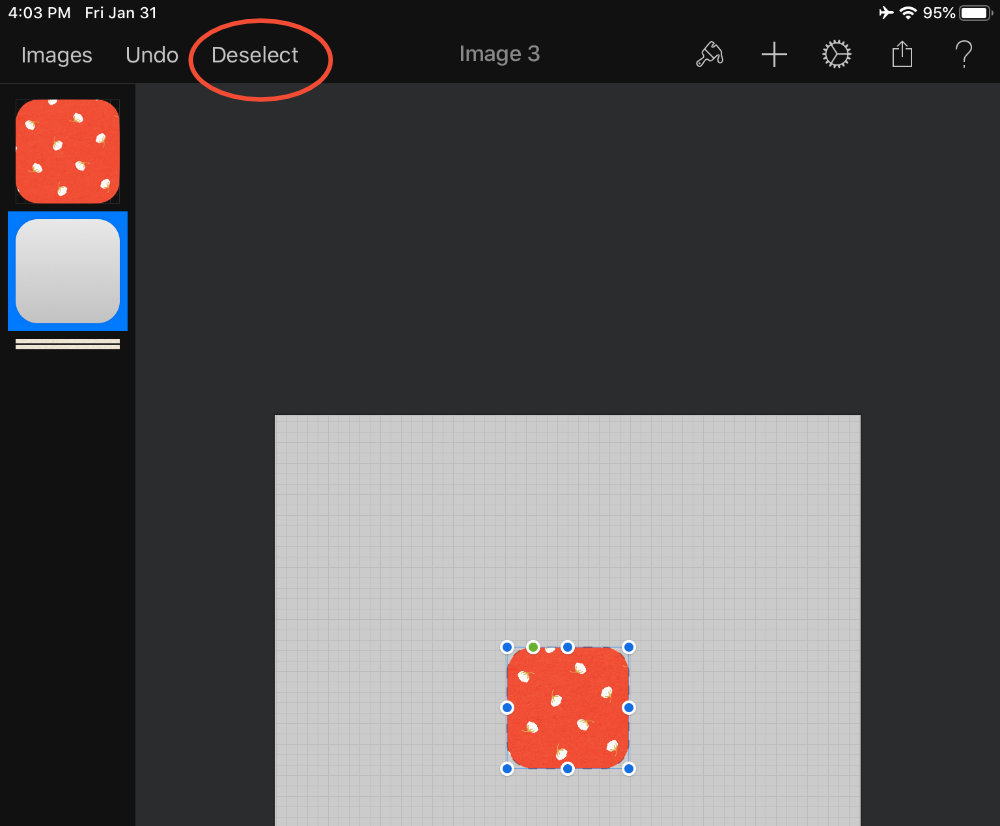
Once your selection is finished, tap Done. The “marching ants” of your selection should still be active.

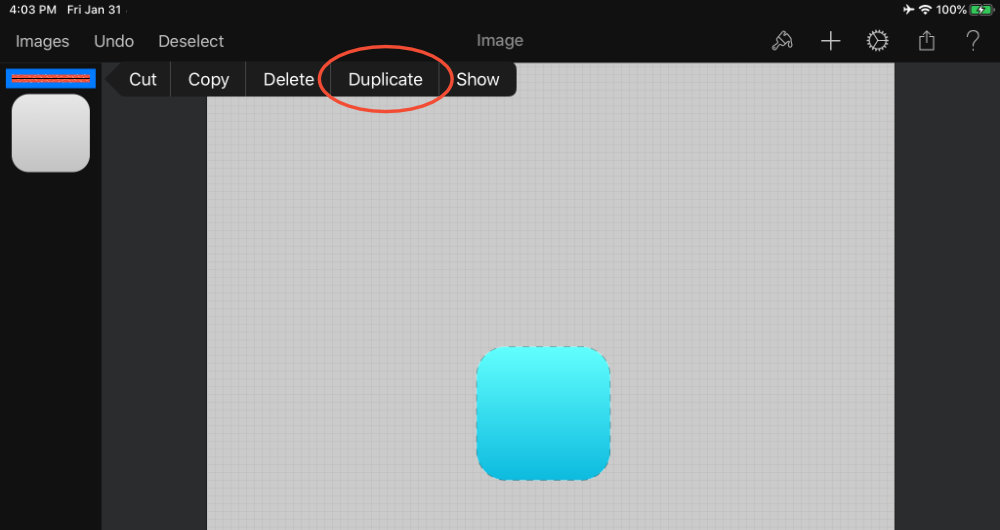
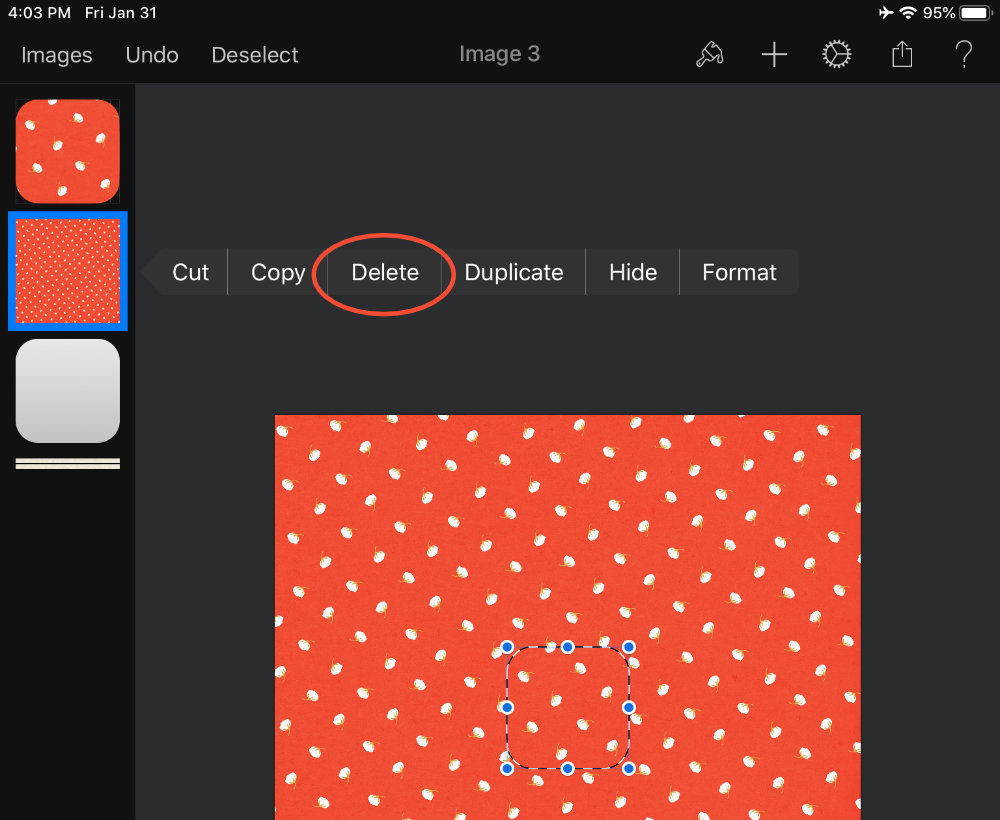
Back at the layers palette, tap on the hidden paper layer, and tap Duplicate. Voila! You have a nice little paper shape! Now, tap the large background layer to delete. Next, tap deselect. You can move the patterned paper aside, and continue to repeat these steps with other papers and even photos.
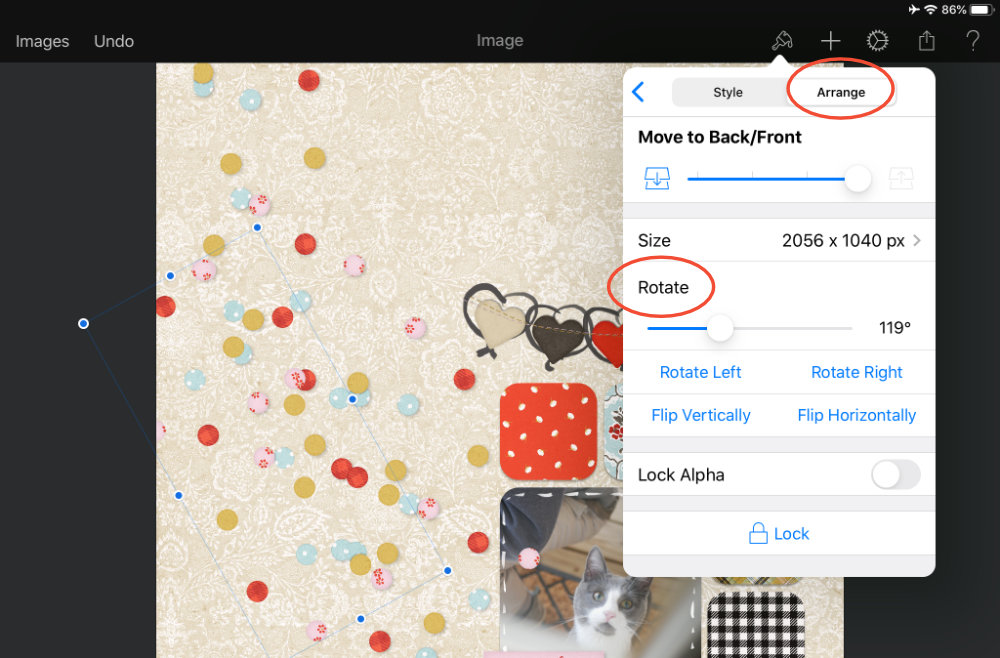
I added several paper blocks and one larger photo for my layout. Once the papers and photo were finished and arranged, I grouped and merged them. I finished the layout by adding a few extra elements. To rotate items, like the confetti scatter, either swivel the layer with two fingers, or choose Arrange from the Tools Menu, and move the Rotate slider.
Once I had my elements in place, I grouped and flattened what made sense, then I added one more, personal touch – something that comes so naturally on iPad – drawing some doodles and handwriting. I used an Apple Pencil to draw on a new layer using the Paint tool. (Tap Plus in the menu bar, tap the 2nd tab, then tap on the blank grid to add an empty layer).

I’ll be back in a few days to continue looking at digital scrapbooking on iPad. Stay tuned!

Thanks for doing this series! Well explained and easy to follow, these are a great help when my desktop is unavailable,
I am glad it’s helpful! Thank you for the feedback.