Way back when I first started out digital scrapbooking (many moons ago), one task I did not relish was selecting items. Thankfully, modern tools are much more powerful than they used to be.
And making selections on iPad? It can feel about as easy as finger-painting. Combined with the Apple Pencil, my selections on iPad are as good as, if not better, than on my laptop.
I adore this photo of our niece, and wanted to extract her image to use in a layout (those curls!). Here’s how I did it in Affinity Photo for iPad.
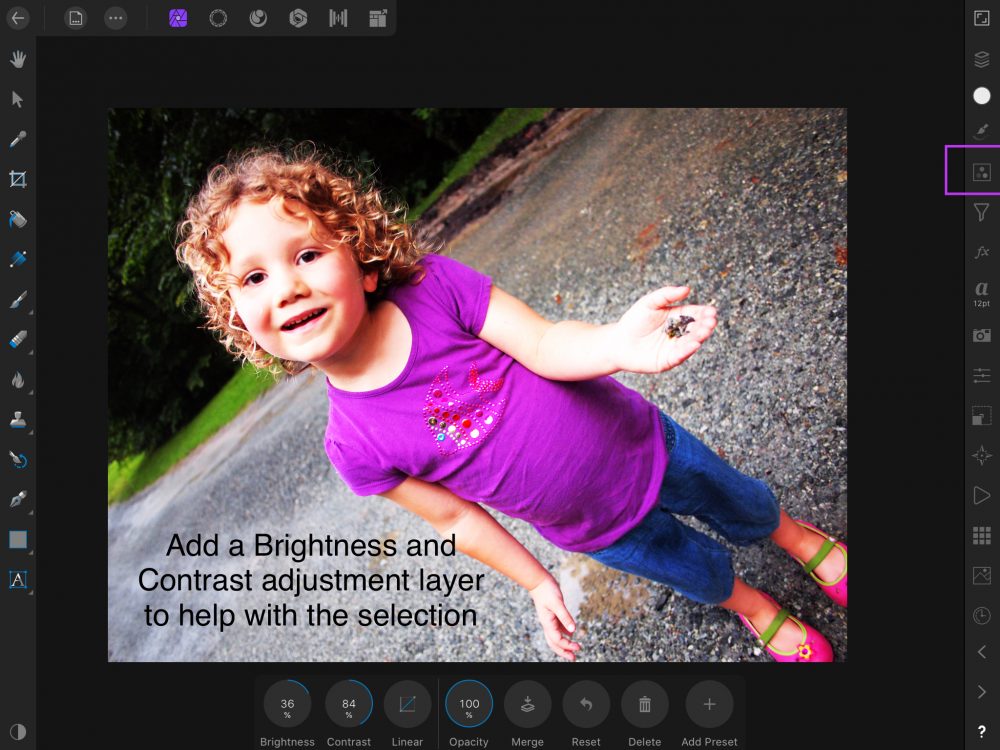
This technique is easiest when there’s a high-contrast background behind your subject. My photo didn’t have exactly that, so I added a quick Brightness/Contrast adjustment layer that darkened the background but kept her hair and skin lighter.
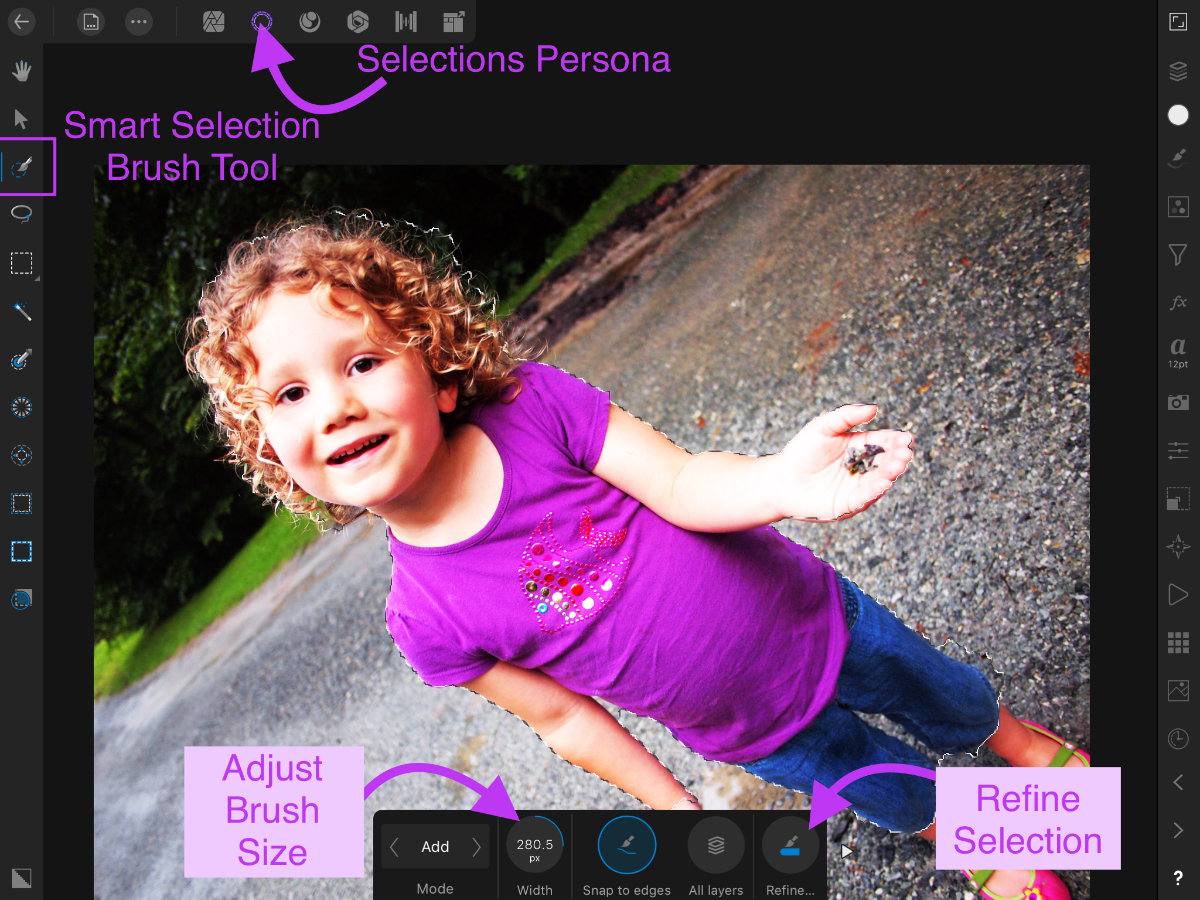
In the Selections Persona, (the 2nd tab), choose the Smart Selection Brush tool. Increase the size of your brush, and brush over the part of the image you want to extract. It can be rough – don’t worry about the details at this point.

Next, tap the Refine Selection tool on the same toolbar, or the bottom button on the Tools panel to the left. Paint around the edge of your object. I enlarged the brush and painted a good swath all around the edges, especially her head. Photo intelligently selects curls of her hair, and even masks out the background in between strands. You can switch the Preview from the default red Overlay to white, black, or transparent if these options help you see how it’s working.
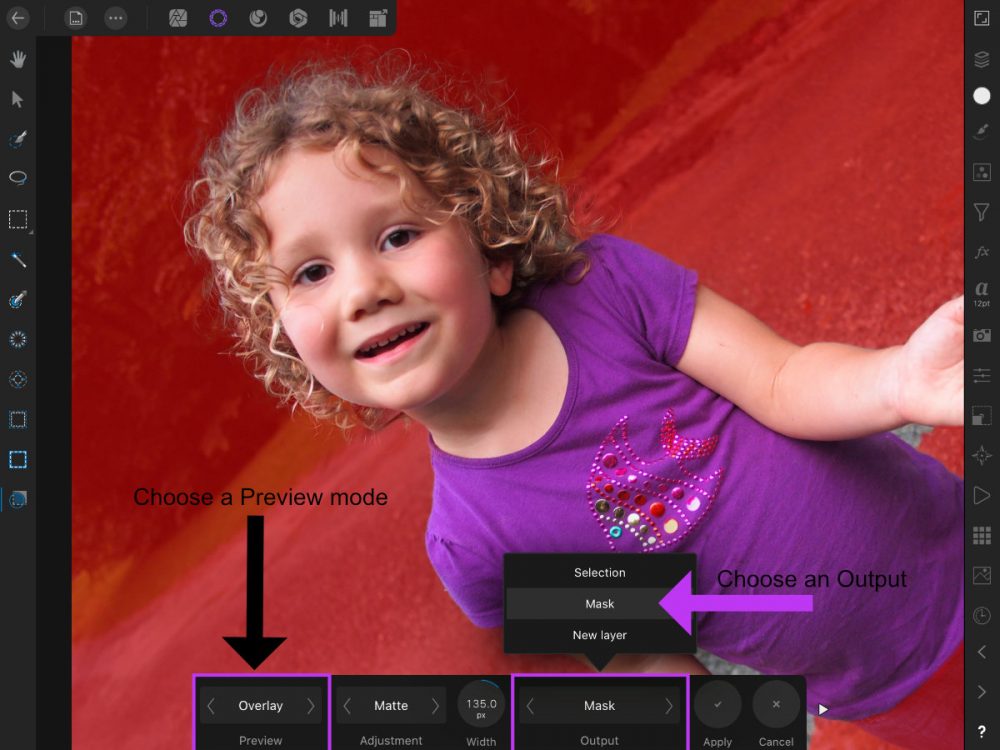
Now, with the selection active, choose a way to output your selection. I chose New Layer with Mask. Tap Apply.
I hid the original photo in the Layers Studio, and I noticed some areas I still wanted to get rid of. Switching back to the Photo Persona, I expanded the mask in the Layers Studio, and used the brush tool to correct a few places on the mask. I went back and forth a few times between hand-masking and using the refine tool again around the edge of her hair and body.
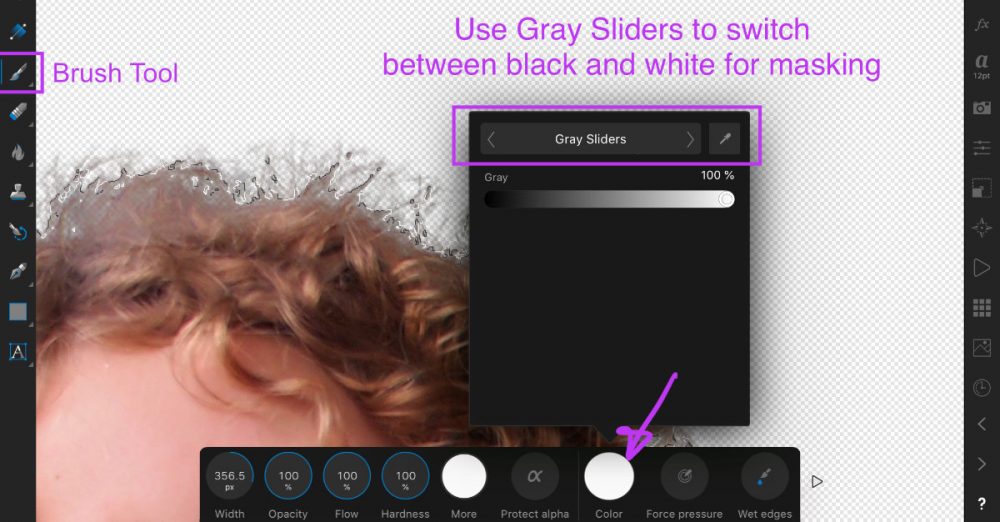
TIP: When masking, it’s easiest to change the color to Gray Sliders so you can quickly switch between black and white. Remember, Black conceals, white reveals.
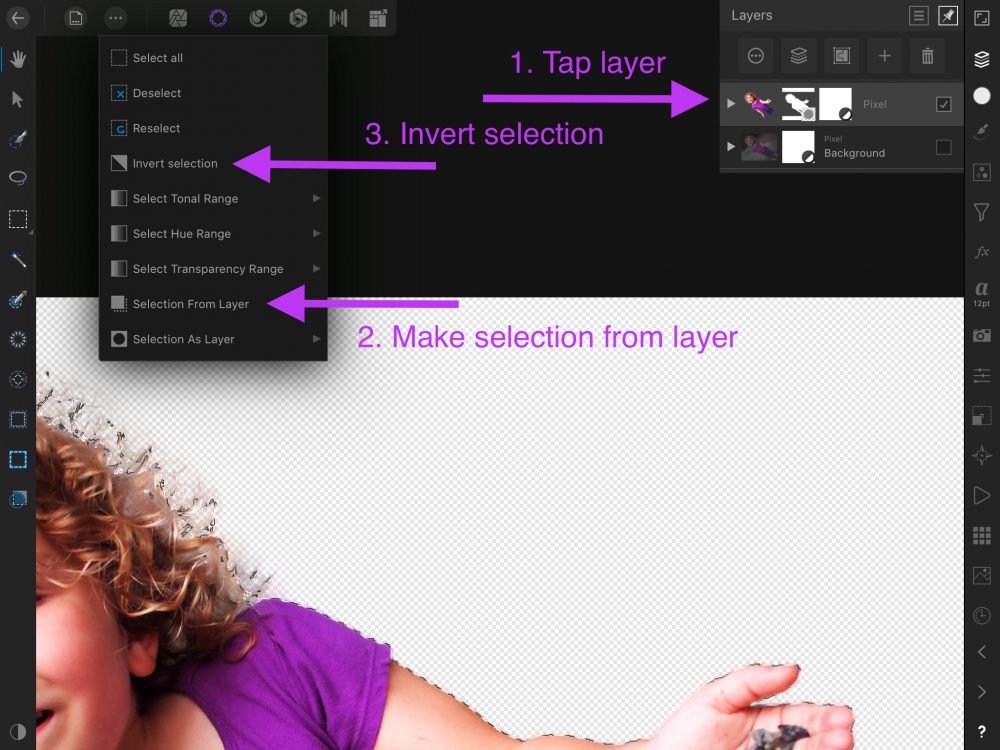
To this point, I’d fixed a few obvious problems around her legs and arms, but I wanted to tweak it a little more. I switched back to the Selections Persona again, and tapped on the photo in the Layers Studio (not just the mask). From the drop down menu, I chose Selection from Layer. Next, I chose Invert Selection. Switching back to the Photo persona, I chose the brush tool again and used a large size with black color to quickly mask out more unwanted stray pixels.
When I felt satisfied with the mask, I copied the masked image layer and then pasted it as a new layer into another document, ready to make a layout. The final results weren’t pixel-perfect, but it was just fine for my layout.
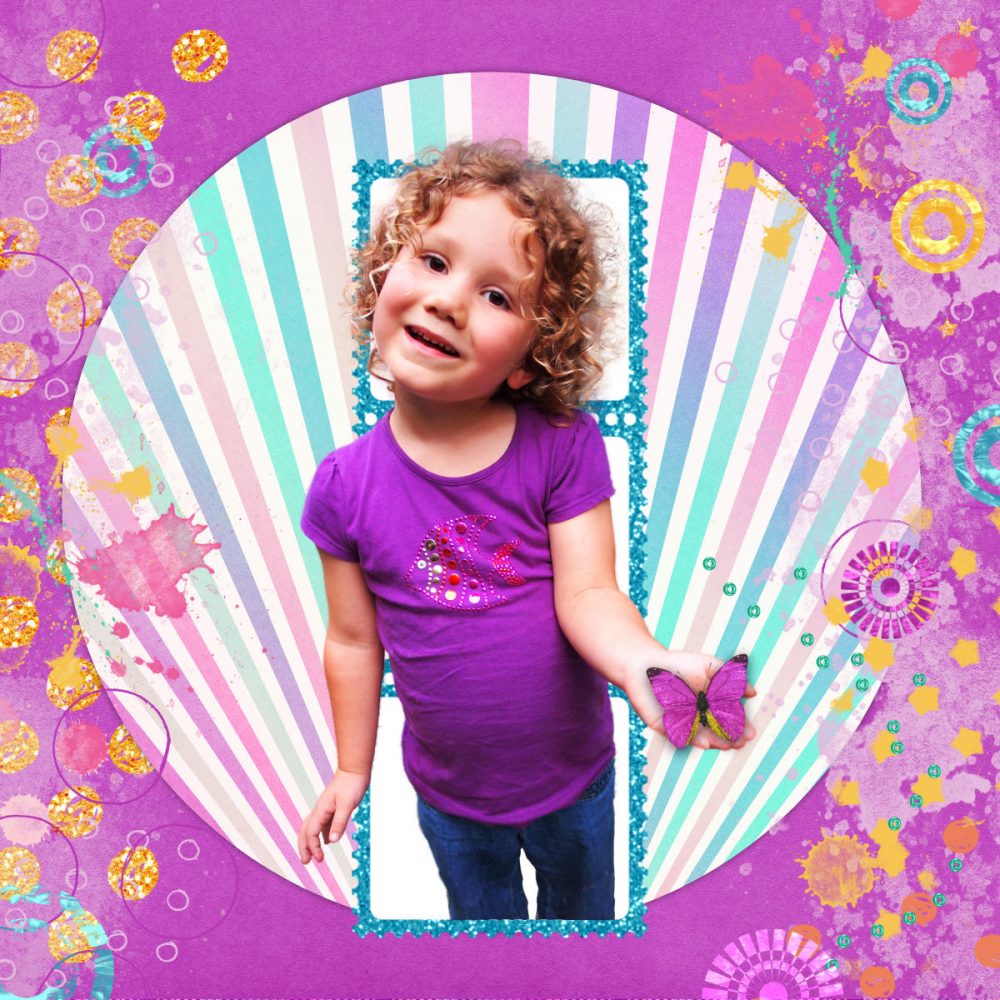
I used Neia Scraps’ Glitter Addict for this page.

Just a reminder, if you create scrapbooking or art journal pages on a tablet, come join us in this month’s mobile scrapbooking challenge in the forum. I’d love to see you there!


[…] have a blog post up at The Studio about how to use some of Affinity Photo’s selection tools on […]