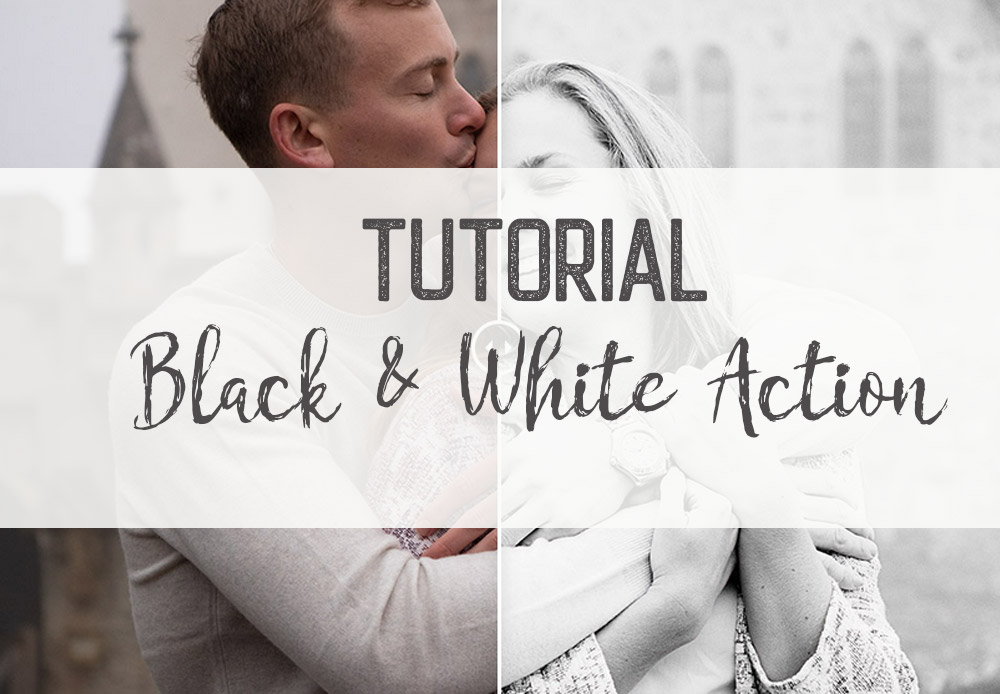
It’s time for an updated Black & White Action… and how I got there. I wound up doing two slightly different versions of the same action. The first is primarily for urban or craggy landscrapes. The second is a softer, lighter version better for people. Here’s a quick look at the Before & After using the Black & White Contrast action.
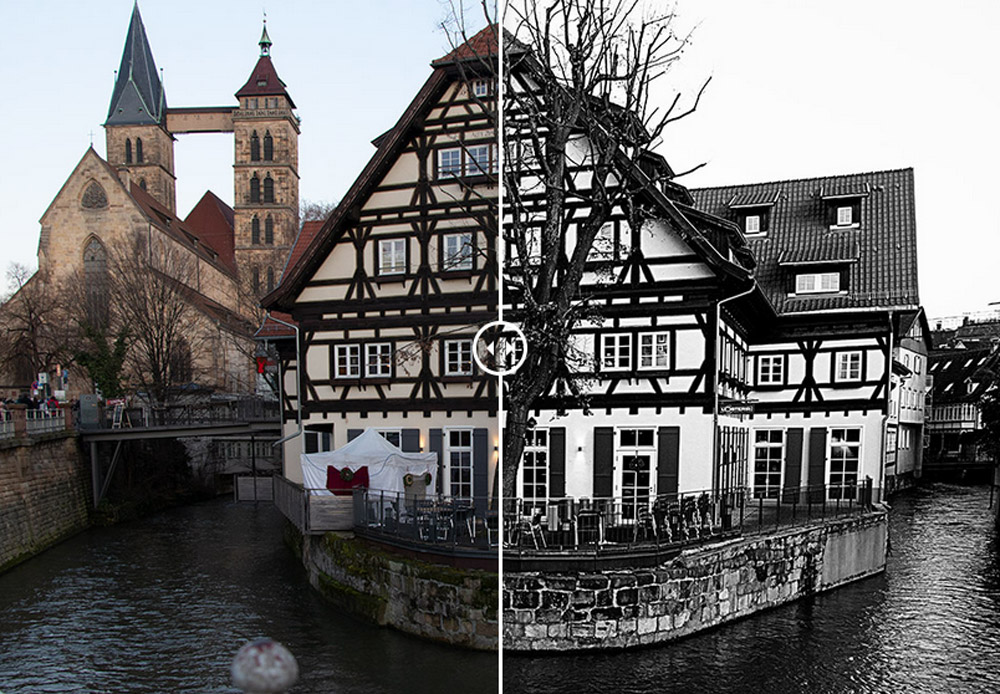
This is one of my favorite spots to photograph in Esslingen, standing on the Agnesbrücke:
I’ve learned to always duplicate the image I’m editing, just in case I walk away & a cat does the unthinkable LOL. The first step of my Black & White actions is the same for both versions:
Image —> Duplicate
I’m now working in a new window, on the exact same image. In Photoshop, and the newest Elements, you can use Smart Objects. In that case, skip this next step & apply the High Pass filter directly to your Smart Object. If you are not working with Smart Objects, duplicate the Background of your photo to create a new layer:
Right-Click —> Duplicate Layer
This will automatically rename your new layer as “Background copy”.
On this new layer “Background copy” run the high pass filter definition, or run it directly on your Smart Object.
Filter —> Other —> High Pass
NOTE: I used 10px, but you can go smaller especially on smaller images.
When you sharpen an image, you’re increasing the contrast along any edges where there’s a change in brightness and texture. If you’re working in Photoshop, its High Pass Filter basically finds these edges and highlights them.
– Adobe
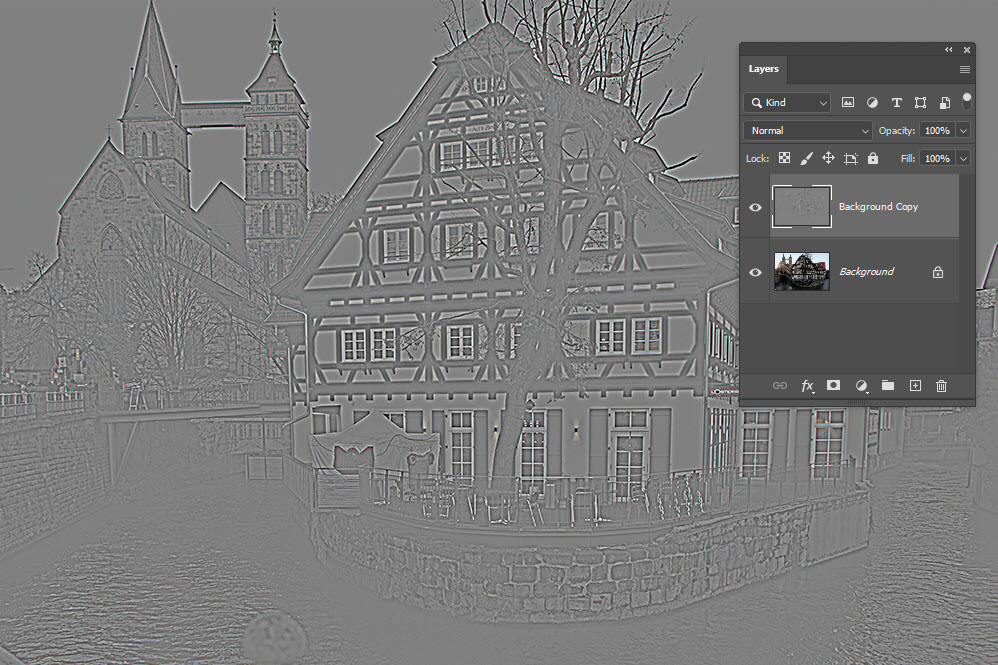
Don’t panic! It’s supposed to look like this. Before you do anything else, rename the layer “Background copy” to High Pass. This will help you keep your layers & their jobs straight.
Now apply a Blend Mode. Here’s where my two Black & White actions start to differ. In this first photo, I want to accentuate the contrast between black & whites. I want to add a little drama to the already fabulous architecture of L’Osteria Esslingen.
Blend Mode —> Hard Light – 70% Opacity
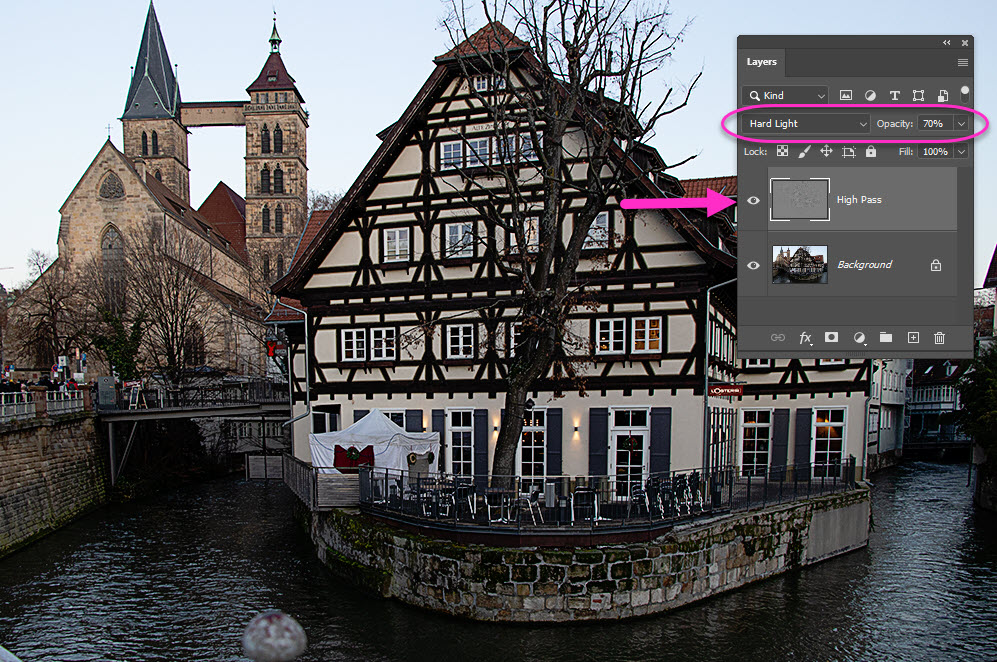
Of course, this is easier to see in Black & White so lets add the Black & White layer next.
Layer —> New Adjustment Layer —> Black & White
Alternatively, on the bottom of your layers palette, click on the black/white circle: Create new fill or adjustment layer –> choose Black & White.
This creates a new layer above your Background and High Pass layers: Black & White I. You can click this Layer Thumbnail to bring up the Properties Palette. This allows you to adjust your blacks & whites specific to your photo.
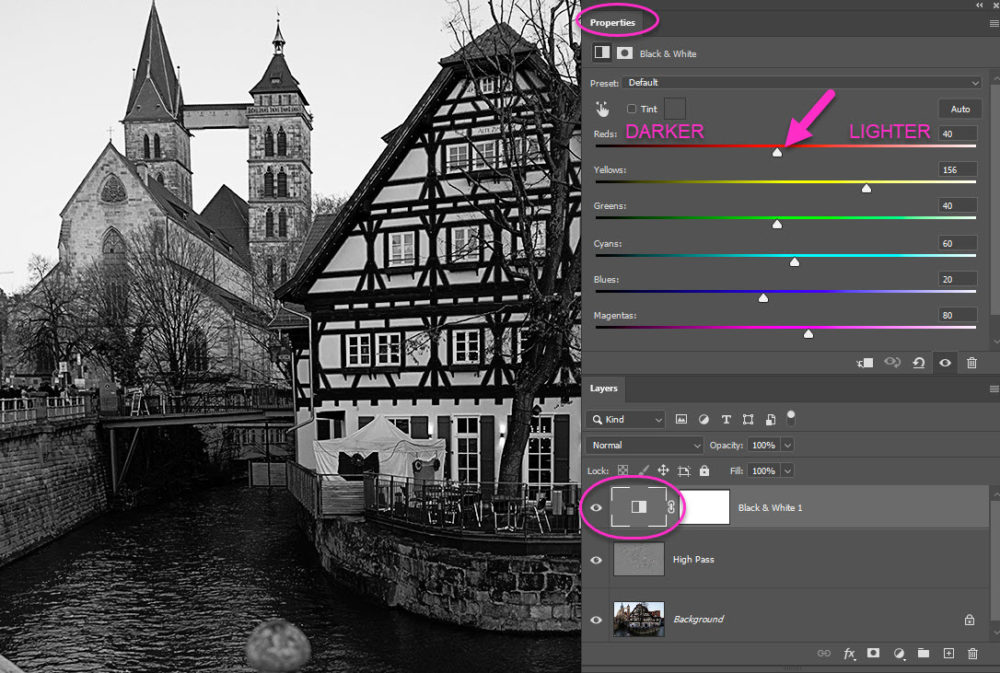
You can see that I dragged my Yellow Slider to the right to give the yellows in my photo a brighter white tone.
For a little more drama, I added a little bit of curve to my curves. Again, you can add the curves adjustment mask one of two ways:
Layer —> New Adjustment Layer —> Curves
Or create a new fill or adjustment layer on the bottom of your Layers Palette and choose Curves
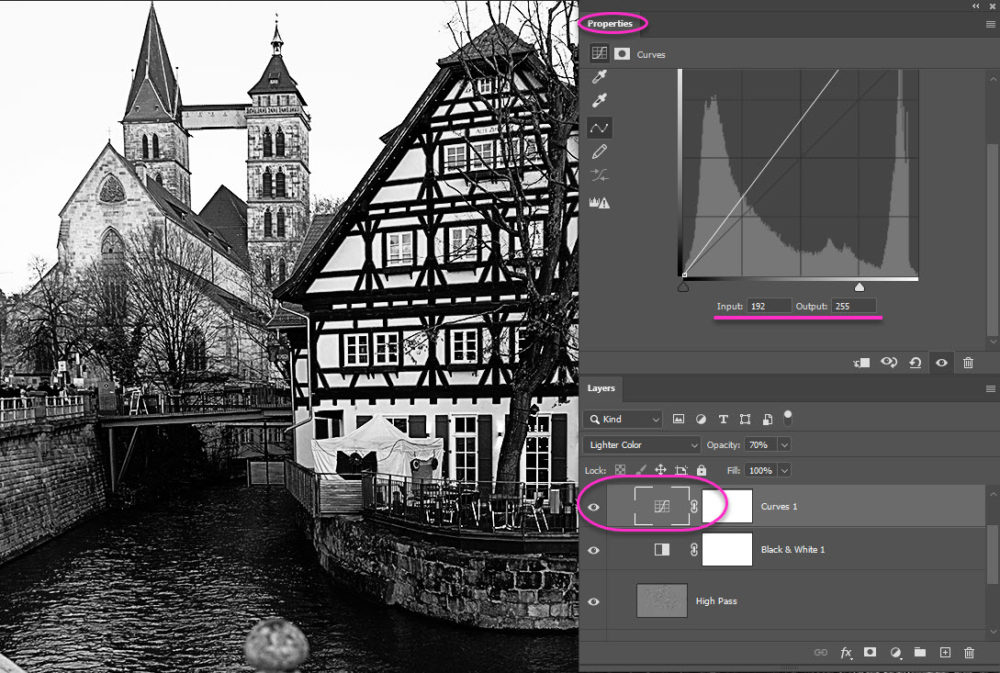
The curves palette has practically unlimitedless possibilities. My goal is to make my Black & White photo standout. What I’m particularly looking for is to brighten the whites. I brighten the whites by sliding the white slider (bottom right) inward. To these settings:
- Output: 192
- Input: 255
This is a little brighter than I want, this Curves Layer washes out my blacks too much. I do, however, like my whites. To make both the blacks & whites adjust to my liking, I change the Blend Mode to Lighter Color and adjust the Opacity to 70%.
I wanted to boost the contrast a little with levels. Again, you can add the levels adjustment mask one of two ways:
Layer–>New Adjustment Layer–>Levels
Or create new fill or adjustment layer on the bottom of your Layers Palette and choose Levels
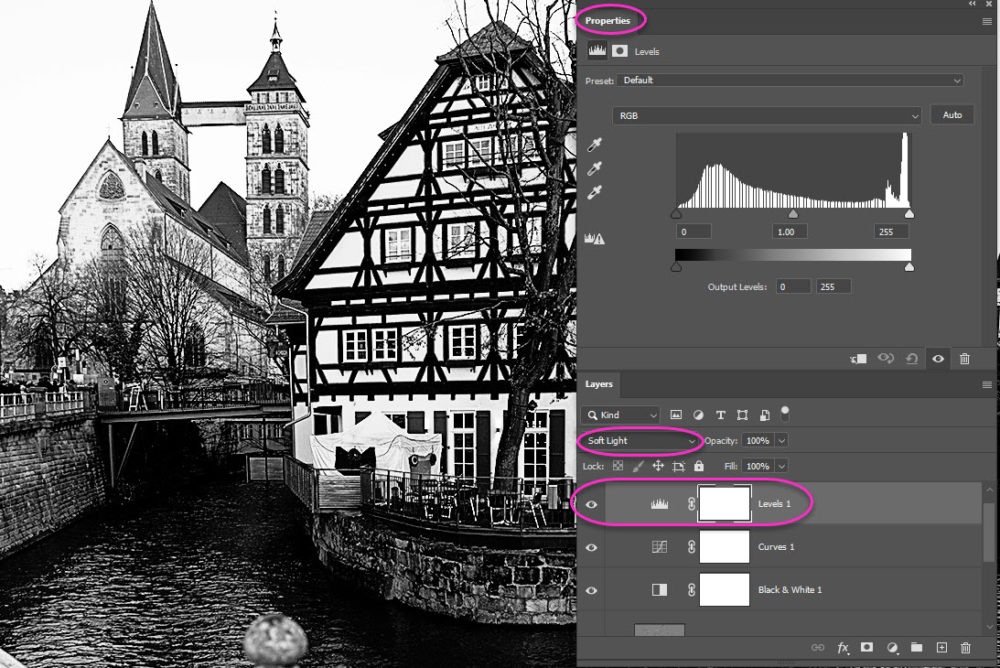
I only made a slight adjustment here. I changed the Blend Mode to Soft Light. This kept the detail but still darkened my blacks. You can adjust the Levels by either using the sliders in the Levels Palette or by changing the Blend Mode and/or the Opacity.
I’m very happy with how my urban photo turned out. However. When I ran the action on people, it was too harsh. I did not like it. I made a slightly different version of the Black & White action: Black & White Bright, specifically with people in mind. As with the previous action, you can open the Adjustments folder and adjust any of the sliders to custom fit your photo. My settings are:
High Pass
- Blend Mode = Color Dodge
- Opacity = 40%
Curves (this curve has two points)
- Input = 22: Output = 68
- Input = 142; Output = 255
Levels
Decrease the amount of black to:
- Output = 90
- Input = 255
- Change the layer Blend Mode to Soft Light
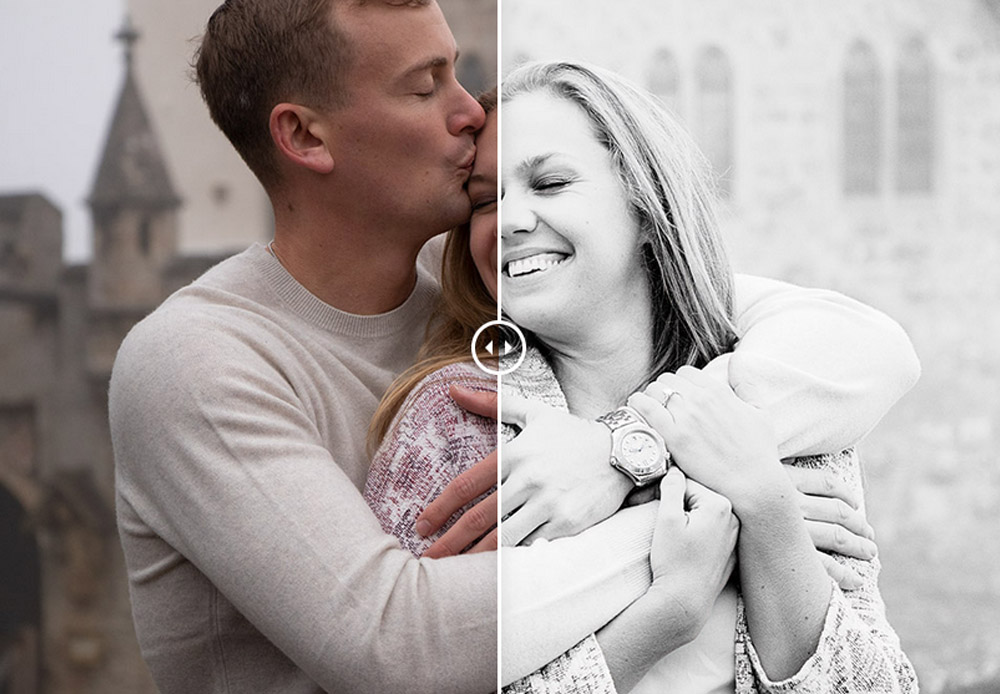
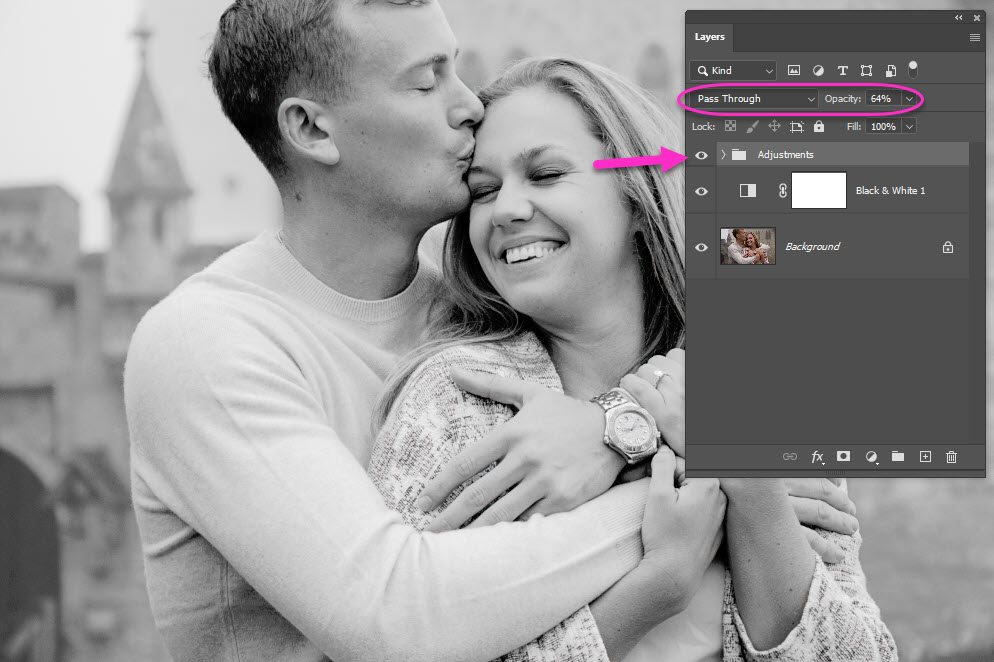
I found this photo a little too bright, too light, too white after running the Black & White Bright action. Did you know you can adjust an entire folder at once in your Layers Palette? Simply select the folder by clicking on it and then changing Blend Mode, Opacity or Fill to whatever suits your fancy.
My fancy was happy by changing the Opacity to 64%.


I love this tutorial, thank you
Toiny, is there someplace I can go that will teach me with video and written instructions on using Photoshop Elements? I purchased the program back in November and I’m overwhelmed as to how to start. I want to do things like this action and so many other things I have seen on this blog!