
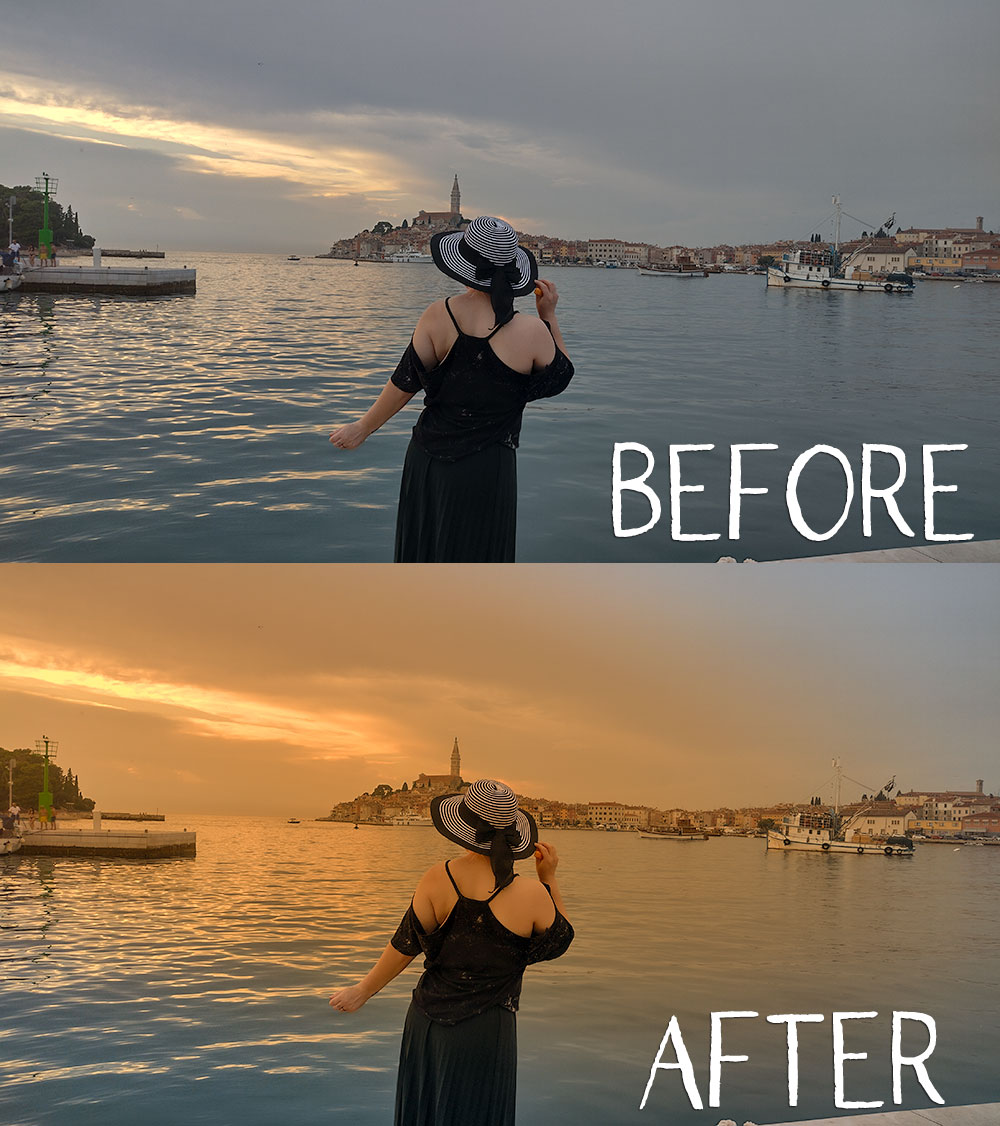
Photo’s taken at golden hour are widely regarded as being the most beautiful photo’s. But what if you just missed that golden hour? And you are in a once-in-a-lifetime moment? What then?
Then, Lightroom to the rescue! Follow along and with a few quick clicks transform your blah photo into a sunny & warm, faux golden hour photo! I am using the Lightroom App for desktop, but this also works in Lightroom mobile.
note: Lightroom for mobile is free!
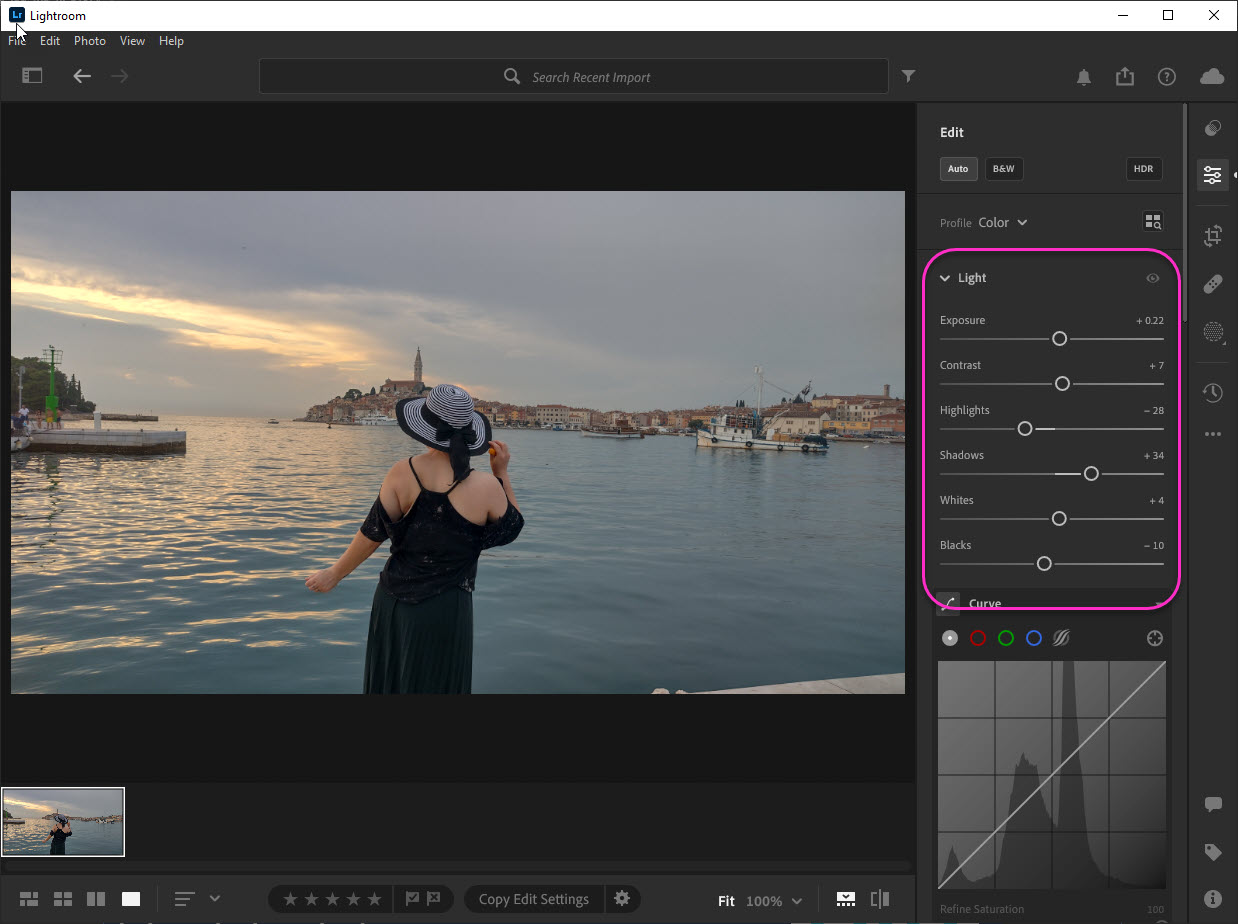
I’ve already added my photo, you can find out how to do that here: Lightroom: Add a Photo. I’ve also done some very basic edits.
Now we are ready to get started. Just like Photoshop & Elements, Lightroom has Masks. Masks are an added layer to your photo that do not edit the photo itself. This is a nondestructive way to edit your photos. Plus, you can change & edit the mask as often as you like. Win-win!
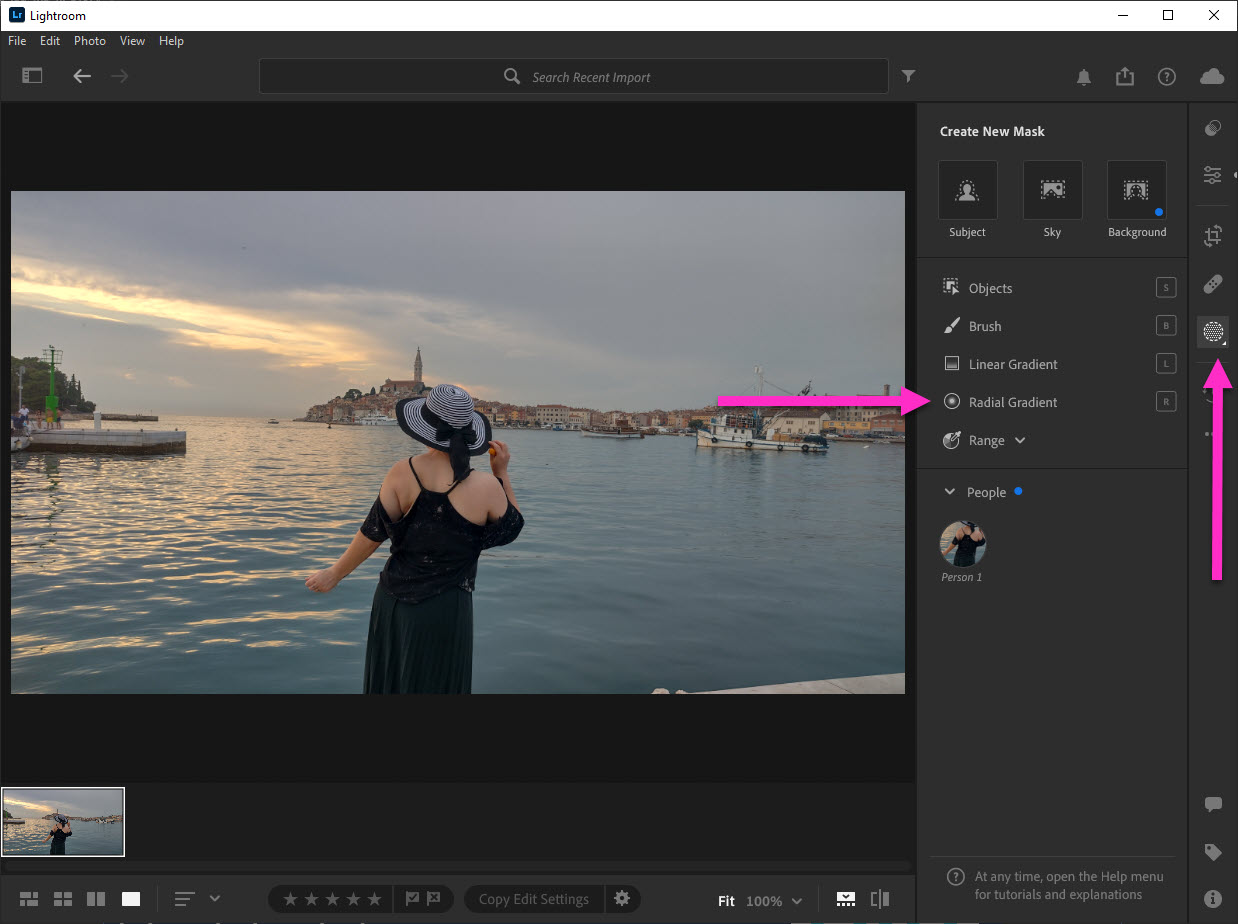
- Click on the round Masking button on the right hand menu
- Then click on the Radial Gradient tool to Create New Mask
My “sun” is on the upper left side, so I dragged a circle (radial) from the top left to just past the center of my photo. Feel free to drag anywhere as small or as big as you like. We can resize & reposition later.
- The mask will appear on a the fly-out menu as white on a black background
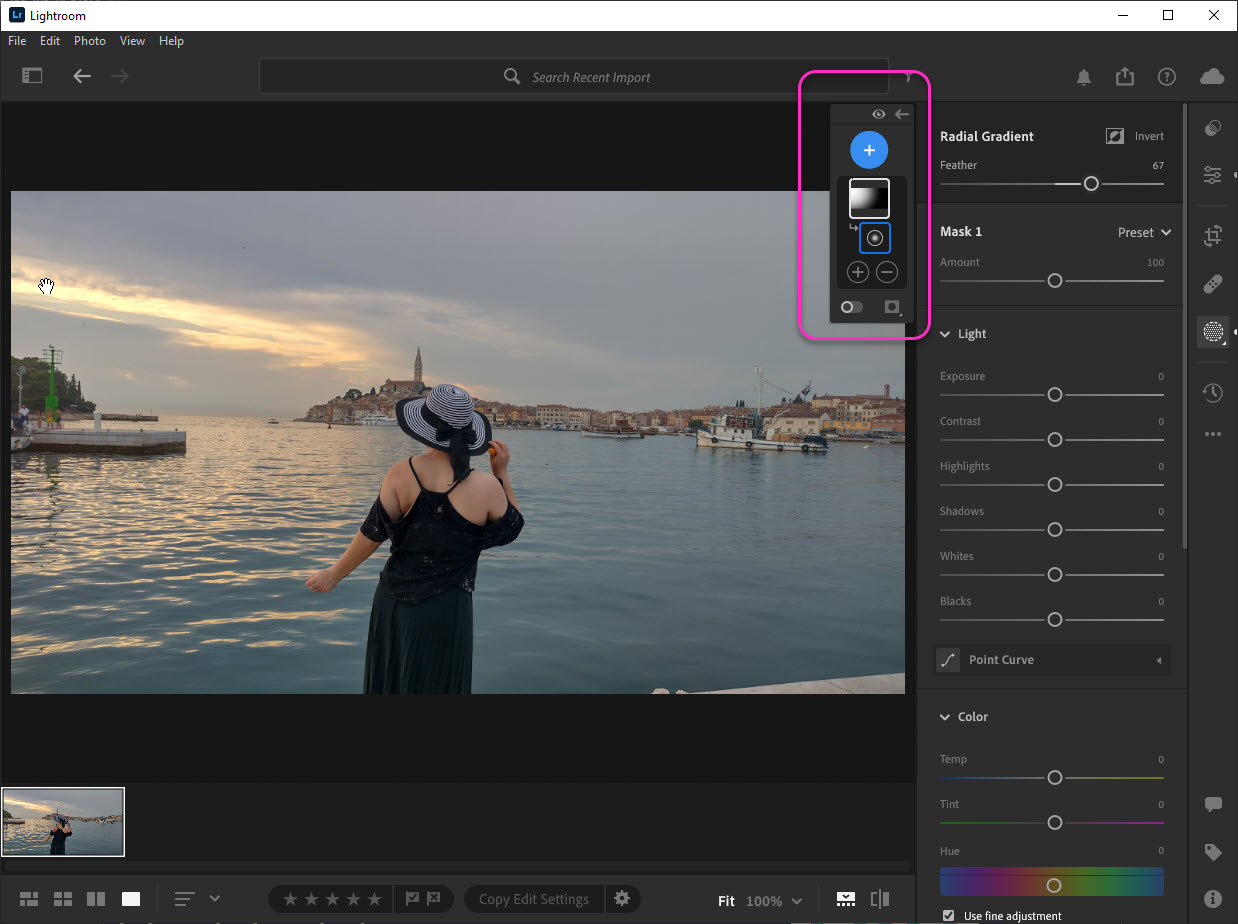
You can turn on mask visibility on the fly-out menu:
- Click the button on the bottom left of the fly-out menu to toggle mask visibility
- The right button will allow you to change mask visibility settings
- Mine is set to Color Overlay
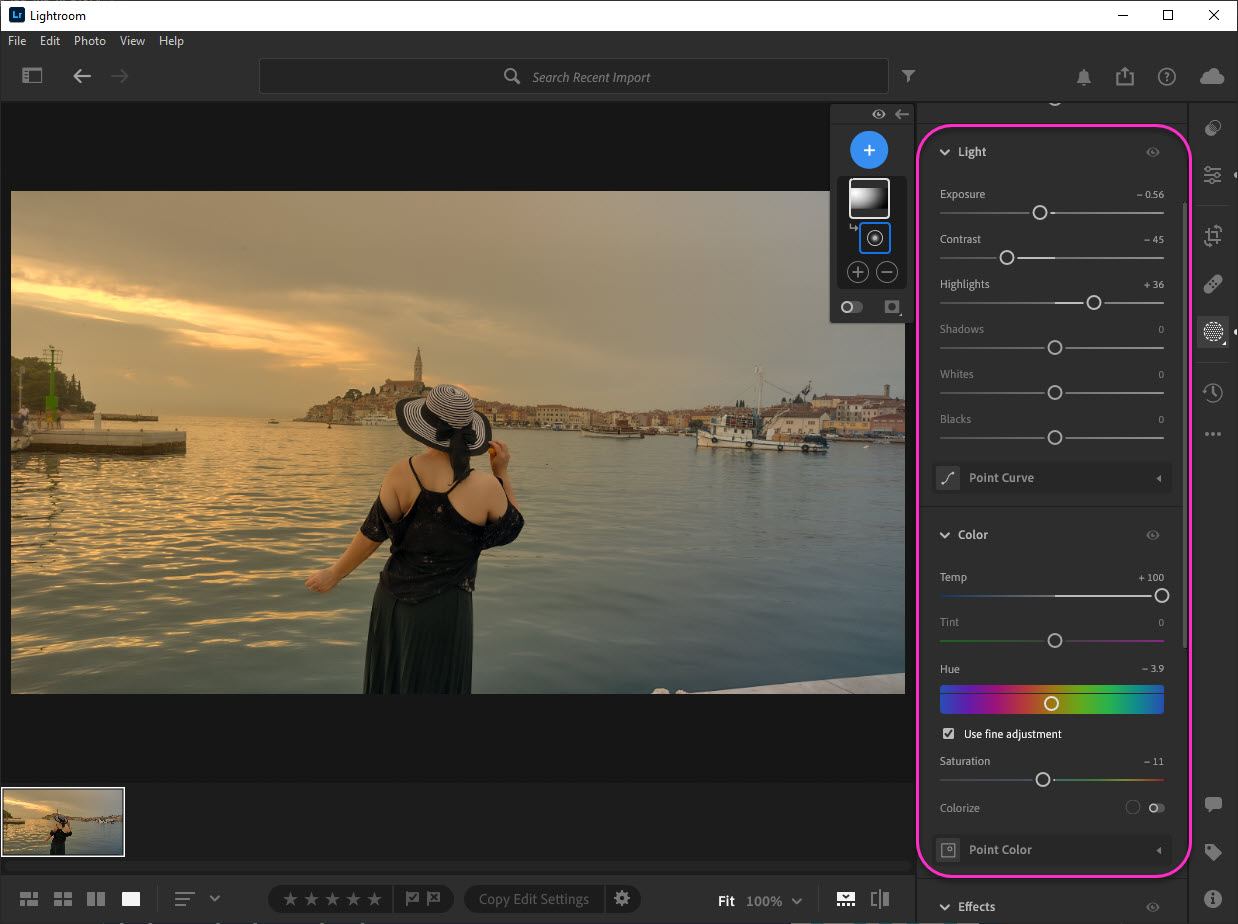
Here’s where we can make the most changes. Slide up in the main Mask menu (Radial Gradient Mask 1) until you get to Light. These are my settings, that I like for this particular photo. Feel free to adjust any of them for your photo.
Light
- Exposure -o.56
- Contrast -45
- Highlights +36
Color
- Temp +100
- Hue -3.9
- Saturation -11
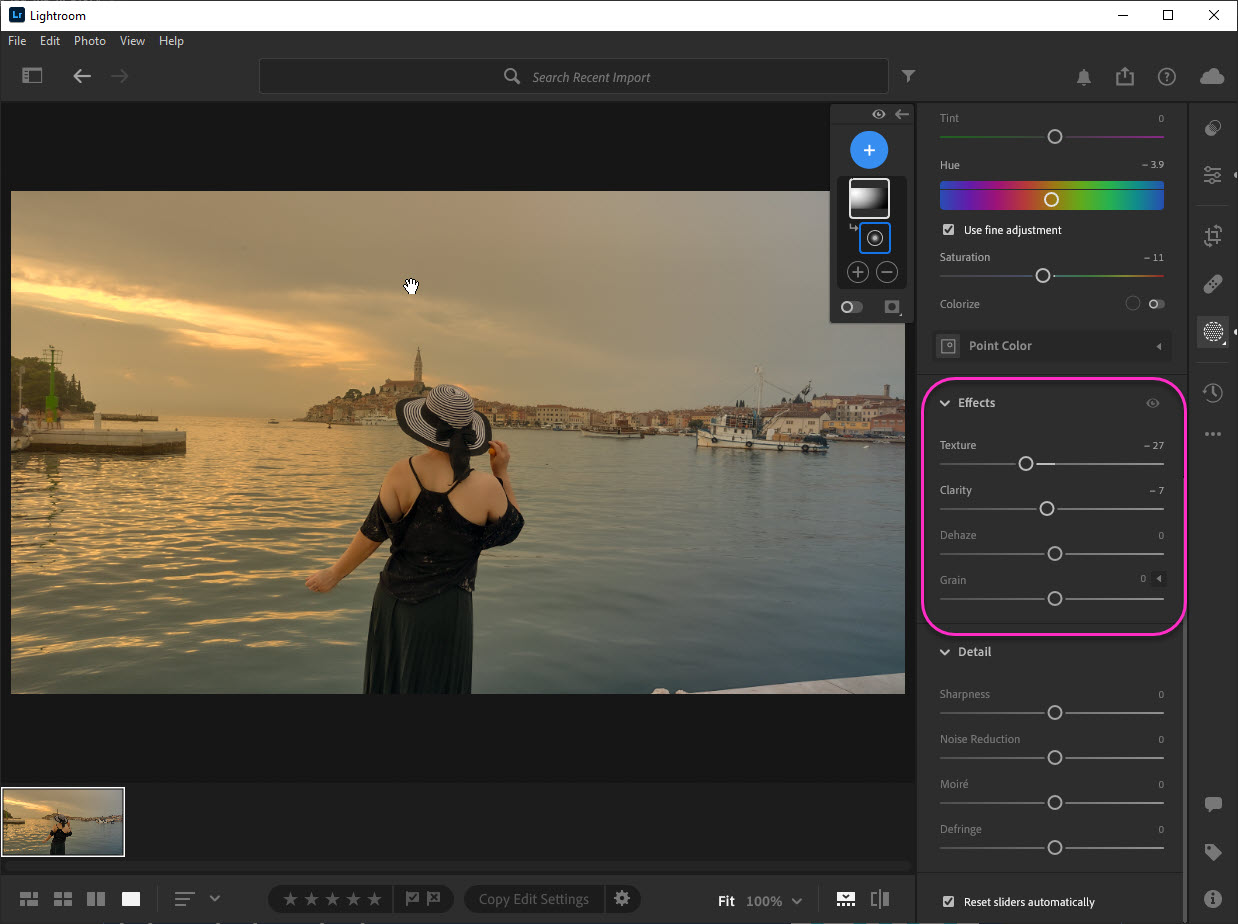
Since the sun during golden hour affects more than just color & light, when seen through the lens of your camera, I made some minor adjustments to Effects as well. Scroll down your Main Mask Menu until you get to Effects.
- Reduce Texture to -27
- Clarity to -7
You can absolutely stop here. My photo is already much more sunny & warm than before. However. I loooooooooove sliding & clicking buttons. I’m a little finicky. If this is you as well, follow me. Let’s click some more!
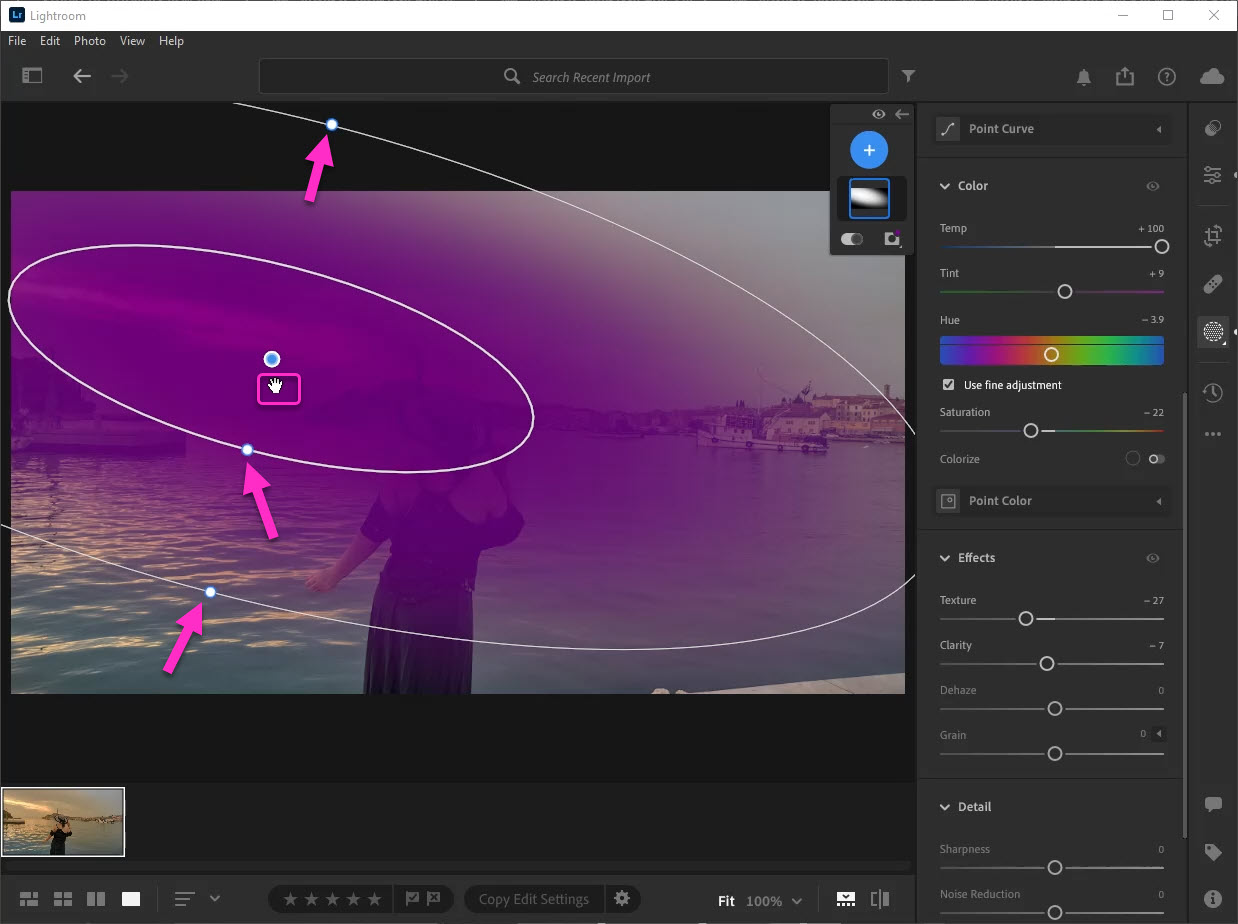
Move your mouse off the Main Mask Menu and onto the workspace, onto the photo, itself. Now you can adjust the Mask itself. Click on either the inner or outer circle to drag & resize as you’d like. I’m going to narrow my mask to resemble more of a ray than a sunburst.
- Click on the mask for the Color Overlay and Adjustable Bounds to appear
- Click on any dot to rotate or resize your mask
- Be patient with yourself, you’ll get the hang of this
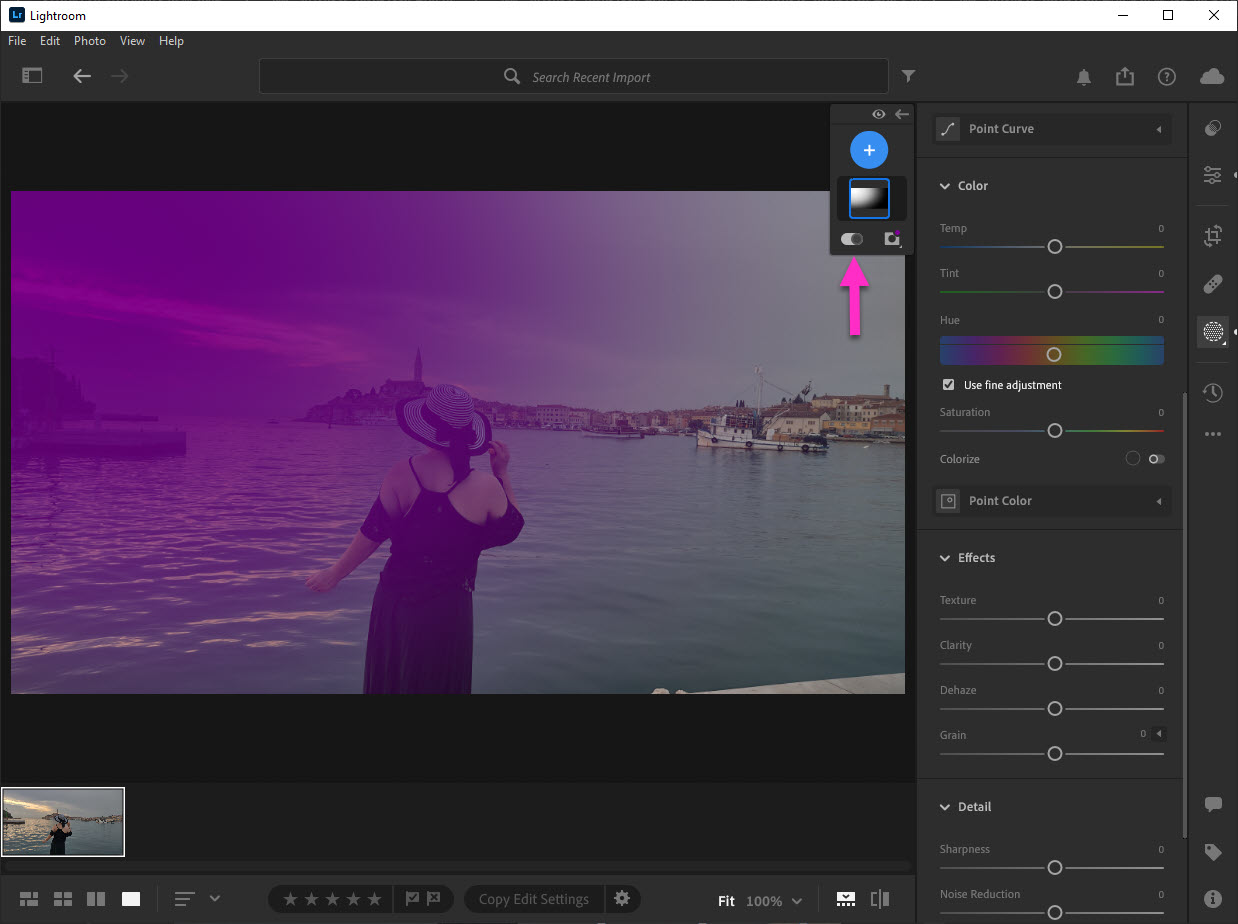
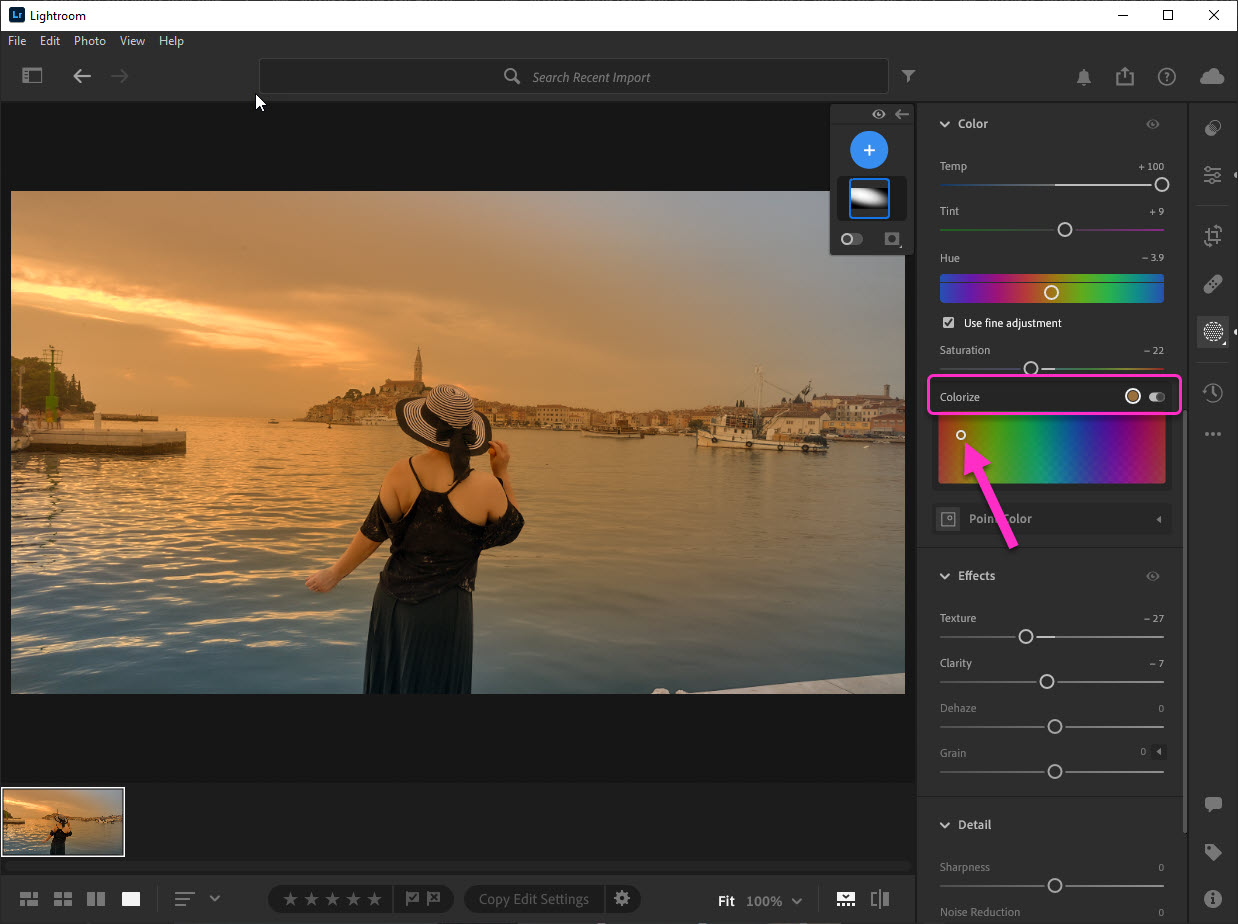
With my sunburst now a perfect sunbeam, I’ve decided I want a little more “gold” in my faux golden hour photo. I need more orange that just adjusting the Temp can give me. Thankfully Lightroom is very robust in its editing choices.
- Navigate back to the Color section of your Main Mask Menu
- Click the Radial Button next to Colorize
- Slide the teeny-tiny circle in the hue palette to select your color
note: I choose an orange hue
And that’s it! I now have a wonderful sunny & warm photo that looks like I made it to golden hour just in time 💜
If you have a minute, let me know if you want more Lightroom tutorials?


Leave A Comment