Two weeks ago we took a look at Photoshop Layer Styles in Photoshop Layer Styles: What are they? We learned that when we apply a Style to an element, that element takes on the characteristic of the Style.
Today let’s take a look at some of the effects that make up a Layer Style.
Depending upon what version of Photoshop or Photoshop Elements you are using, all of the following options may not be available to you. For this tutorial I am using Photoshop CS6.
When a Style has been applied to a layer, a small “fx” icon will be present on the right side of the layer.
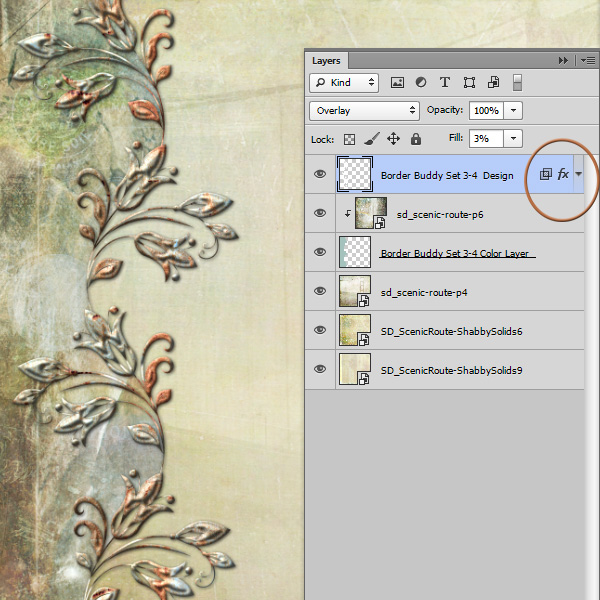
By clicking on the down-pointing arrow on that layer, the Effects Panel opens and we are able to see what effects have been utilized in the creation of the Style.
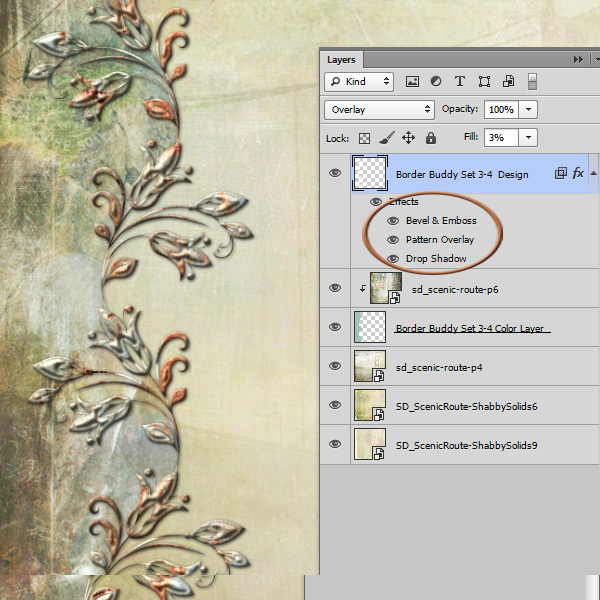
In the image below, you will see that I created the Rusted Metal Style (which has been applied to the Border Buddy) using only 3 Effects: Bevel & Emboss, Pattern Overlay, and Drop Shadow
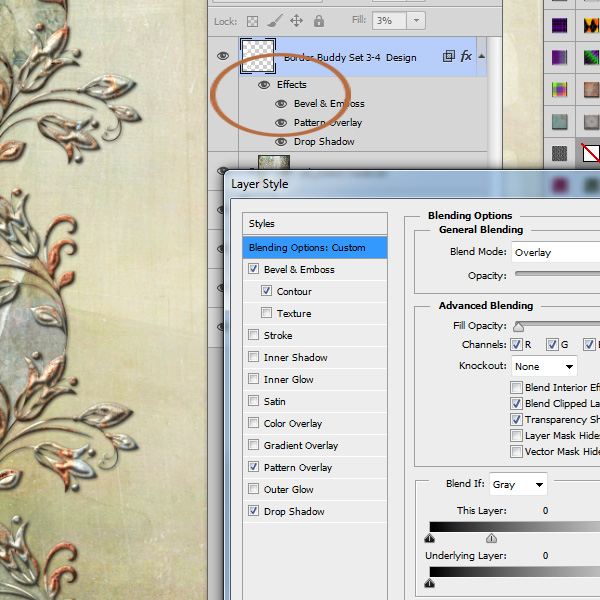
By double-clicking on “Effects,” the entire Layer Style Panel will open. Here is where the “nuts and bolts” of a Style are located.
Today let’s explore the Bevel & Emboss options.
In the image below, I applied one of my Rusted Metal Styles to a Border Buddy (Set 3).
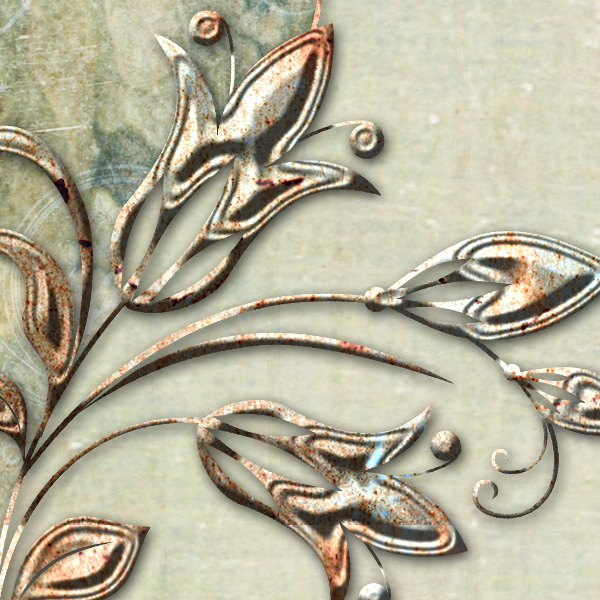
You can see that it doesn’t look good at all. The contour in the style doesn’t conform to the shape of the flowers or leaves, and the stem looks flat in one area and round in another. Eck.
Let’s take a look at the anatomy of this Style and see if we can make any adjustments to make it look better.
First, let’s look at the “Structure” of the Bevel and Emboss option. We see that this Style was created using an Inner Bevel. When we click on the down-pointing arrow next to Inner Bevel, we see that there are other Bevel & Emboss options available for us: Outer Bevel, Emboss, Pillow Emboss, Stroke Emboss.
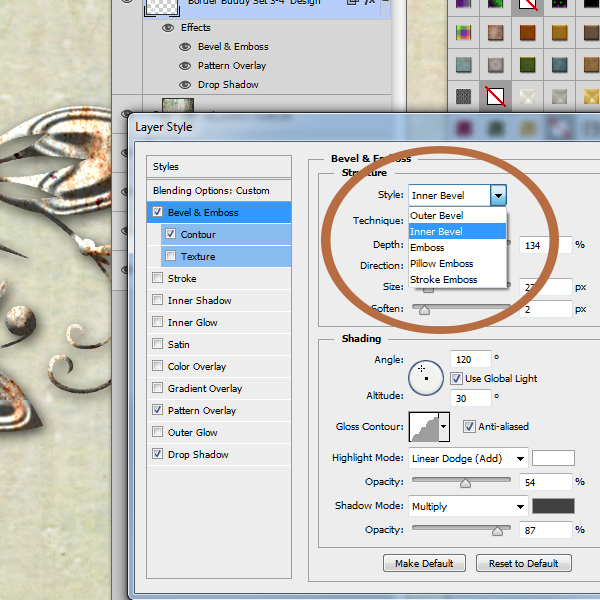
Sometimes a quick fix to a problem like this is simply to experiment with the different Bevel and Emboss options. I tried that, for this Border Buddy, and wasn’t happy with the results.
The next step is to take a look at the Technique. This style was created using a Smooth Technique. When we click on the Technique drop-down arrow, we see that we have several other options available to us: Chisel Hard and Chisel Soft.
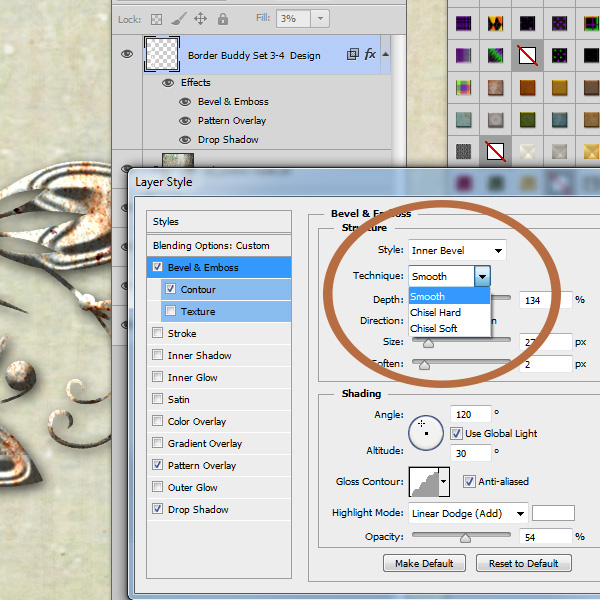
Let’s try Chisel Hard first and see what it looks like:

With the Chisel Hard Technique applied, the Style conforms beautifully to the shape of the Border Buddy, and I’m happy with it.
I did try the Chisel Smooth, just to see if it was any better than the Chisel Hard, and there wasn’t much of a difference at all on this element. Chisel Hard was a tad better in certain areas, so I set the option to Chisel Hard, and clicked OK to save the selection.
Did you notice that in the lower flower, there is a line in the pattern? Seamless styles will not have lines in them, so you won’t see this when you use them. Some styles are not seamless, due to the nature of the pattern. This style is not seamless, and that is why you see that line.
We’ll talk about how to fix that next week! We’ll also cover Depth, Direction, Size, and Soften, the other options in the Bevel & Emboss Structure.
Please note that not all Styles are suited for all shapes. The choices that the designer has made when creating the style, can very often be adjusted to suit your needs; but there are still times when a Styles just isn’t suited for a particular shape.
For today’s tutorial, I am using the same image that I used in Photoshop Layer Styles: What are they? This finished paper was offered as a free download in that tutorial. If you missed it, be sure to go back and pick it up, if you would like to have it.
See you next week!


[…] Photoshop Layer Style Effect: Bevel and Emboss – 1 freebie(s)? […]
[…] Photoshop Layer Style Effect: Bevel and Emboss – 1 freebie(s)? […]
[…] we are continuing our look at Photoshop Layer Styles. In Photoshop Layer Style Effect: Bevel and Emboss, we focused on the “Style” and “Technique” options in the Bevel & […]
Большое спасибо очень интересные и полезные уроки!!! Буду искать другие ваши уроки.
[…] lot of versatility. You will find a 2 part tutorial on using Styles on theStudio’s blog: Photoshop Layer Effects: Bevel and Emboss and Photoshop Layer Effects: Bevel and Emboss, Part 2. This is a great way to utilize those Styles […]