Last week in Coloring Digital Stamps we looked at how to create a nice embellishment by coloring or by clipping a paper to a stamp.

Today, let’s expand on this by adding a few more options. You may choose to add one, all, or a combination of these options:
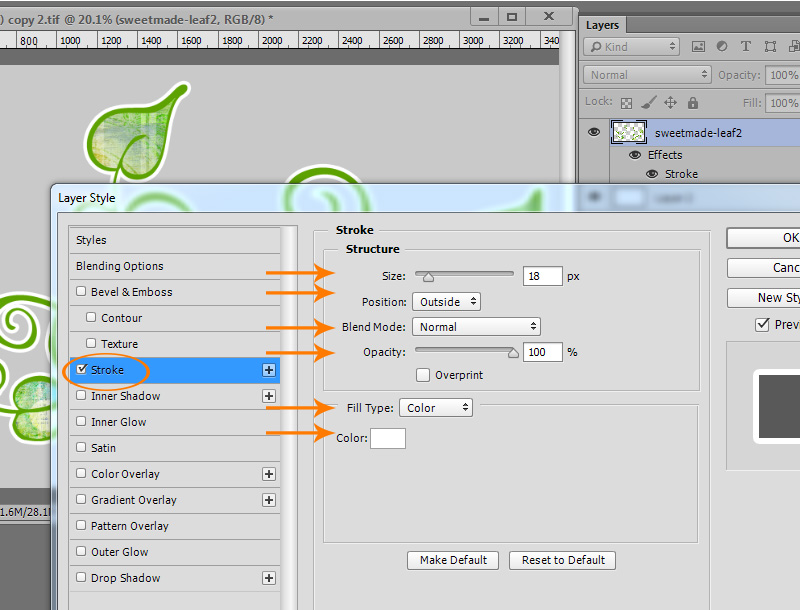
1. Stroke:
- Double click on the element layer (in this case one of my favorite doodles from My Heart Leafs 2 by SweetMade) to bring up the Layer Style panel.
- Tick the “Stroke” check box to open the Stroke options.
- Adjust the size of the stroke to your liking. I chose 18 px for this image.
- Position: Use the drop-down box to see and choose your stroke position option: Inside, Outside, Center. I chose Outside.
- Choose a Blend Mode and Opacity. I left mine set at normal.
- Use the drop-down box to choose Fill Type. I chose Color.
- Choose the Color stroke you would like. I usually choose the color first, so I can see how all of the other options react with my choice color. For this example, I chose White, to create a pretty sticker effect.
- Click OK
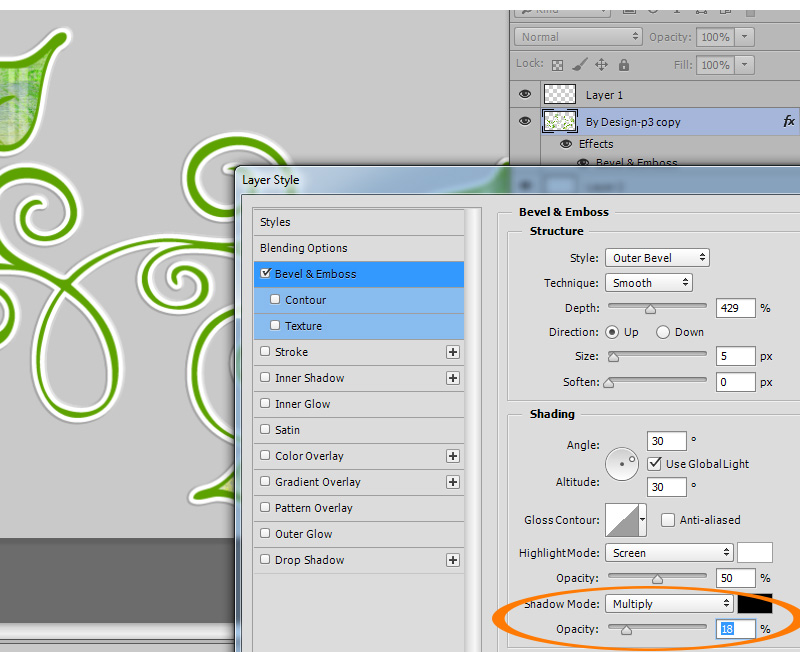
2. Bevel and Emboss: Let’s say we like the white stroke and want to add a Bevel & Emboss Style to the element.
- Double click on the element layer to bring up the Layer Style panel.
- Tick the “Bevel & Emboss” check box to open those Style options.
- Experiment with the options in the Structure Panel: Style, Technique, Depth, Direction, Size, Soften until you get the look you like. I chose Outer Bevel, Smooth, Depth 429, Direction Up, Size 5, Soften 0 for this element. For now, I left the shading alone and used the Photoshop preset.
- Click OK


Notice how the Bevel and Emboss was applied to the original stamp and NOT to the Stroke? If that is the look you are going for, great! It not, let’s set it up so that the Bevel & Emboss is applied to the entire element.
- Either turn off the visibility of the Bevel & Emboss option or delete it, leaving only your Stroke present.
- Right click on the shape Layer to bring up Layer Options.
- Choose “Rasterize Layer Style” (“Simplify” for Photoshop Elements Users.) This will remove the Stroke as a “style” and incorporate it into the “body” of the element.

Now you are able to add a Bevel & Emboss Style to the entire element, which now includes the stroke.
In the image below, I have used the same Bevel & Emboss options as shown above. See how different it looks? The Bevel & Emboss style is currently applied to the entire element, which now includes the white stroke. The Bevel & Emboss Shading is too dark for the white edge, although it looked fine on the green edge of the element itself.

One simple way to soften that dark edge is to open the Bevel & Emboss Panel again and lower the Opacity of the Shadow Mode.
Compare the edges of the image below with that above. I think the one below looks much better.
3. Shadowing: Now what if you want to shadow this element?
Something new to Photoshop Creative Cloud 2015 is the ability to “stack” certain Styles. CC2015 users can apply a Drop Shadow to this element, through the Styles Panel, just as you normally would add a style to any element. However, in Pre-CC2015 and in Photoshop Elements, we will need to rasterize/simplify the Bevel & Emboss Layer Style, just like we rasterized/simplified the Stroke Style, in order to apply a shadow to the entire element. Follow the same instructions above for rasterizing/simplifying, and apply the desired shadow.

I have applied Vero’s Light Shadow 3 on this element, and I think it looks great!
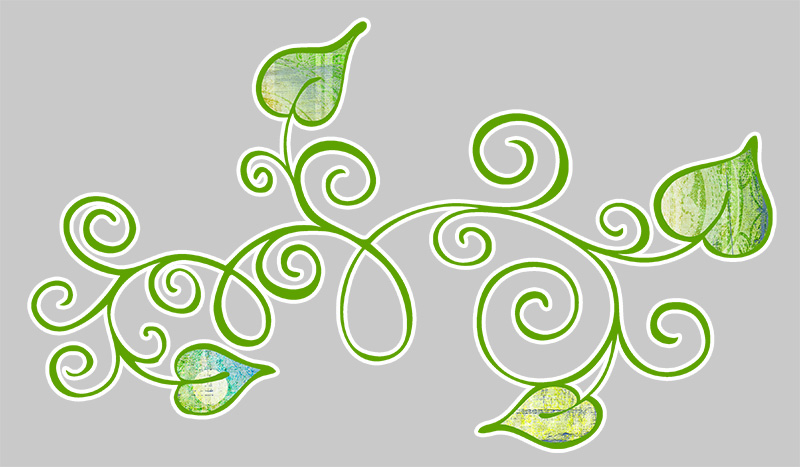
That’s how easy it is to go from a stamped image to a lovely embellishment! So the next time you see Stamps – or Brushes – that you love, just remember these techniques and envision what beauties you will be able to create!
It’s always great, when learning something new, to be able to purchase the necessary tools at a savings! Why not check out both the Personal Use and Commercial Use Bundles this week, which are always your best savings – BUT you can save an extra 10% now by using the coupon code: bundle-me-up!
Personal Use and Commercial Use bundles.

If you would like to keep this tutorial on your computer for easy reference, you may download a PDF here: Coloring Digital Stamps Part 2
If you are a visual learner, you can view this tutorial on SnickerdoodleDesigns YouTube Channel and on theStudio’s YouTube Channel.
Please head over to YouTube and take a minute to Follow both channels. Each Channel will have some exclusive videos, so by following both channels, you will be sure not to miss a thing!


[…] Coloring Digital Stamps Part 2 – 1 freebie(s) […]