Over the past 2 weeks, we have been looking at how to restore or remove unwanted areas in photographs. (Healing Brush Tool, Using the Spot Healing Brush). Today let’s take a look at the Patch Tool, which provides yet another way of accomplishing this task.
The Patch Tool is located in the same grouping of tools as the Healing Brush and Spot Healing Brush.
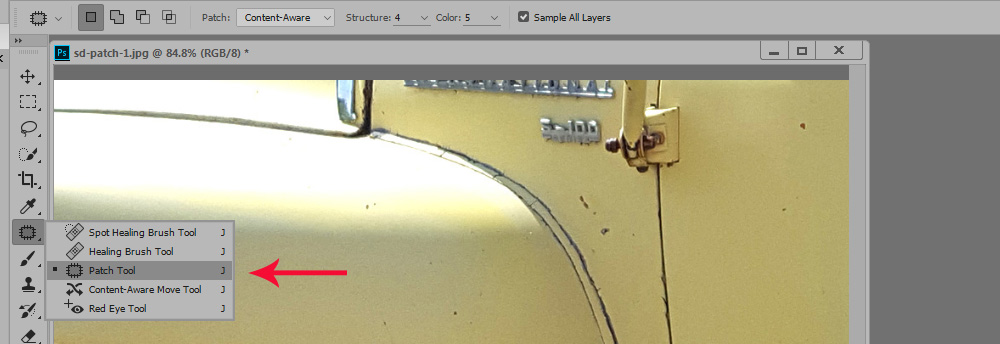
Patch Tool Options:

When you select the Patch Tool, you have several options to choose from in the Options Bar:
- Patch: Choose Content-Aware.
- Structure: You may choose a value between 1 and 7 to determine how closely Photoshop will try to match the pattern of the image. A lower value will reflect a loose pattern match, while a higher image will reflect a stricter pattern match. Typically, I leave this set to 4.
- Color: You may choose a value between 1 and 10 to determine how Photoshop tries to color-blend the patch. A lower number will indicate a loose color match, while a higher value will reflect a higher color match. Usually a setting of 5 works well for me.
- Sample all layers: Enable this option if you are working with multiple layers, and your patch source is on a layer different that the one you are working on. Typically, we, as scrappers, will leave this unchecked.
Using the Patch Tool:
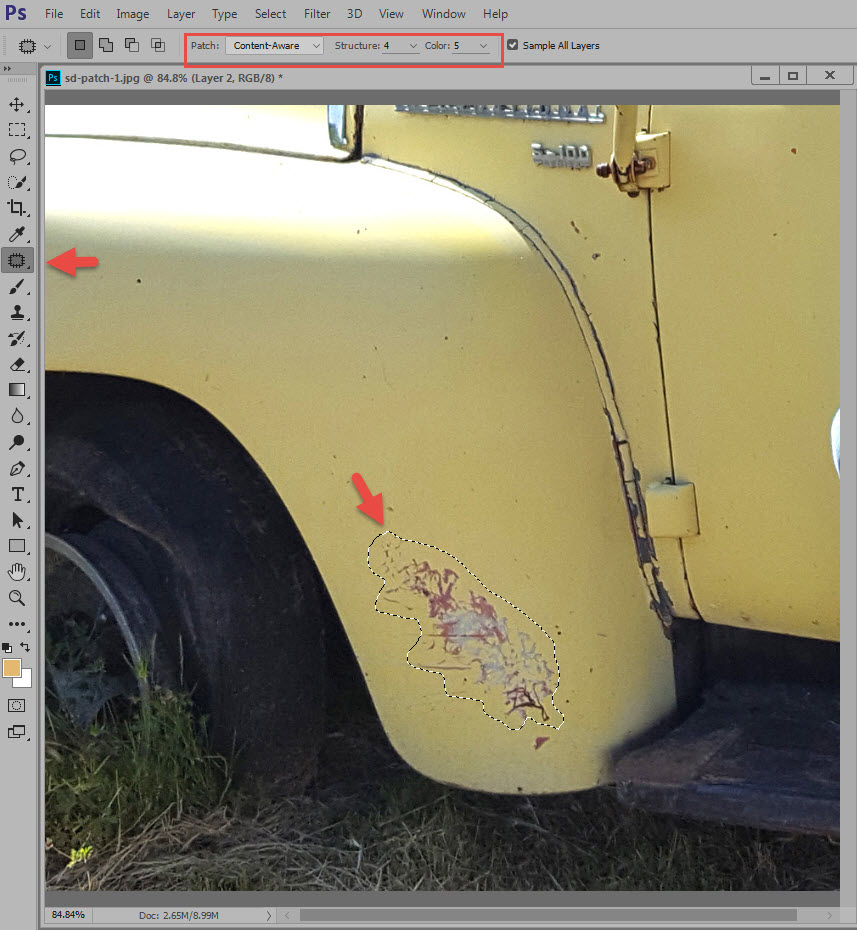
- Select the area you would like to remove/replace in your image by holding down the left button on your mouse and dragging around the area. When you reach your starting point, Photoshop will place marching ants around the area, to indicate it has been selected.
- Drag the selection over the area you would like to use as your target replacement, then let go of your mouse. Photoshop will calculate how to replace the selected area, based upon the Options choices you have made.
That’s all there is to it! Let’s see the result, using the same image we used last week.
Let’s remove that rusty area on the fender. I’ve chosen the Patch tool, set my Options, and made a selection of the rusty area.
Next, I dragged the selection up a bit, then let go of my mouse. (Once you start dragging the selection, Photoshop will give you a preview of how the area will look, which is why you do not see the original rusty spot in the image below.)
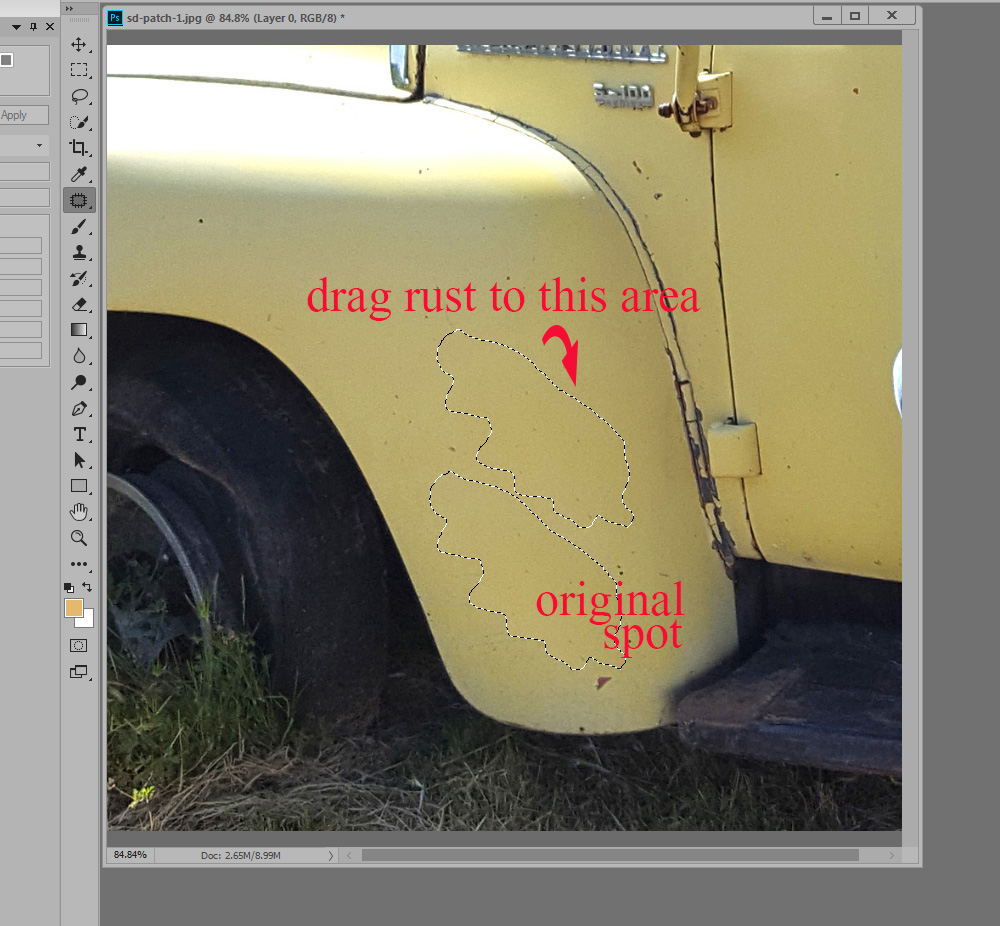
Once I let go of the mouse, Photoshop blended the edges, based upon my Option choices.
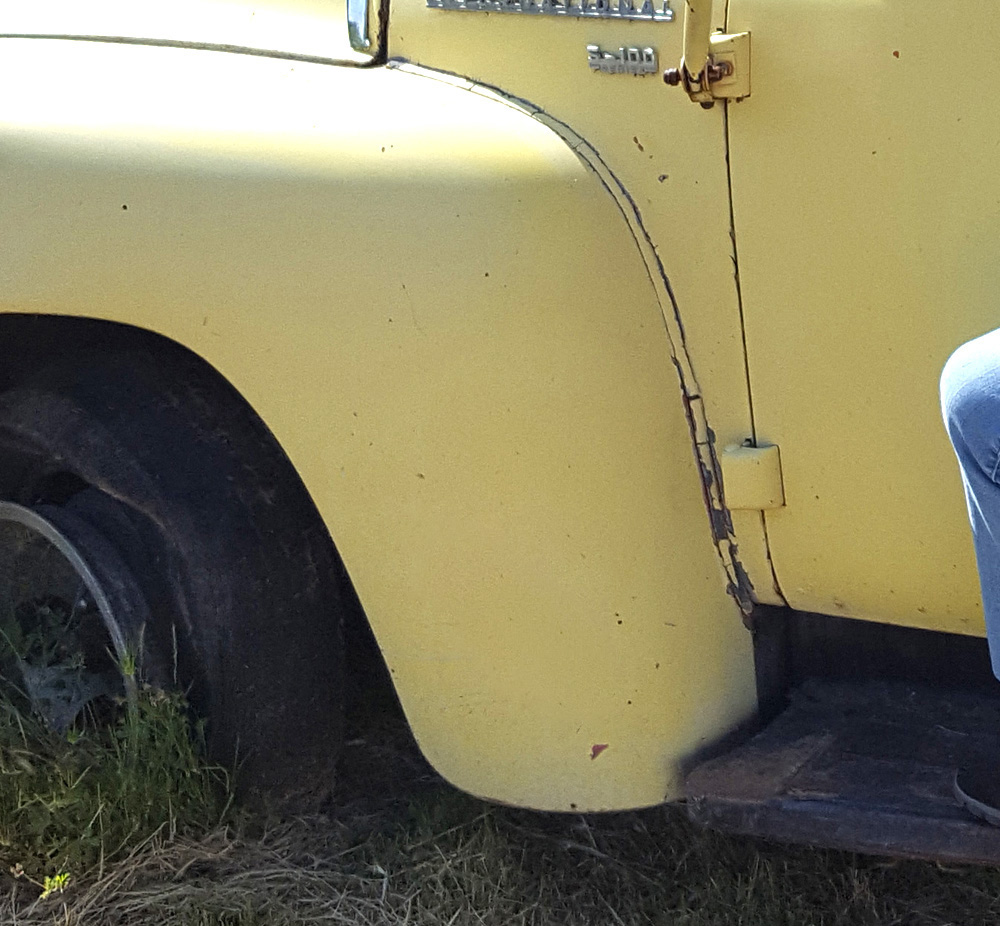
I think Photoshop did a great job with this, and it took just a few seconds.
Because one tool can work better than another on any given image, it’s helpful to have as many tools in our technique arsenal as we can have. Here is another one for us!
The Patch Tool is not available in Photoshop Elements; however, PSE users can use the Spot Healing Brush and Healing brush to achieve similar results!
If you would like to download a PDF copy of this tutorial, you may do so by clicking on this link: Patch Tool Tutorial.
Save
Save
Save
Save
Save


Leave A Comment