Hello! It’s Ann here again, with some tips on using templates for scrapbooking in Affinity Photo for iPad.
I used Val’s adorable Just Another Boo collection for this page.

Clipping masks are at the heart of using templates in Photo. I’ve written before about how to use them in this app. To quickly recap, you drag your shape layer (like the photo placeholder), on top of your photo layer. The layer’s thumbnail turns bright blue to let you know it’s clipping.
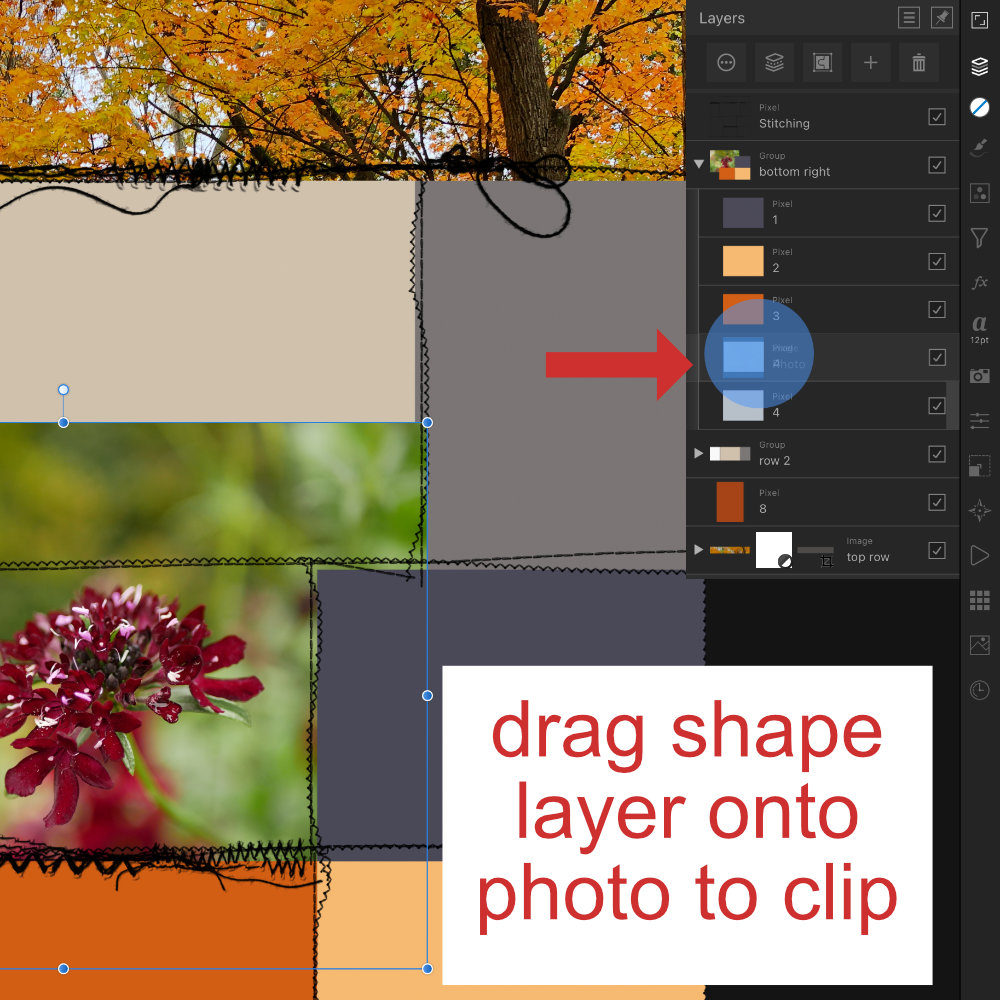
TIP: Before you import images, tap on the layer you want to clip with. This will place your imported layer directly above it.
Here are a few other workflow tips and tricks when using templates in Photo.
Use Place Image from the Document menu to import an image or element into your document. Tap the canvas once to pop it onto the canvas, or drag to size.

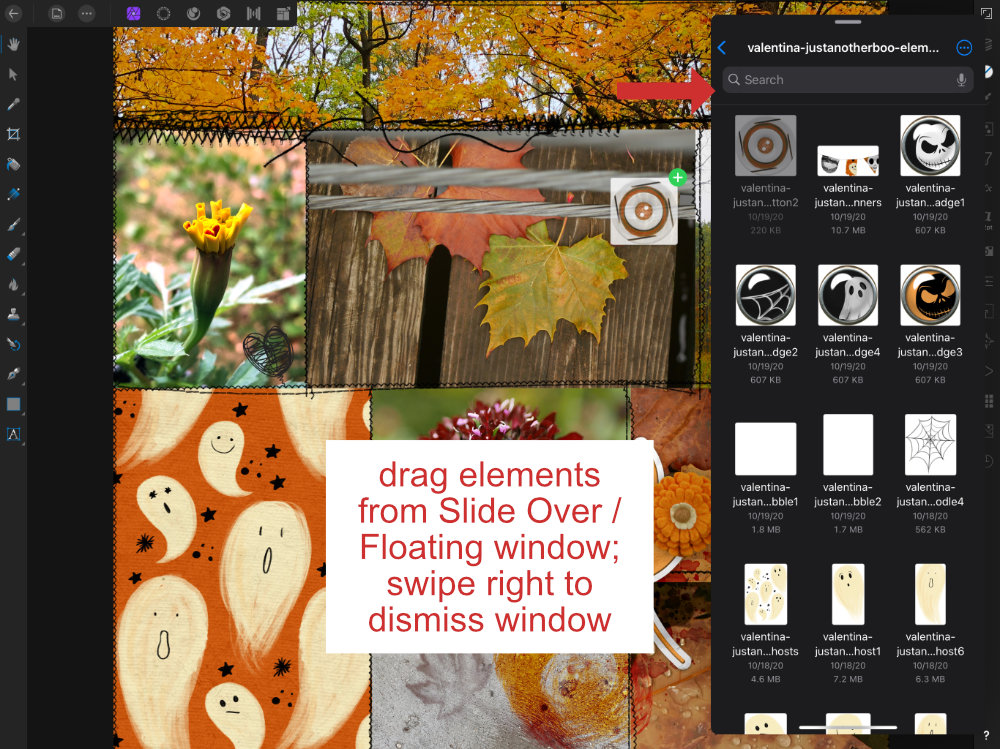
You can also drag and drop images from Files in a Slide Over window. Turn on this iOS feature in Settings >> Home Screen & Dock >> Allow Multiple Apps.
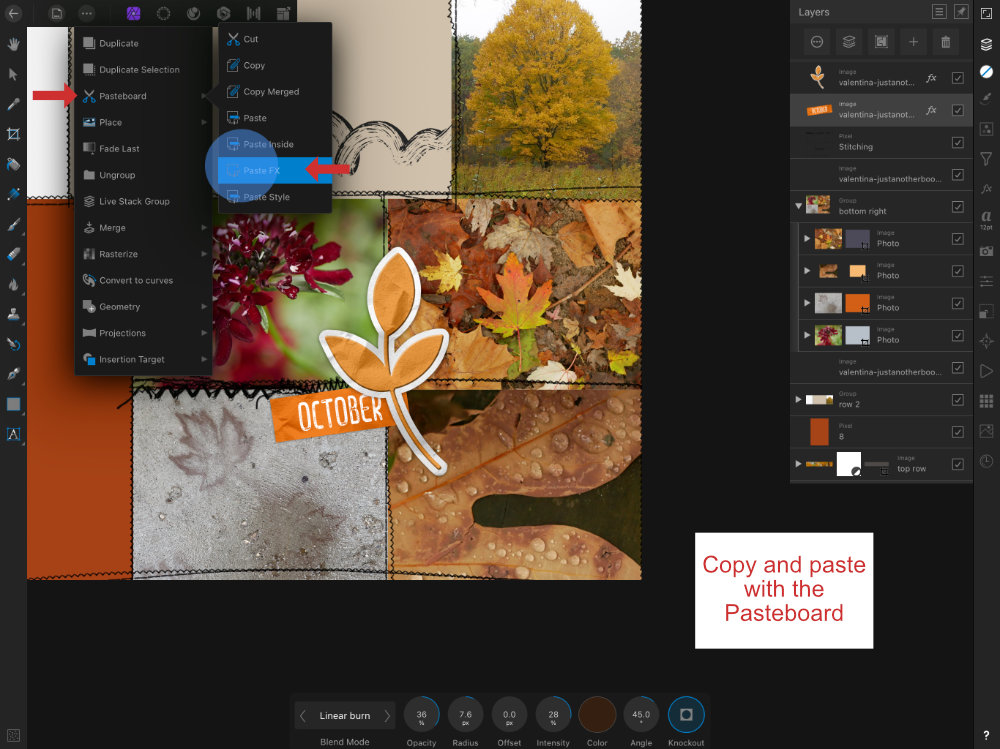
Copy and paste layer styles and effects (FX) on other layers using the Pasteboard. Leave as-is (if the other shadows are similar), or quickly edit the size, etc. This saves a couple of taps over adding an FX from scratch. Like Toiny wrote about in this post, you can also drag shadow positions around on the screen with your finger or Pencil.
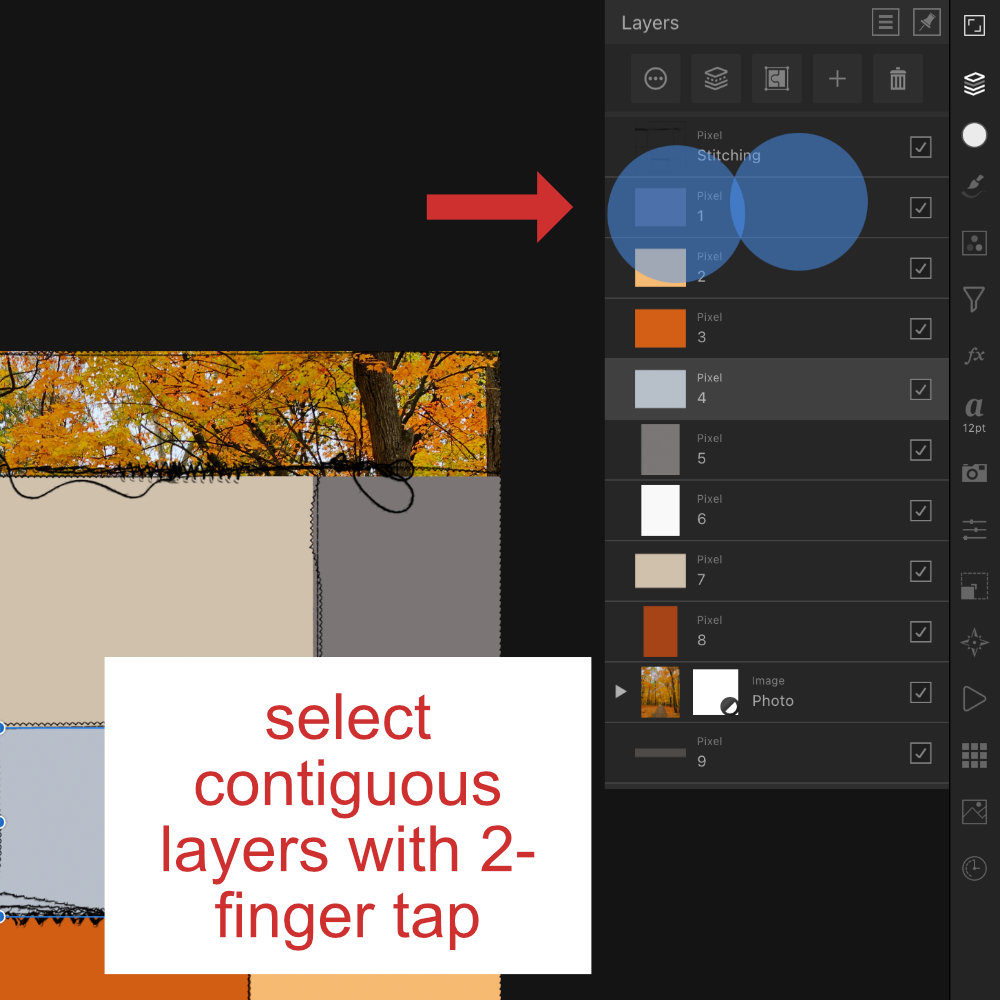
Organize your layers into groups. For this layout, I organized by row. This is especially helpful if you are working in a template with a lot of layers!
To select layers for a group, swipe layers individually.
Or, to quickly select multiple, contiguous layers, tap on a layer, then scroll to find the last layer you want in your group, and two finger tap on that layer. Every layer in between is selected.
Next, tap the Group button. To rename, tap the 3 dots and tap on the default name at the top at the next screen.
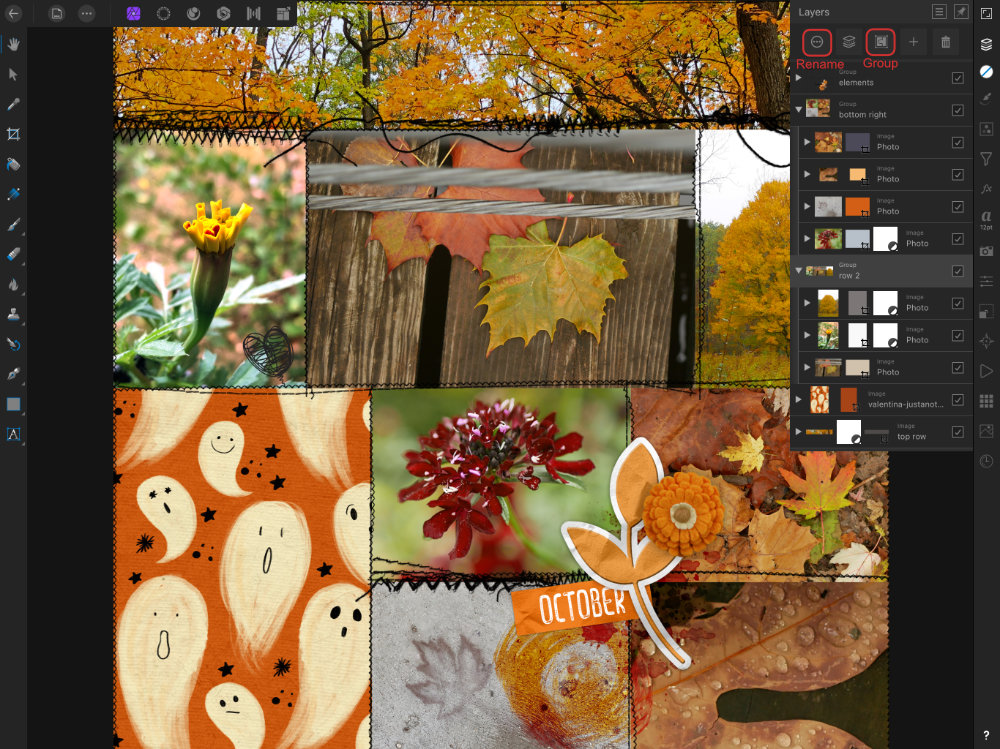
You can also draw around layers to select them with Apple Pencil.
Add additional layers to the group by tapping and dragging them into the the group in the Layers panel (look for the long blue line that shows the layer is being nested.

Don’t forget to save, create your flat .jpgs, and back up! First, Rename and Save your document in the Gallery.
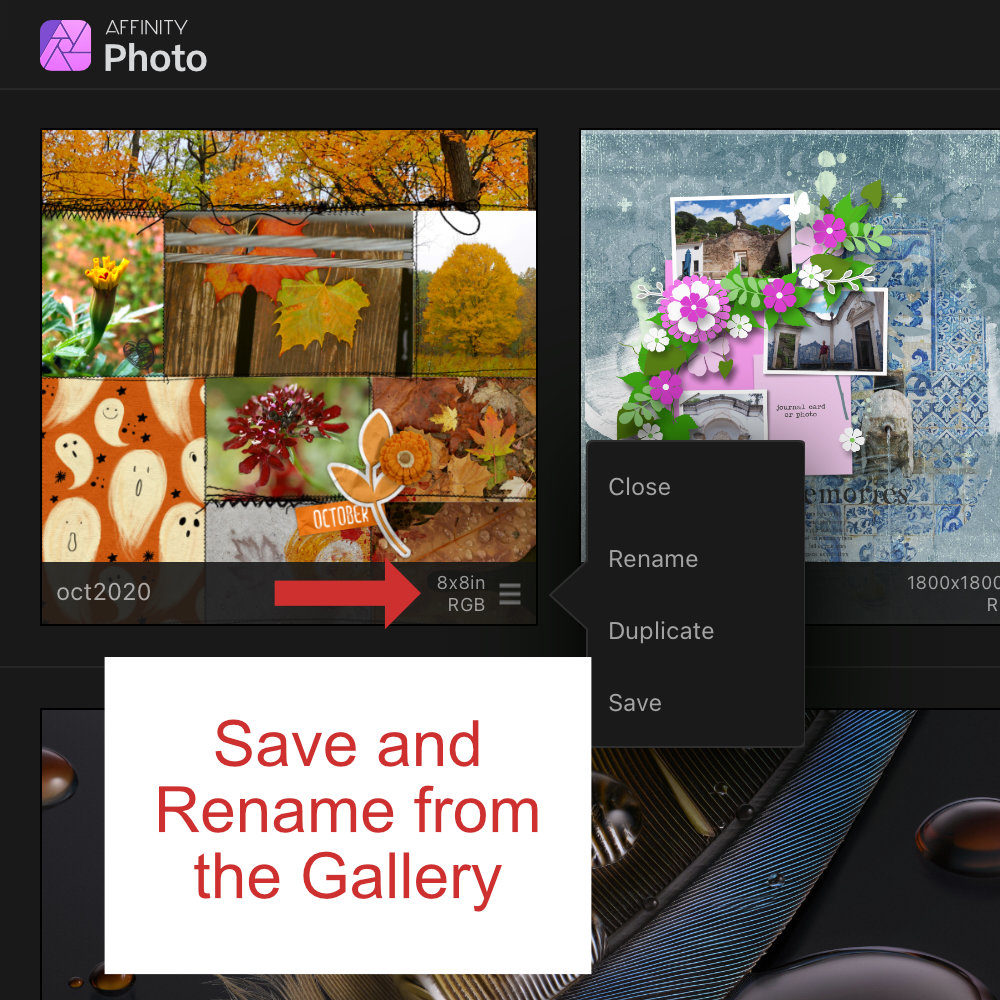
Save isn’t in the Document menu until you’ve named the file in the gallery. Remember to Save once in a while as you’re working, in case you crash!
Once the layout is done, I create 2 .jpg files using Export. The first .jpg is full resolution, and the second, for online galleries, is resized to 1000×1000, image quality reduced to about 75%.
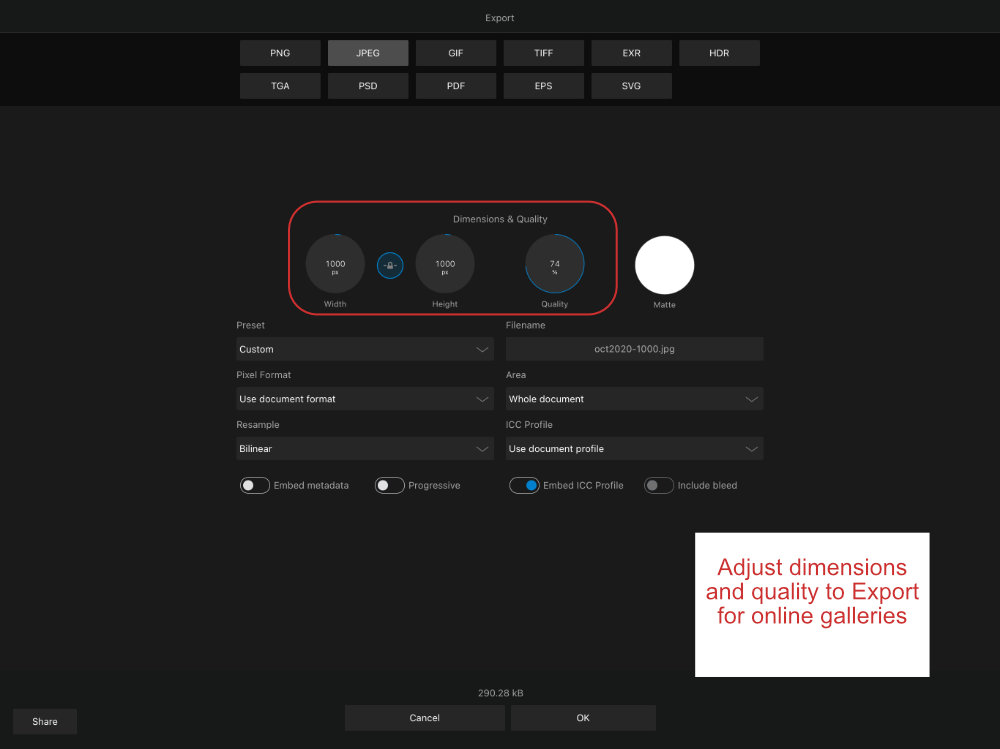
You can back up a .afphoto file using Save A Copy in the Document menu. Alternately, you can Export and choose .psd or .tiff.
Are you using templates on iPad? Do you have time-saving tips? I’d love to hear them!
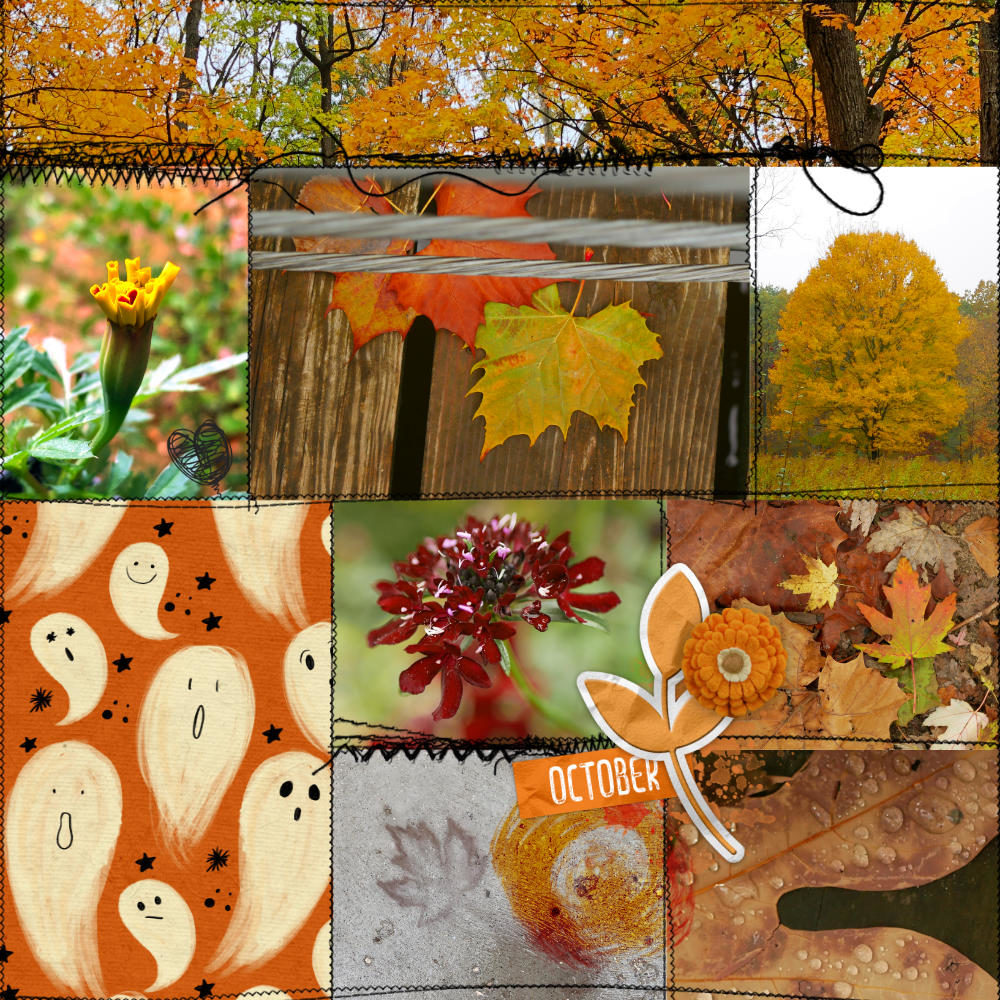
I can’t end the post without mentioning the current Layout-a-Day event still going on. Freebies? Fun challenges? I’m all in, every day I can be! This collection definitely needs to find its way into some of my layouts for the rest of the week.
Happy scrapping!


[…] imported and clipped a Hygge paper to […]