Last week we looked at how to sharpen parts of an image using the Sharpen Tool. (Using the Sharpen Tool in Photoshop). This week, let’s look at how to blur parts of an image using the Field Blur Filter. This filter is a great tool to use when you would like to direct the viewers focus to one specific area of an image.
I am using Photoshop CC2017 for this tutorial. Photoshop Elements does not have a Field Blur Filter. I couldn’t find a work-around in PSE that I was satisfied with; but if anyone else can find one, please let us know.
EDIT: Thank you Kathi and Peggy for your comments. I have added instructions for PSE users at the end of this post, based upon your suggestions!
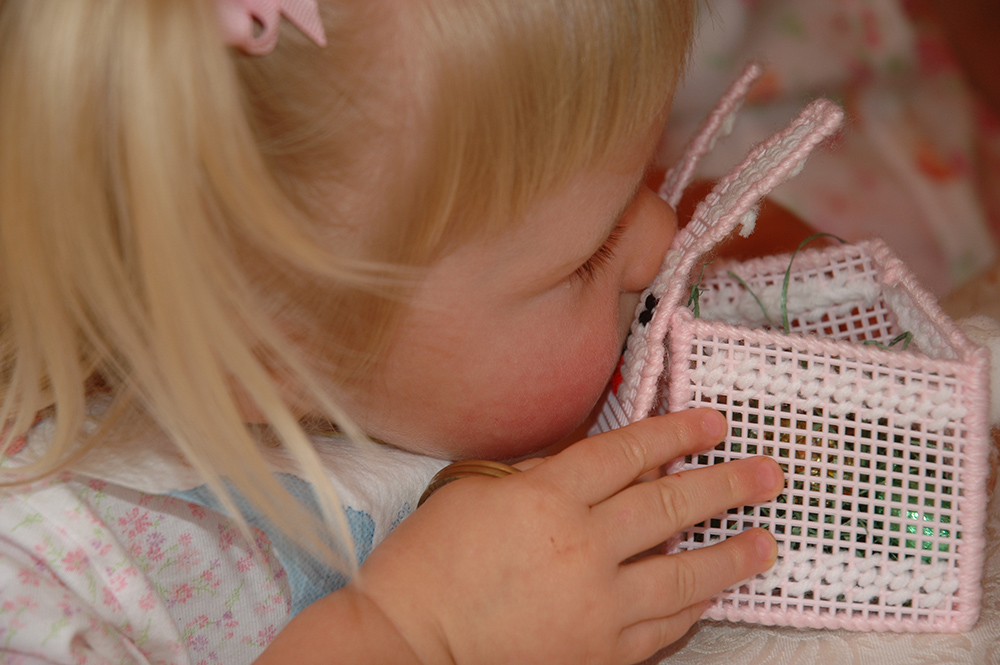
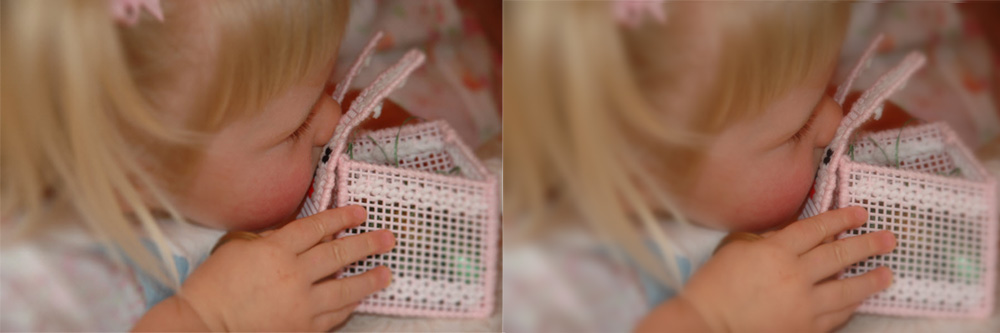
This is a photo of my granddaughter kissing a needlepoint Easter basket that her great-grandmother made for her. I would like to keep the focus on her kiss.
Here’s how:
- Duplicate the image using your favorite method. (I like to use Control+J).
- Right click on the duplicate and choose “Convert to Smart Object.” This will allow the filter to be applied as a Smart Filter so you can work non-destructively, and adjust the filter if you like. (How Smart are Smart Filters?)
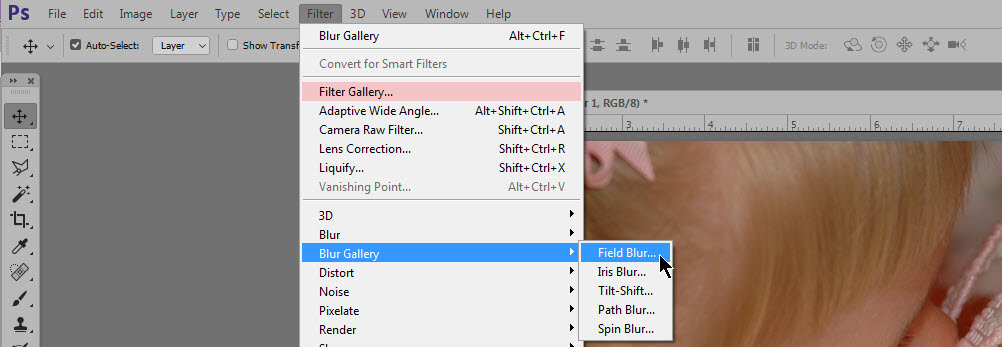
- In the top menu bar: Filter > Blur Gallery > Field Blur. The Field Blur Panel will open, and you will see a pin in the middle of your document.

- The Blur Value is determined by sliding the white portion of the ring. You may also click on the black portion of the ring to automatically advance the white portion quickly. Reduce the black area to remove blur; add more black area to lessen the blur. The amount of blur applied will show in a percentage number when you are moving the slider. This is helpful if you want to match blur percentages in different areas of the photo.

- By clicking and holding my mouse on the very center of the ring, I can move the pin to a different area of the photo. Because I want the kiss to be without any blur, I moved the pin to that area and reduced the blur to 0% by adjusting the slider.
- Click in other areas of the image to add additional pins. Add as many pins as you like, adjusting the blur of each pin to suit your needs.
- Click OK to return to exit the Field Blur Panel.
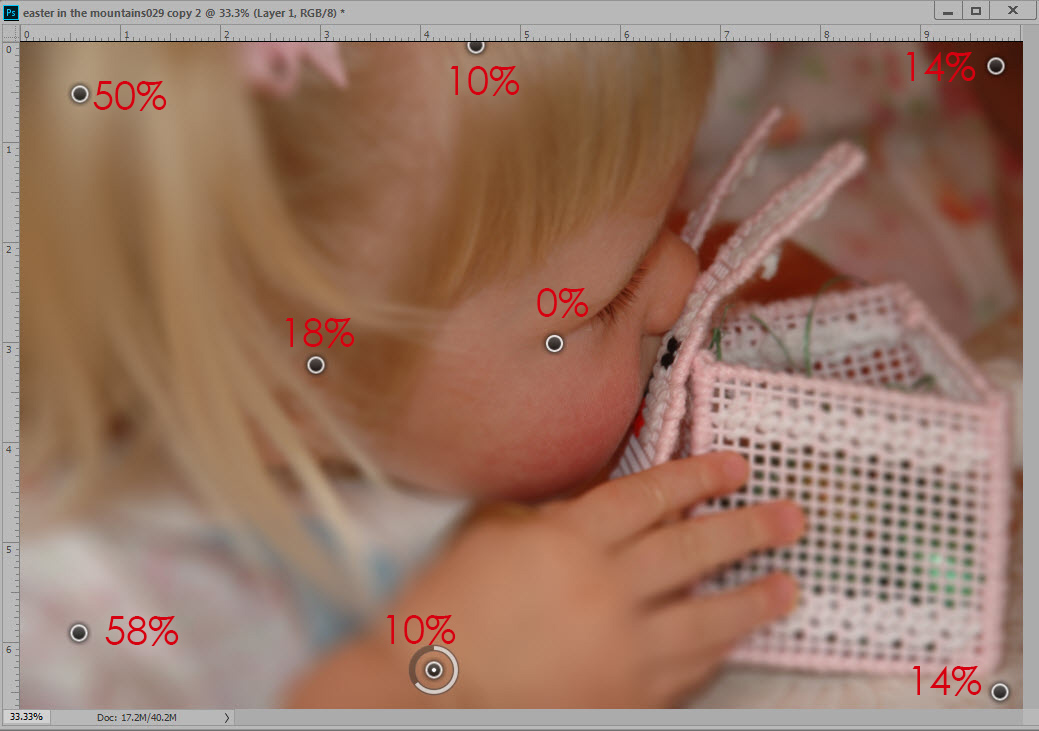
I placed a 0% blur on my granddaughter’s face. I wanted a nice gradual blur, so chose a 10% blur for her hair and hands, which were closest to her face, and then increased the blur as I moved to the left of her face. On the right, I kept the blur at 14%. A higher blur created too sharp of a contrast so close to the 0% blur and didn’t look realistic.
Experiment to see what works best for your photo. There are no magic numbers. Each photo will be unique.
PSE USERS WORKAROUND:
- Duplicate your photo.
- Place a Mask on the duplicate.
- Set Black as your Foreground Color.
- Select a soft-edged, round brush.
- In the Brush Settings, set the Hardness to Zero.
- Set the brush Opacity to around 50%
- Select a brush size to approximate the area of the photo you would like to be clear.
- Position the brush directly over the area you would like to stay clear, and click once with your mouse.
- Lower the opacity of the brush again, to around 25%.
- Enlarge the size of the brush again (I originally set my brush to 300 px, then increased it to 400 px).
- Click in the same area you clicked before.
This will create a gradual blur, and very much simulates the look CC users can get using the Field Blur Filter. You could continue to experiment with the brush, opacity, and mask if you liked, to really customize the blur on your photo.
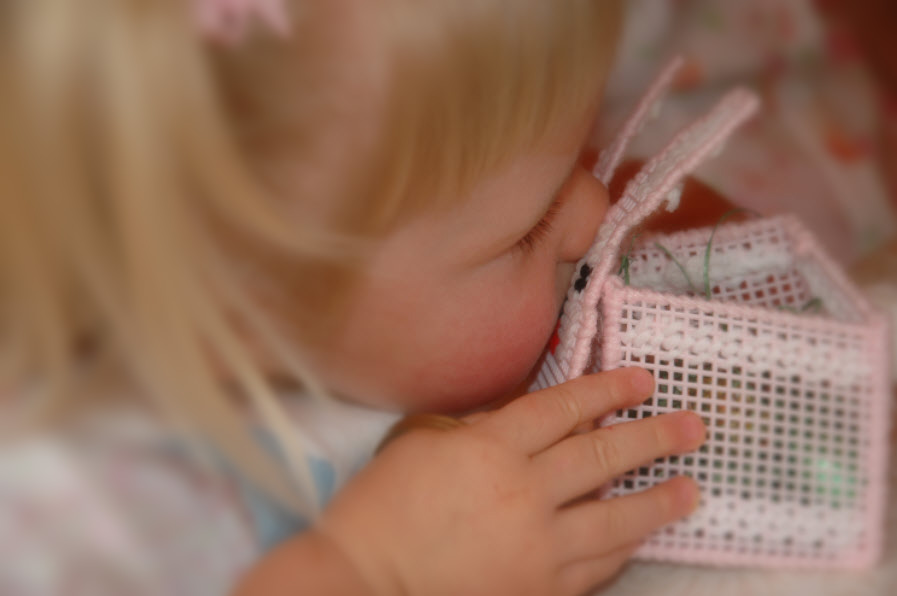 Comparison:
I hope you have enjoyed this tutorial! If you would like to download a PDF, you may do so here: How to use the Field Blur Filter


I have PSE15; and I still haven’t figured out the gradient tool consistently! My first thought as a work-around: 2 copies of the picture. Blur bottom one to max blur (58% in your pic). On top pic, use gradient tool that fades to Foreground to Transparent on a radial gradient. I’m playing around doing that now.
Kathi, that is a clever idea for PSE! Another would be to duplicate the photo and use gaussian blur on the top copy, add a mask, then change the opacity of the brush on the mask according to how much you want the blur to show. Your idea would be faster if the part you want blurred is on the perimeter, which it usually is. Karen, you are making me so much more aware of what I don’t have, not having the full version of Photoshop. It has so many variable tools! Amazing. Someday.
WOW! That will be so handy for me, thank you so much, ANOTHER thing I didn’t know.
Thanks, Kathi and Peggy for your suggestions. Great idea! I’ve amended the tutorial and added the suggestions!
Thanks, Faith! So glad this is helpful for you!