
Today we are going to fake a bokeh background. At it’s core, bokeh means blurred. Technically it means the aesthetic of the blurring of light in a photograph. We are going to focus on the simplest of it’s meaning and blur our background so that our subject stands out.
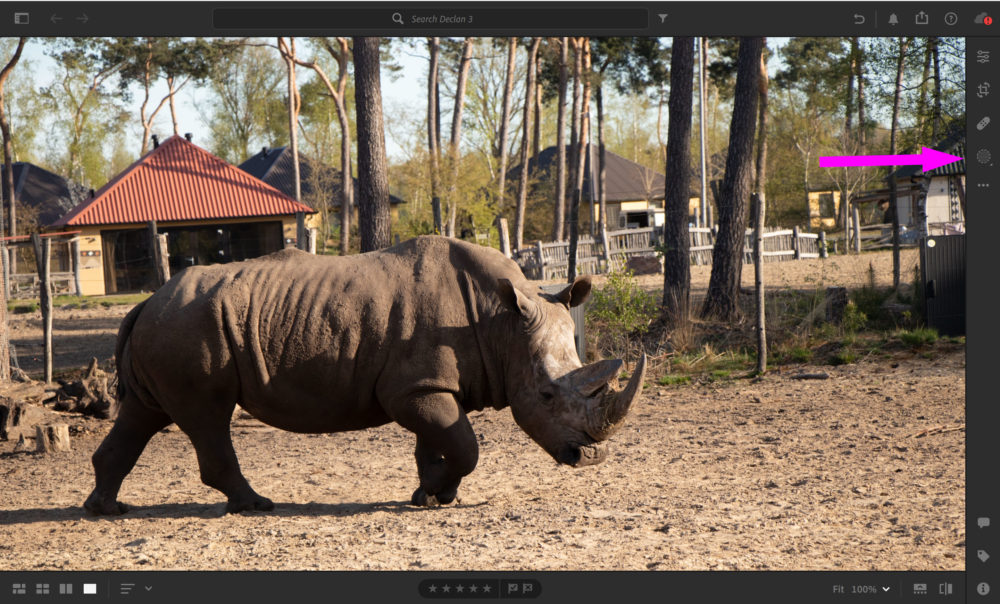
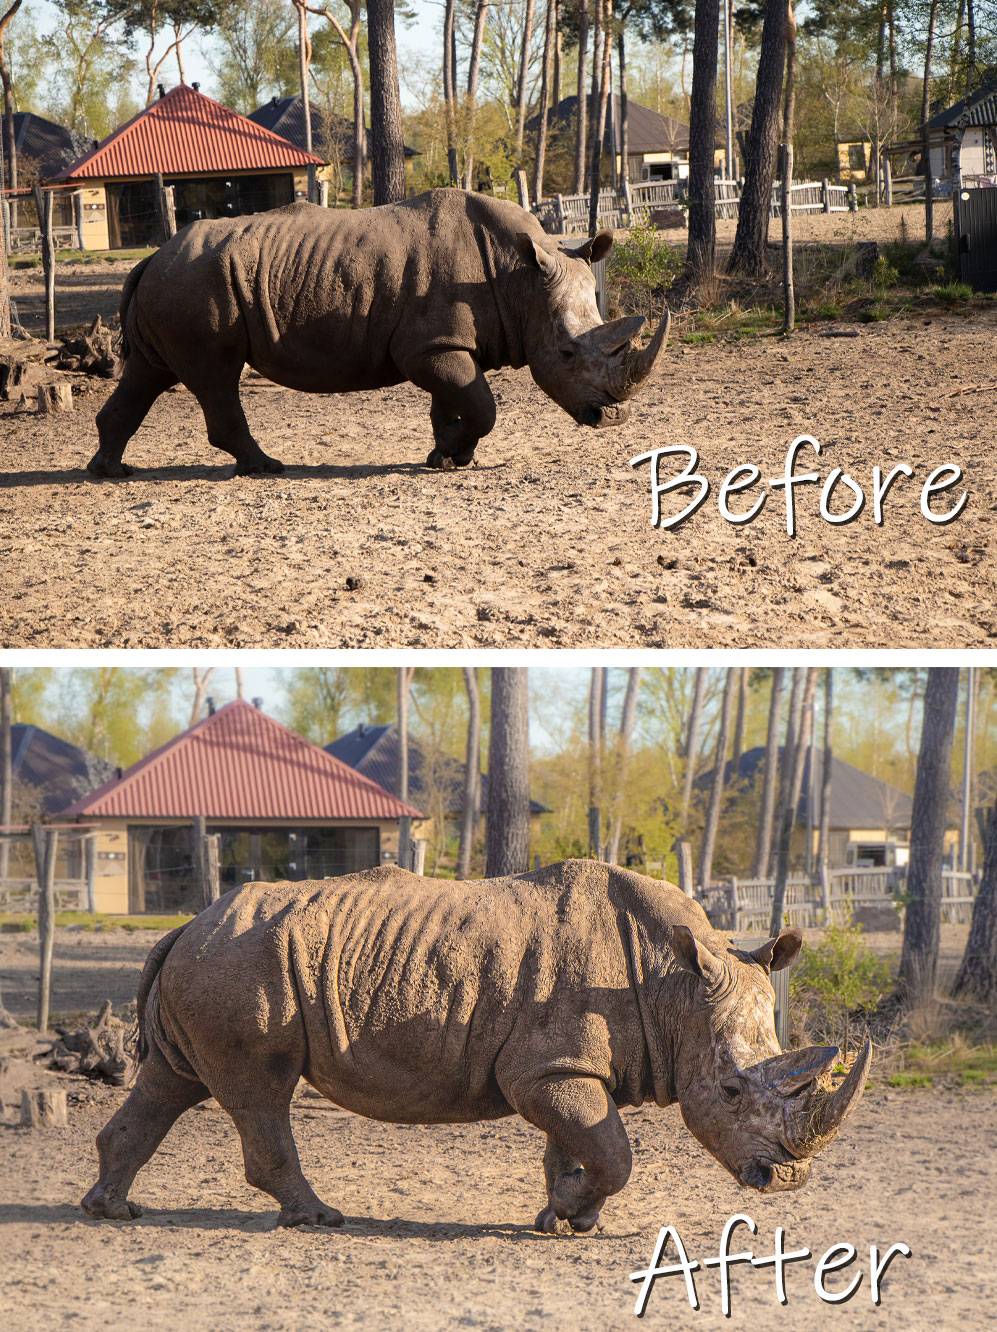
This shot of a rhinoceros outside my Savannah Lodge at Beekse Bergen was taken with a Canon 80D, I did get some blur in the background, but not enough. Usually it’s my cell phone pictures that have everything crispy clear, this time I managed it with my camera as well. No worries! Lightroom to the rescue.
Note: you can click on all the images to enlarge them
- Open your photo in Lightroom
- Do your basic edits first
- Click on the Masking icon
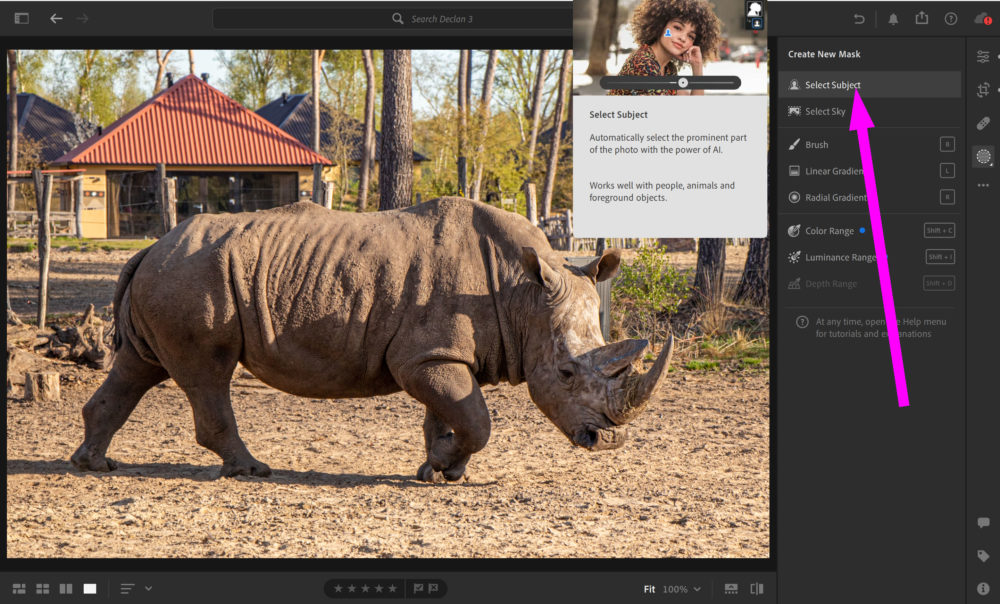
With the Masking panel open:
- Click on Select Subject
- Be patient, it may take a hot minute
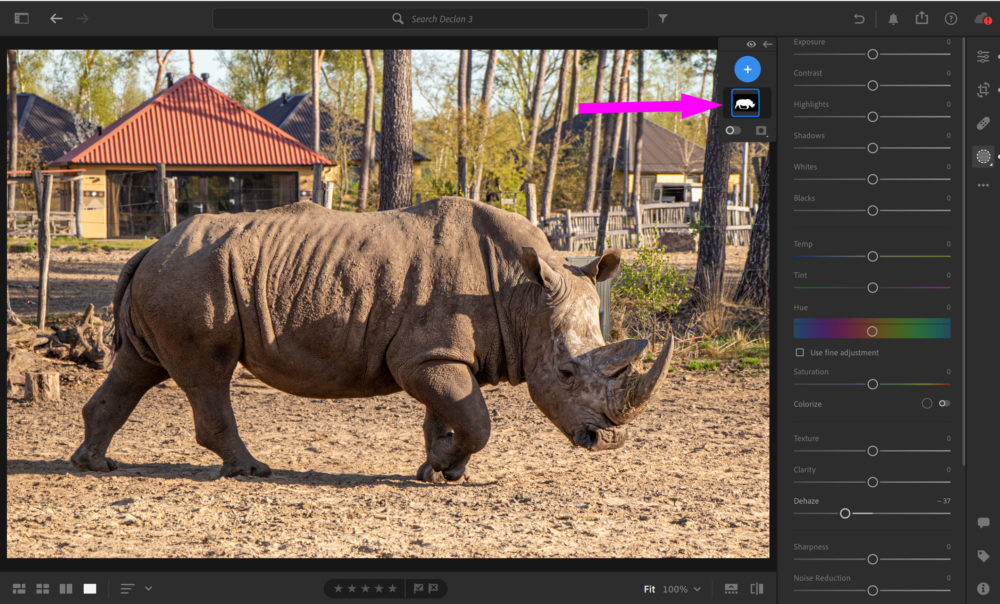
When the automatic selection is done, a small fly-out menu will appear showing a black/white mask of your selection.
- Black will not be affected by edits
- White will be affected by edits
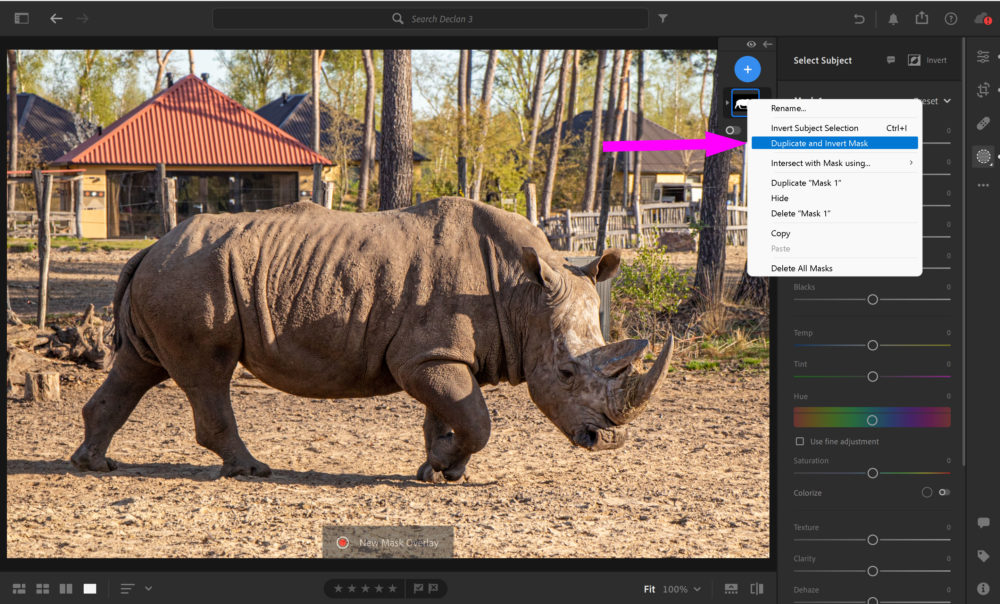
Since we selected our subject, but are interested in changing the background:
- Right-Click on your subject mask
- Choose Duplicate and Invert Mask from the pop-up box
This next step would probably be better to do on the first, select subject, mask. However, I forgot. The automatic selection is rarely perfect, but we can easily make it perfect.
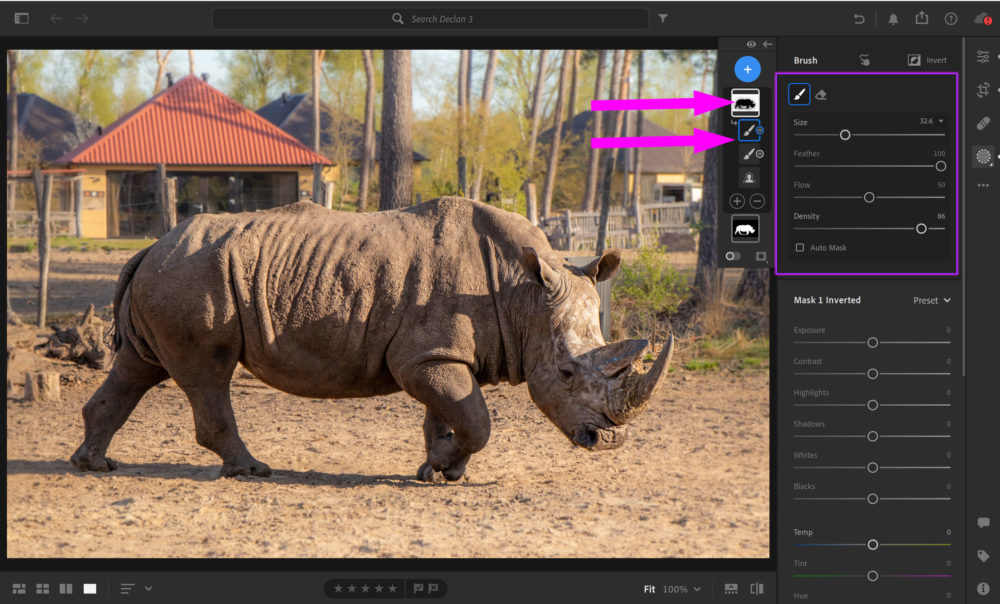
- Click on the mask to expand it; I clicked on the inverted mask
- Click on the – button
- Click on Brush
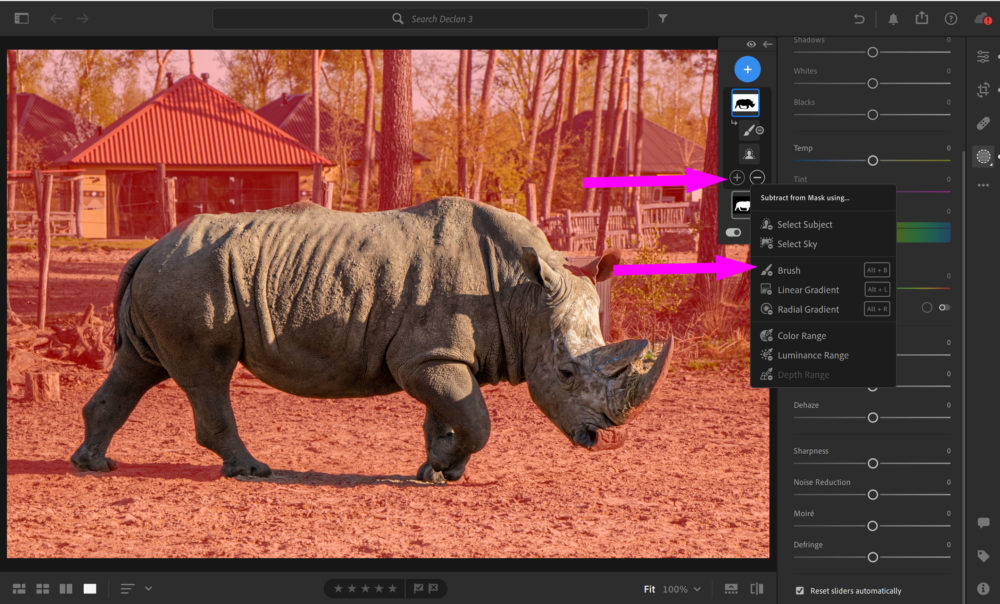
We are going to brush ON the mask to remove the “red” mask so that our entire subject is properly masked out.
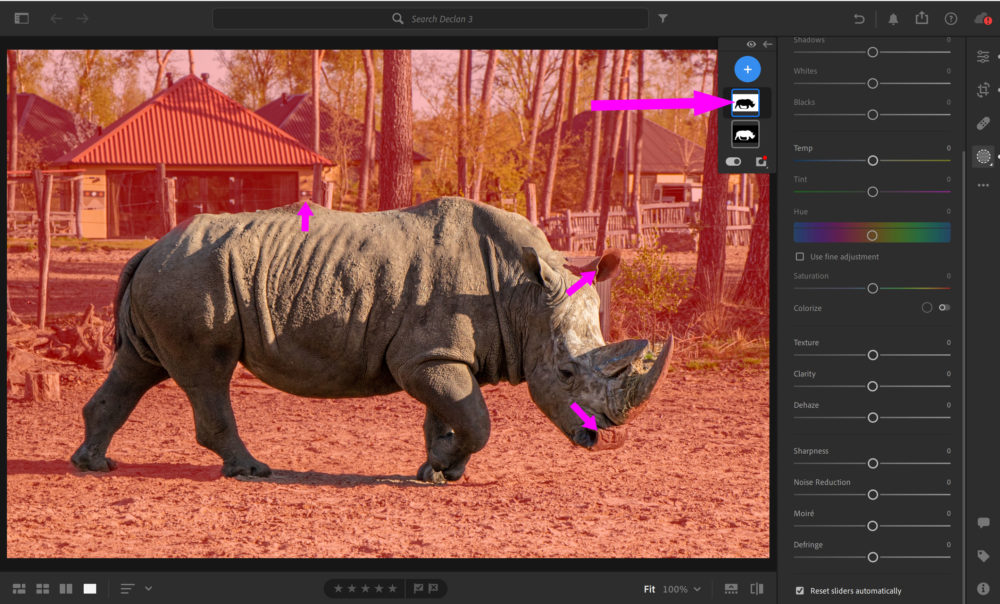
- You can easily turn on/off the red mask overlay by sliding the switch at the bottom left of the mask subpanel
- Right is red
- Left is photo view but the mask is still active
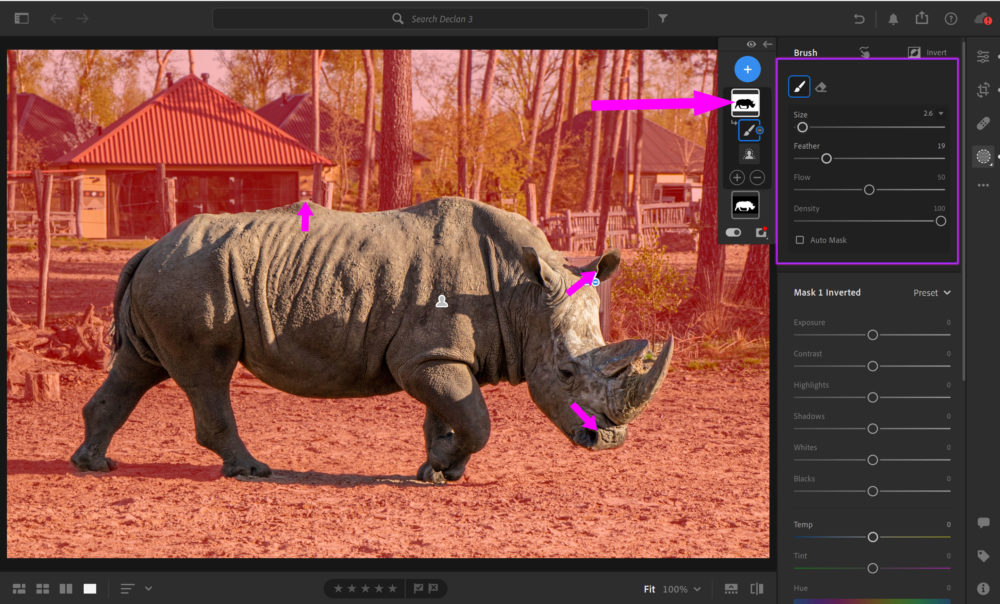
With our brush selected, we can change:
- Size – ie, how big/small our brush is
- Feather – how deep/shallow the feather is
- Flow – how fast/slow the brush selects
- Density – how opaque/visible the brush selects
I’m nitpicking here, the automatic selection did a great job, so I’ve got a small brush that works quickly & completely.
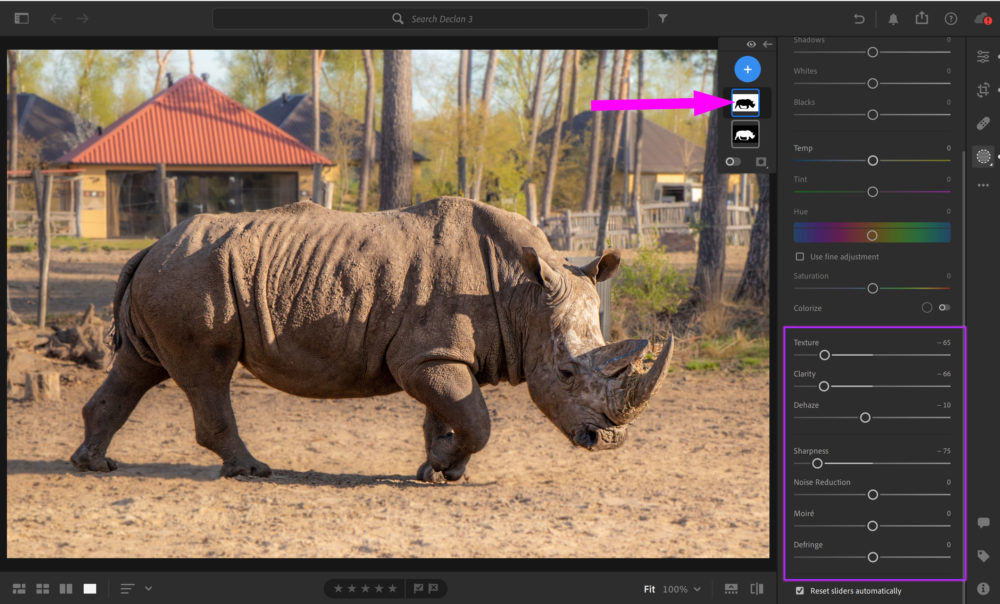
Now that my selection is perfect, I’m going to work on blurring the background using the edits possible in the Mask panel. Note that the tools here are not as comprehensive as in the Edit menu.
- My rhino has lots of texture. He likes to lay in mud puddles. So I’ve reduced Texture on the background to let his texture pop more.
- I’ve also reduced Clarity & Sharpness
I like the way it looks, but it’s a little unrealistic that literally only the rhino is crisp & clear. I’m going to brush out a little more of the background.
- Make sure you are on the invert selection still
- Click to expand the mask subpanel, if needed
- Click on + button this time
- Choose a larger brush, with more feather and lower Density, we want to add some of the foreground in, not all
- Brush around our subject, the foreground only is a great choice, you will see some fuzzy light grey around your subject on the invert mask
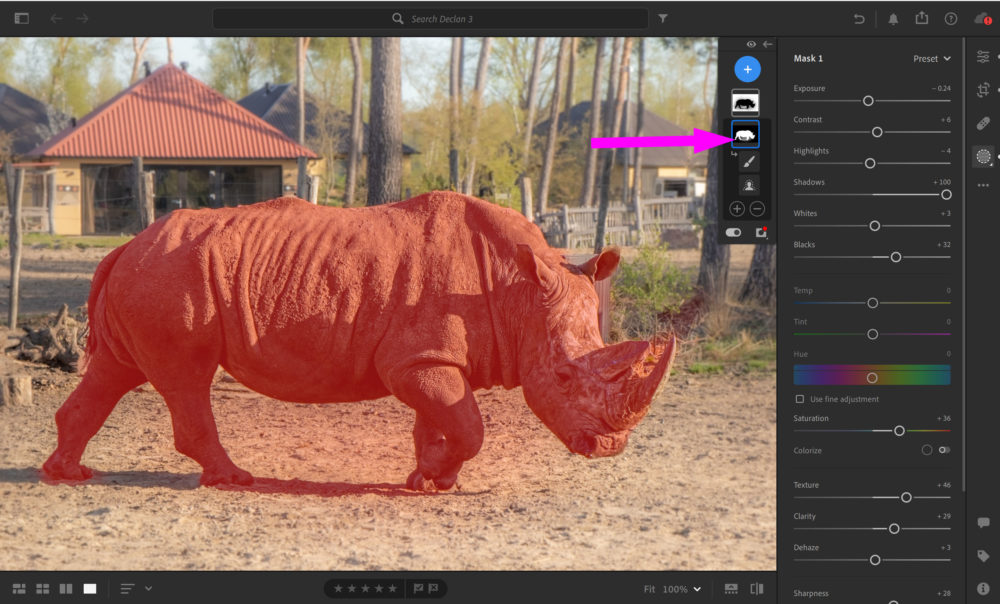
To make this work properly, select the initial Subject mask, and repeat your steps with your brush at the same settings. While we are on the initial Subject mask, we can do some edits here as well.
- I’ve slid my Shadows way right, I had a ton of shadow in this photo
- I’ve decreased Blacks as well
- I’ve upped Saturation to help him stand out
- I’ve upped Texture to pop that mud
- I’ve upped the Clarity to increase the focus
I did a couple more edits on the Edit menu, to blend the Mask effects a little better. Overall, I’m very happy and feel my rhino is now the star of my photo.
We still have a week left in our 100 Days of Summer Project, you can join in any time & show off your photography skills and edits. It’s free & fun!


Leave A Comment