
The other day I wrote a little freckle trick that got my brains a-churning (see Lightroom: Adding drama). My cousin is not the only one with freckles. In fact, a couple of my kids have freckles. While they may not love their freckles, I’m bonkers for their freckles! I think my kids are absolutely adorable.
Out of all my kids, Cole has the bestest freckles. I’ve got an old blog post, with lots of freckle-intense photo’s: A Bittersweet Day. Now on some of those photo’s I popped the freckles, ie did a little photoshopping to help the freckles stand out. I love those freckles! If you are like me, and you are a freckle lover, follow along to pop the freckles on your own photo’s.
I’m starting with one of my all-time favorite photo’s of Cole. I had a new camera that day. Perfect lighting. And a non-cooperative teenager. I’m pretty sure he’d be a little non-cooperative to this day. He is the perfect model LOL.
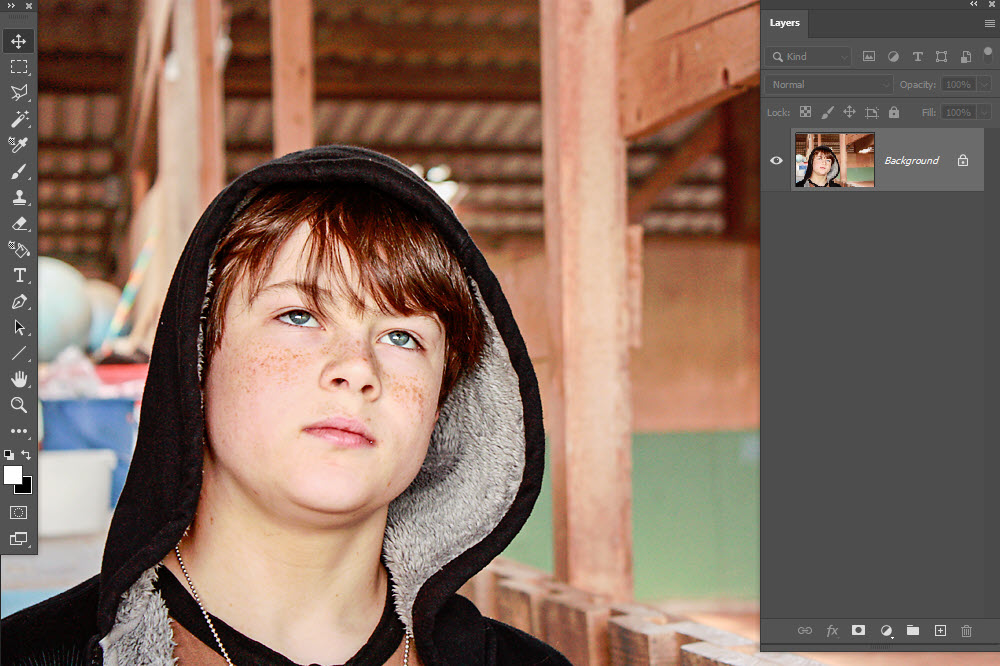
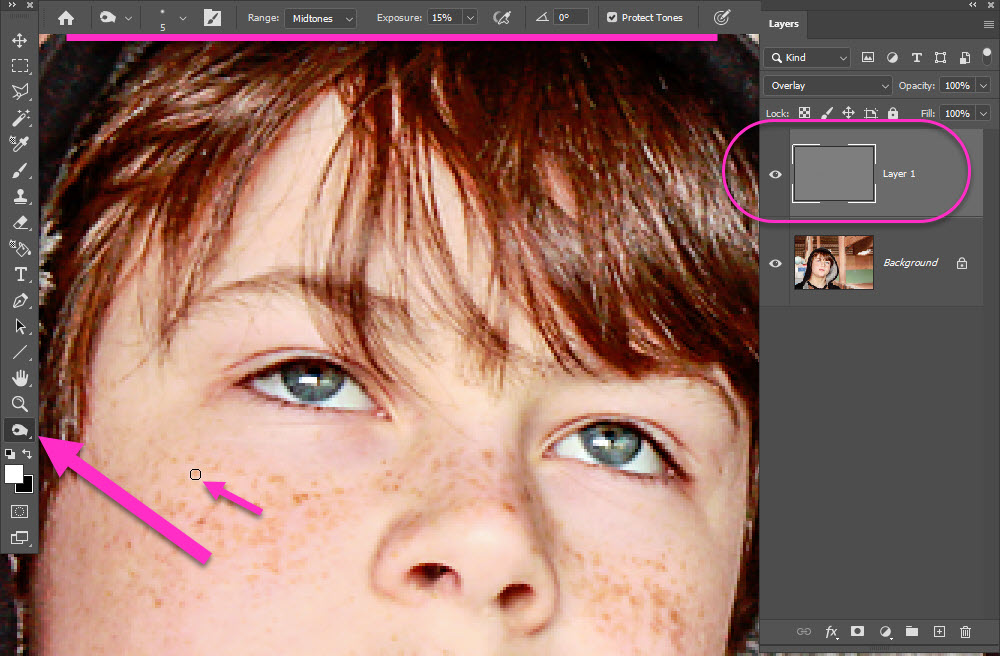
I’ve done my basic Lightroom edits, feel free to browse the blog for Lightroom-specific tutorials, and opened the photo in Photoshop. First thing I’m going to do is add a new layer to pop those freckles.
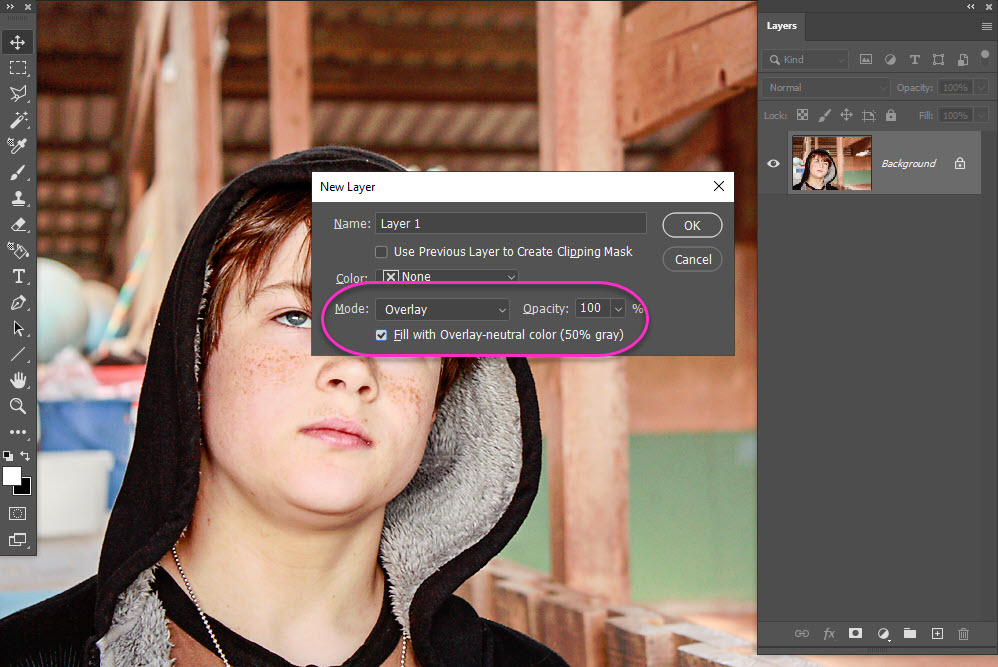
- Use Ctrl + Shift + N to open a New Layer
- Immediately a small box pops up
- Click on the teeny-tiny dropdown arrow next to Mode

With the New Layer pop-up still open;
- Choose Overlay
- Click to select the Fill with Overlay-neutral color (50% gray) box
The new layer will appear above your photo/background layer as Layer 1.
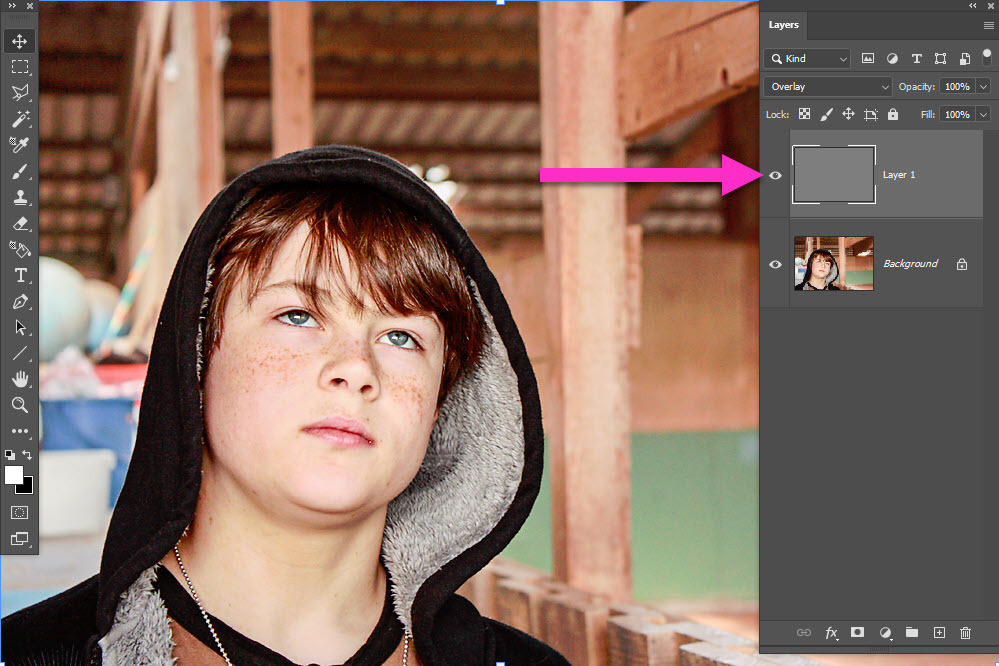
Make sure you are on Layer 1 and let’s pop those freckles! I’ve got two techniques to do this, they are almost the exact same. The difference is one is fussy, and one is quick. Let’s start with the quick method first.
QUICK
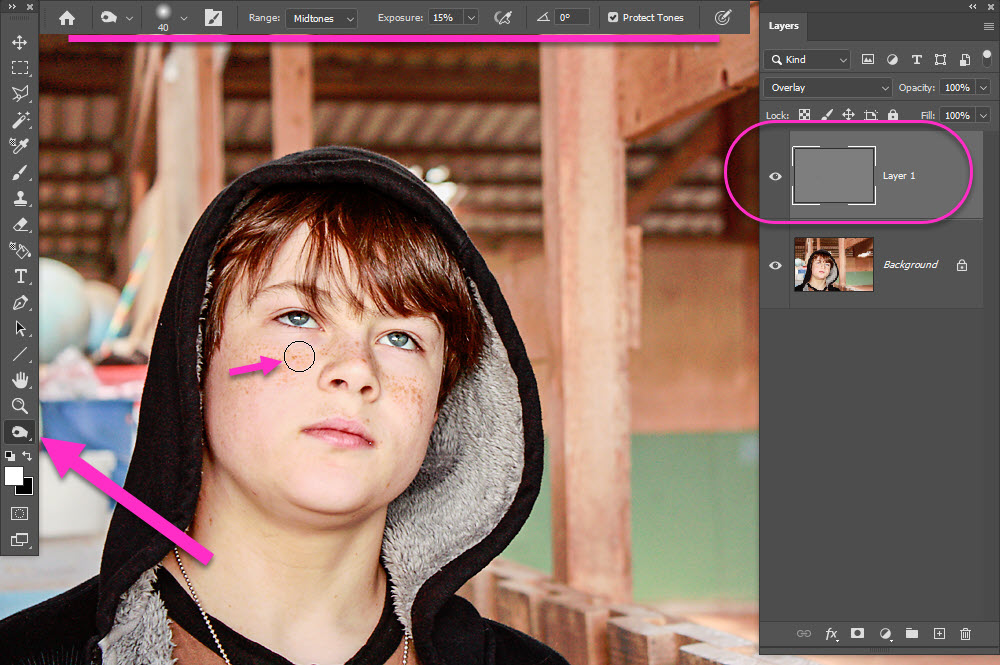
- Choose the Burn Tool from your left menu
- Change settings for the Burn Tool in the top menu
- I set mine at a soft edge, 40 px
note: my photo is websize at 1000 X 667px; 72 dpi - Choose Midtones or Shadows for the Range (to be burned)
- Set Exposure at 15-20%
- Checkmark Protect Tones
- I set mine at a soft edge, 40 px
- The Burn Tool shows as a faint circle on your workspace
- Brush over the freckles zone, be sure you are on Layer 1
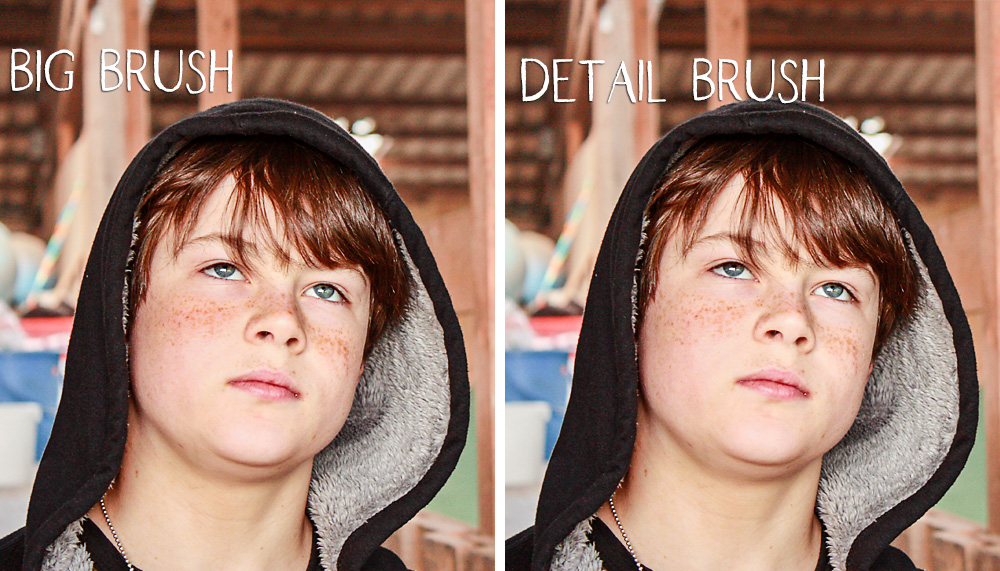
FUSSY
- Choose the Burn Tool from your left menu
- Change settings for the Burn Tool in the top menu
- I set mine at a soft edge, 7 px
note: my photo is websize at 1000 X 667px; 72 dpi - Choose Midtones or Shadows for the Range (to be burned)
- Set Exposure at 15-20%
- Checkmark Protect Tones
- I set mine at a soft edge, 7 px
- The Burn Tool shows as a faint, TINY, circle on your workspace
- I zoom in 200-300%
- Click to brush over each individual freckle, be sure you are on Layer 1
Both methods pop those freckles. The big brush over the general area adds a little more color to the entire area, I’m okay with this. It saves me time. I’m all about time savers. But. Some of you won’t like the effect it gives. It may look a little too fake, or too make-up-y. Here’s a quick side-by-side of the same photo using each of the above techniques:
I picked the big brush as my favorite result. Take a gander at the before & after:
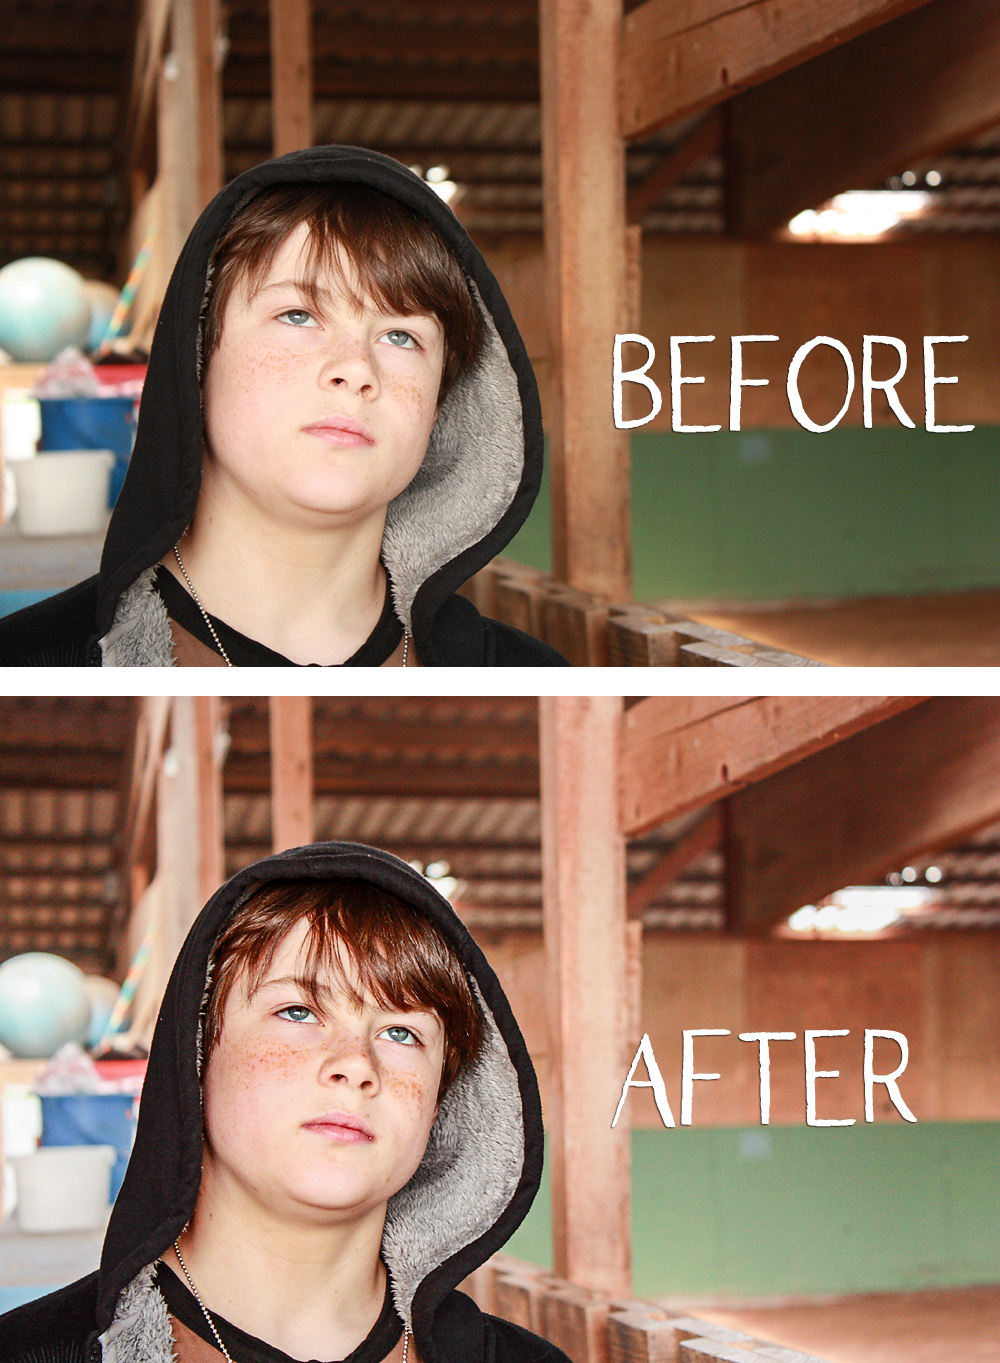
Which is your favorite?


So I just had to pop in here with my own experience that you can share with your kids. I have A LOT of freckles and not just on my face…let’s just say I am covered with them. I am 69 and must admit that many of my freckles on my face have faded – but not on my arms! I never loved my freckles but my Mom and Dad said they were “angel kisses” so that made it a little easier. So when I was a senior in high school we had moved to Hawaii (military transfer). I went to get my senior picture done and when I received the pictures back they literally had removed ALL of my freckles. I had absolutely NO blemishes….they were freckles! It was that point in my life that I decided I really did like my freckles as the photos without made me very homely! I quickly went back to them and asked them to remove all their “touching up” and give me my freckles back. Freckles are really a part of your “personality” and my experience proved that!