Hellllooooooooo world! This is the first in a looooooong series of DUO Element tutorials. Not only will these be read-along, follow-along on the blog but I’m also ditching my stage fright & popping the exact same tutorial up on our YouTube. Gulp. Be kind? Be gentle?
If you are anything like me, you have zero patience. You’ve found a new hobby. You’ve got a new toy. You’ve got zero time to read the instructions, you just want to go! So this is where we’ll start, at go.
I am using Adobe Photoshop Elements 2022. You can still buy this version in some stores, or even used, or buy the newest version of Adobe Photoshop Elements 2023 on the Adobe site. I will compare versions in a later blog post. Elements is a lighter version of Photoshop, therefore quicker & easier to use. Plus, it’s a pay & you own it vs. a monthly/yearly subscription that really adds up.
This tutorial is for Beginners. Stay tuned for even more beginner tutorials on our YouTube Adobe Elements Tutorials *and* here on the blog. You can bookmark the Beginner page or the Elements page for updates. This tutorial is on how to use Elements to create your first digital scrapbooking page. I am assuming your software is installed and ready to go.
We are diving right into creating our first page, click the Elements icon on your desktop, or launch Elements from your start menu. Elements pops up with a home screen that looks like this:
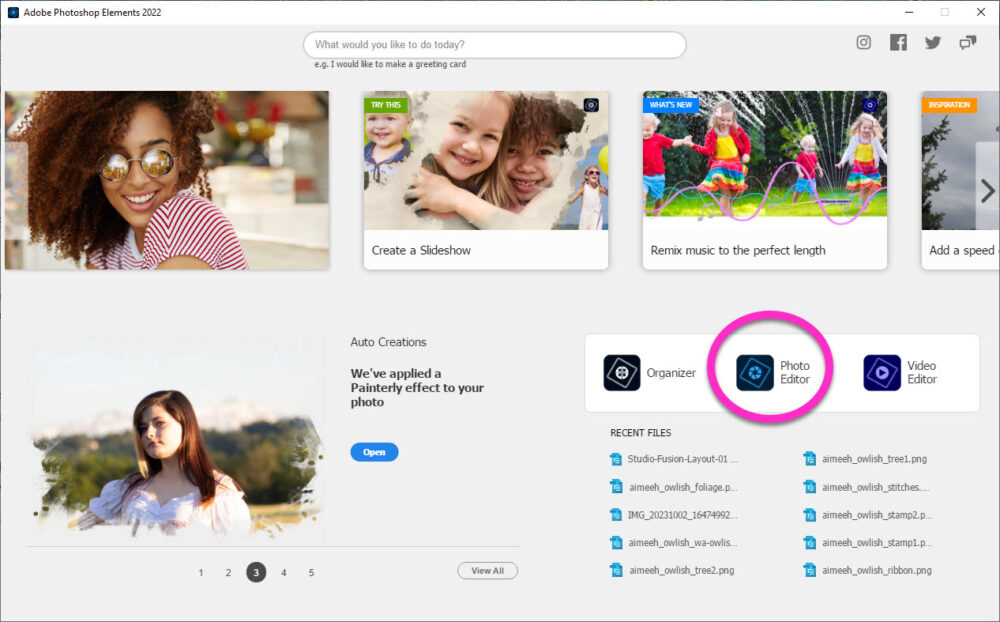
We are making our first page, so let’s dive right into the Editor:
- Click on Photo Editor
- Be patient while “loading Adobe Photoshop Elements Workspace”
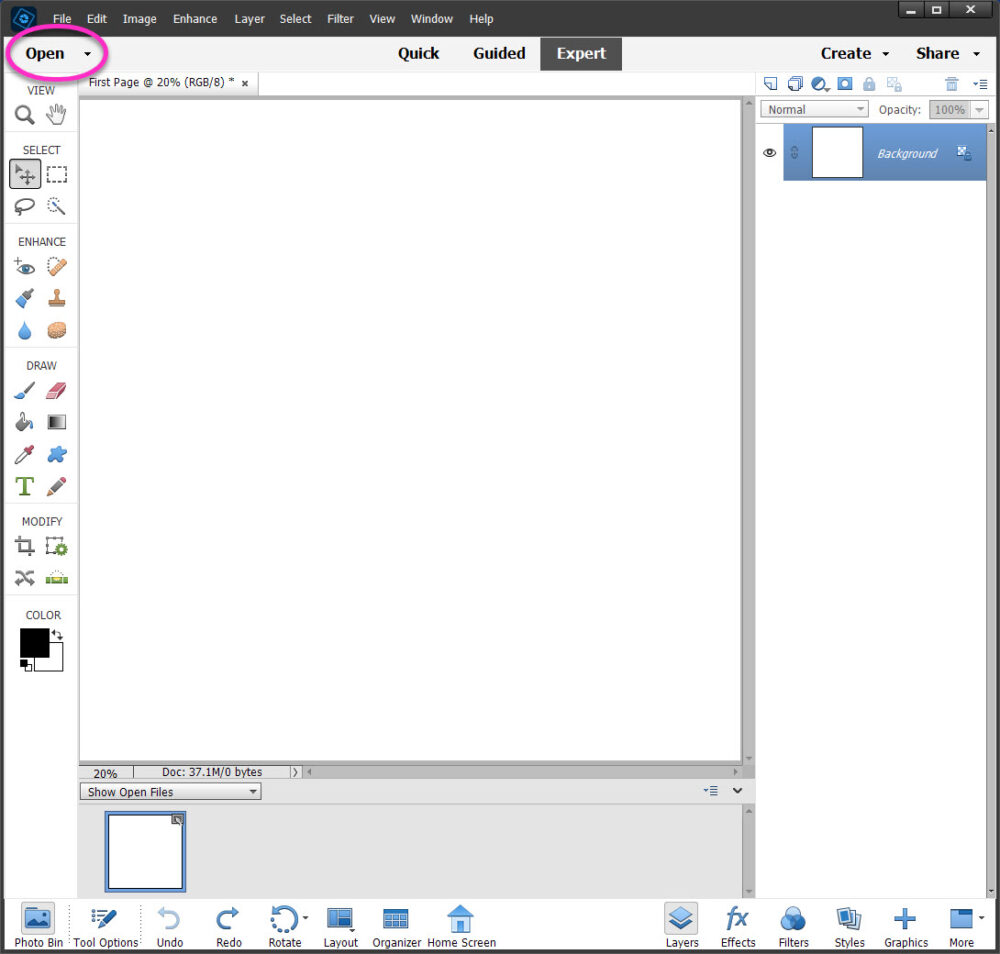
Once the default Workspace has loaded, it will look like this:

For the purposes of this tutorial, which is to make a first page fast:
- Click on the Expert tab at the top
note: this changes you from primarily photo editing to scrapbooking
You can skip this next step and just open the QuickPage (see below), however I highly recommend always starting with a New File to avoid accidental overwriting of existing files. It prevents frustration.
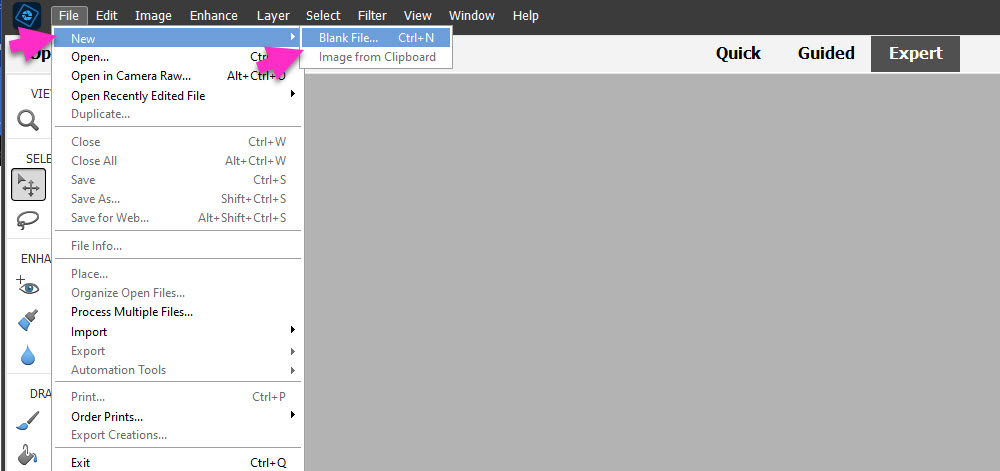
Open a New File to start your first page:
- Click on File in the top menu
- Click on New in the dropdown menu
- Click on Blank File in the flyout menu
You get a pop-up box with choices:
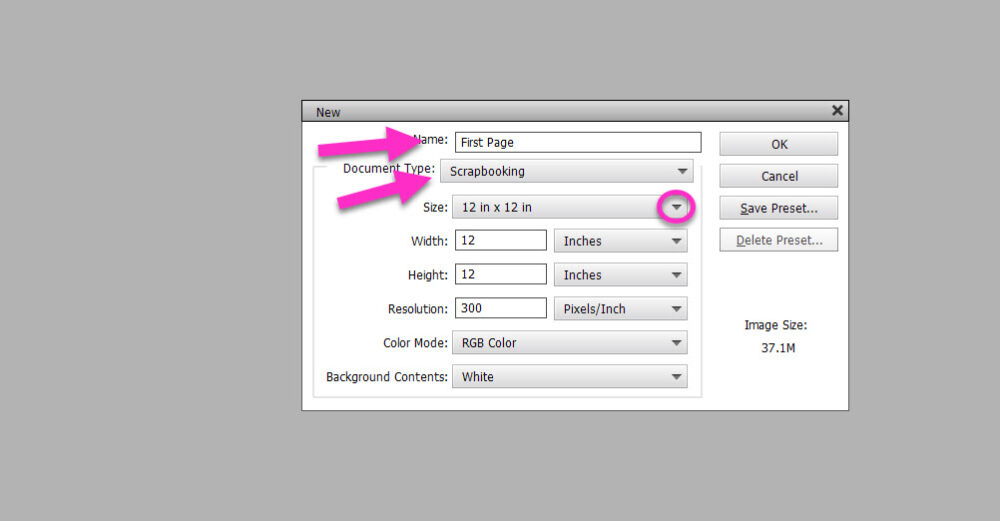
From the pop-up box choose:
- Change the Name to: First Page
- You can leave it as Untitled, however you will soon have 6 million files named Untitled
- Document Type: Scrapbooking
- the default size is 12 in x 12 in
- the default resolution is 300 ppi
note: this is print resolution
You now have a beautiful, blank, canvas to create on! The world is your oyster.
Now it’s time to open your QuickPage (you can download this quickpage FREE below). Be sure to remember where you’ve downloaded the quickpage, and be sure to unzip before proceeding.
- Click on Open at the top of your Elements Workspace
You will get a pop-up box to your File Explorer:

Navigate to the location of the QuickPage (any quickpage or the FREE quickpage below).
- Click on the QuickPage (Studio-Fusion-QuickPage.png)
- Click on Open
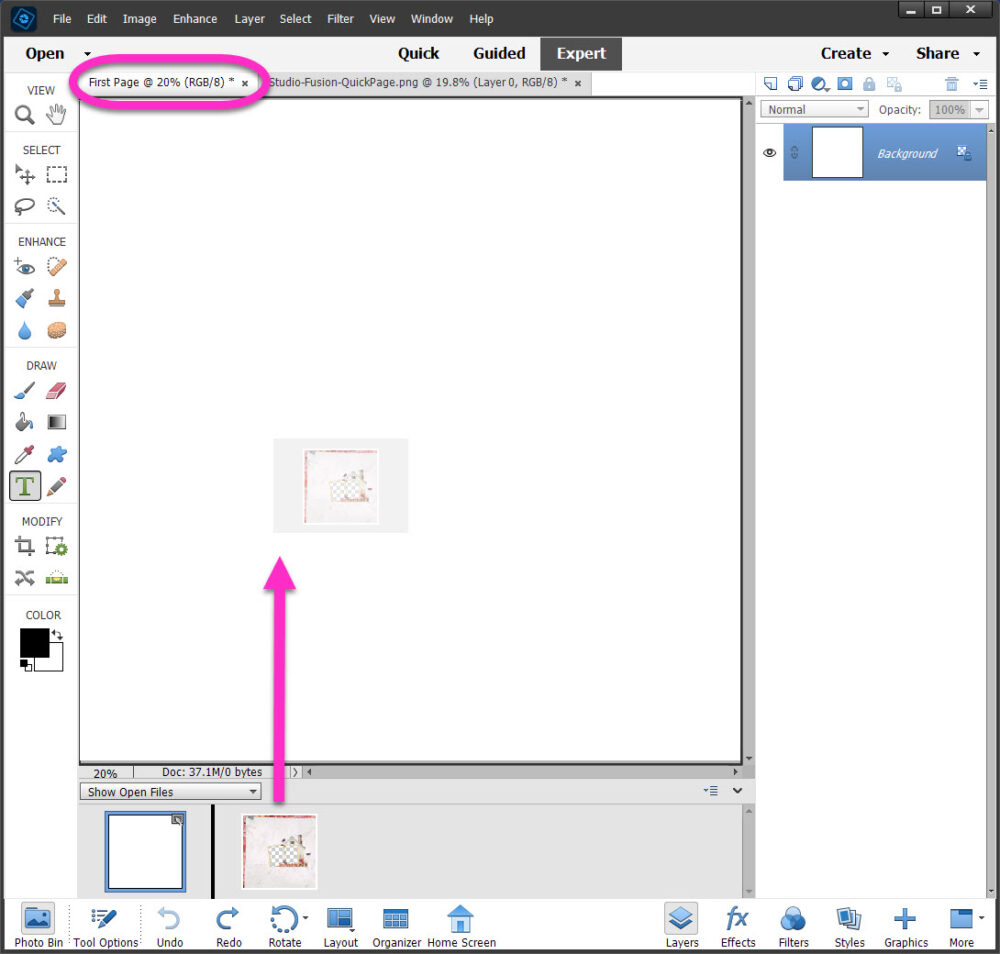
You now have two open files within your Elements Workspace:

We are going to move a copy of the QuickPage into your blank file “First Page”:
- Make sure your Photo Bin is showing open files
- Click on the Photo Bin icon to toggle hide/unhide open files
- Switch to the blank file “First Page” by clicking on it either at the top or in the Photo Bin
You can tell you are on the correct file because the First Page tab is a little lighter, the page itself is a blank, and there’s a blue outline around the current file in the Photo Bin.
To add the copy of the QuickPage to your blank “First Page“:
- Click & Hold the QuickPage icon in the Photo Bin
- Drag the QuickPage icon directly onto your First Page file
It’s small, and it’s faint, but you will see a miniature ghost version of the QuickPage move into your open file as you drag:
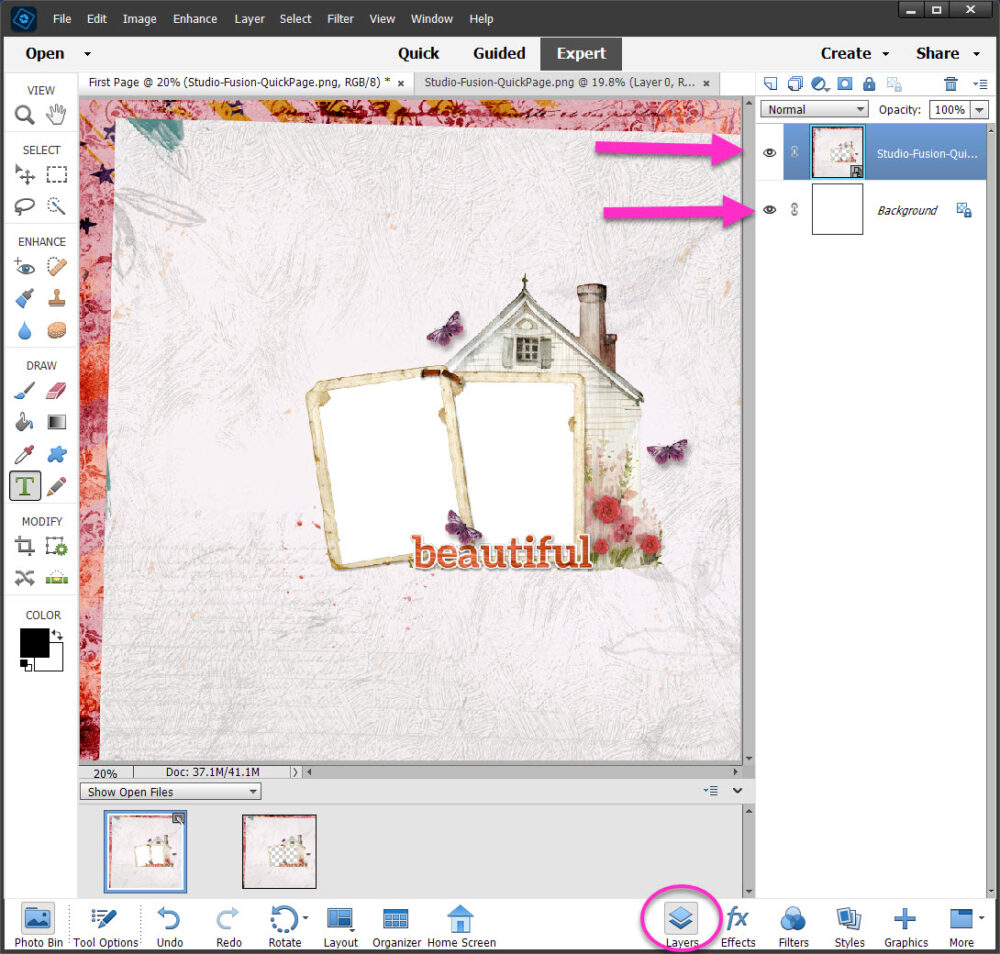
You now have two Layers in your open file. Layers, also known as Adjustment Layers, are the best part of Photoshop + Photoshop Elements. Layers are what let you create to your hearts desire. Each layer is every single element you add to a page, design or photo.
When you are scrapbooking, each paper, flower, brad, ribbon, etc. is in effect a Layer. In scrapbooking, however, every time you glue down a layer or write a title or journal, it’s permanent. It’s one use. In digital scrapbooking you can reuse each layer. You can reglue it. You can rewrite. You can duplicate, resize, reuse over & over. It’s freaking awesome!
Take a look at your two Layers on your open file. You have both:
- the Quickpage (Studio-Fusion-QuickPage.png); and
- the Background
If you do not see the Layers as shown here, please click on the Layers button on the bottom right of your Elements Workspace:
This QuickPage has two open “holes” for your photo’s. It’s time to add your photos to the Photo Bin. This will be the same process as opening and adding the QuickPage (above).
- Click on Open at the top of your Elements Workspace
- You will get a pop-up box to your File Explorer
- Navigate to the location of your photo’s
- Click on your photo’s
- Click on Open
You now have four open files within your Elements Workspace:
You can see the open files both in your workspace, your active file is the lighter tab, and in your Photo Bin:
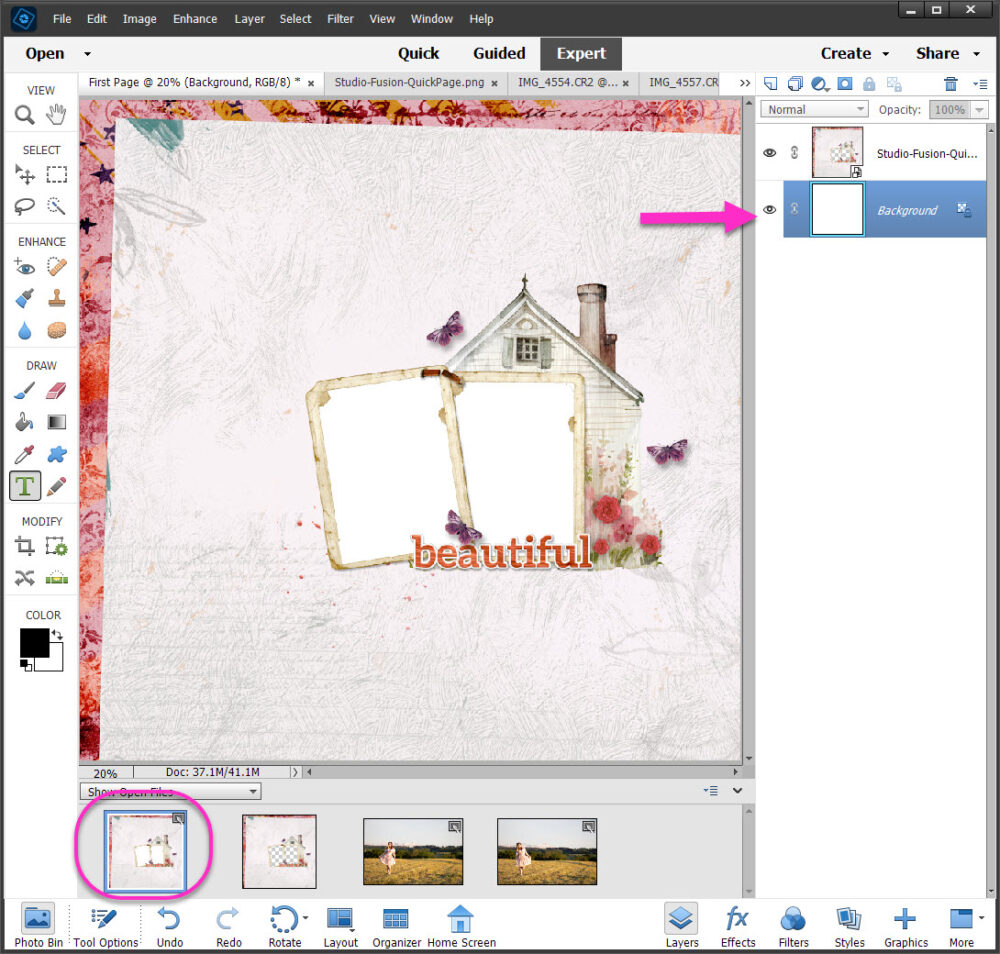
Switch to your First Page file to continue editing your QuickPage.
- Click on the Layers icon if your Layers panel is not showing
- Click on the Background to continue creating your QuickPage

Double checking that you are on your first page, and on the Background Layer, repeat the directions above to drag in one of your photo.
- Click & Hold your photo icon in the Photo Bin
- Drag your photo icon directly onto your First Page file
- in between the Background Layer and the QuickPage Layer
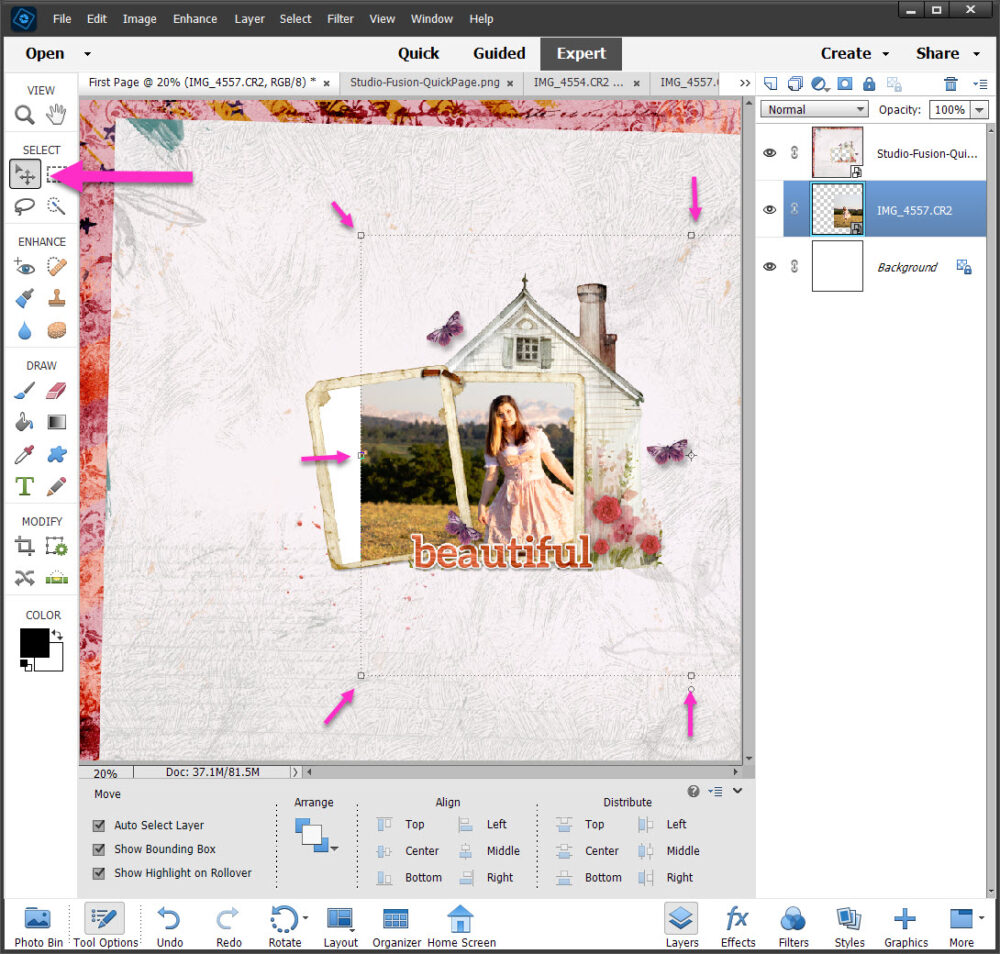
You will see a “Bounding Box” around your photo. This lets you see the outline of your photo, even when it’s behind other layers. Your photo may be too big, or in the wrong location for the “hole”. Mine is both! We can move & resize the photo:
- Make sure you are on the Photo Layer
- Click on the Move Tool
- You can now Click + Hold to move your photo
You can also resize the photo:

To keep your proportions when resizing:
- Click + Hold on a corner of the Bounding Box
- Make sure the Constrain Proportions box is checked in the menu bar below
- Drag the corner of the Bounding Box to resize your photo
- Click the Green Arrow to accept your changes to your photo
Repeat this step as necessary. I resized, moved, resize & moved several times to get my photo just right.

My photo is a little too wide to fit perfectly in the frame, even with resizing. The quickest and easiest way to get rid of the extra photo bits is to use the Eraser Tool.
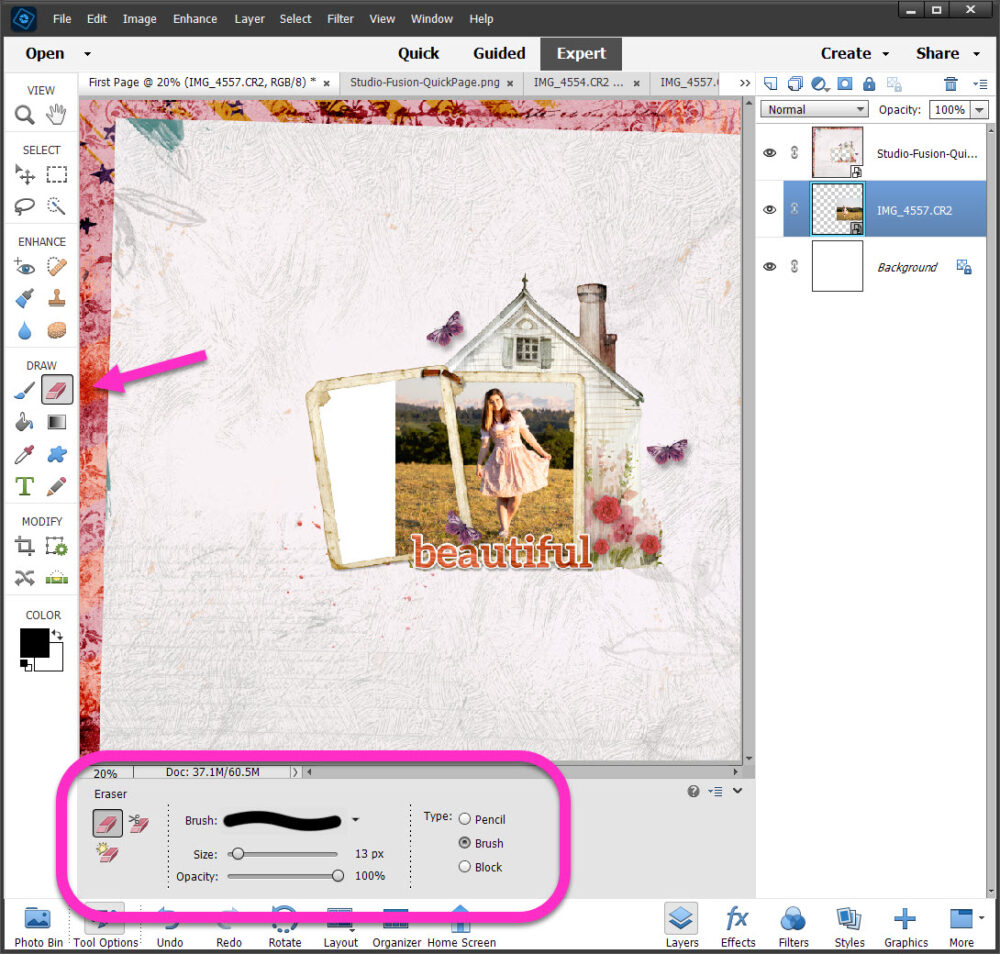
Click on the Eraser Tool in the Draw panel on the left-hand side of your Elements Workspace. The menu bar at the bottom will change to that of the Eraser Tool.
- Make sure you are on the Photo Layer you want to erase
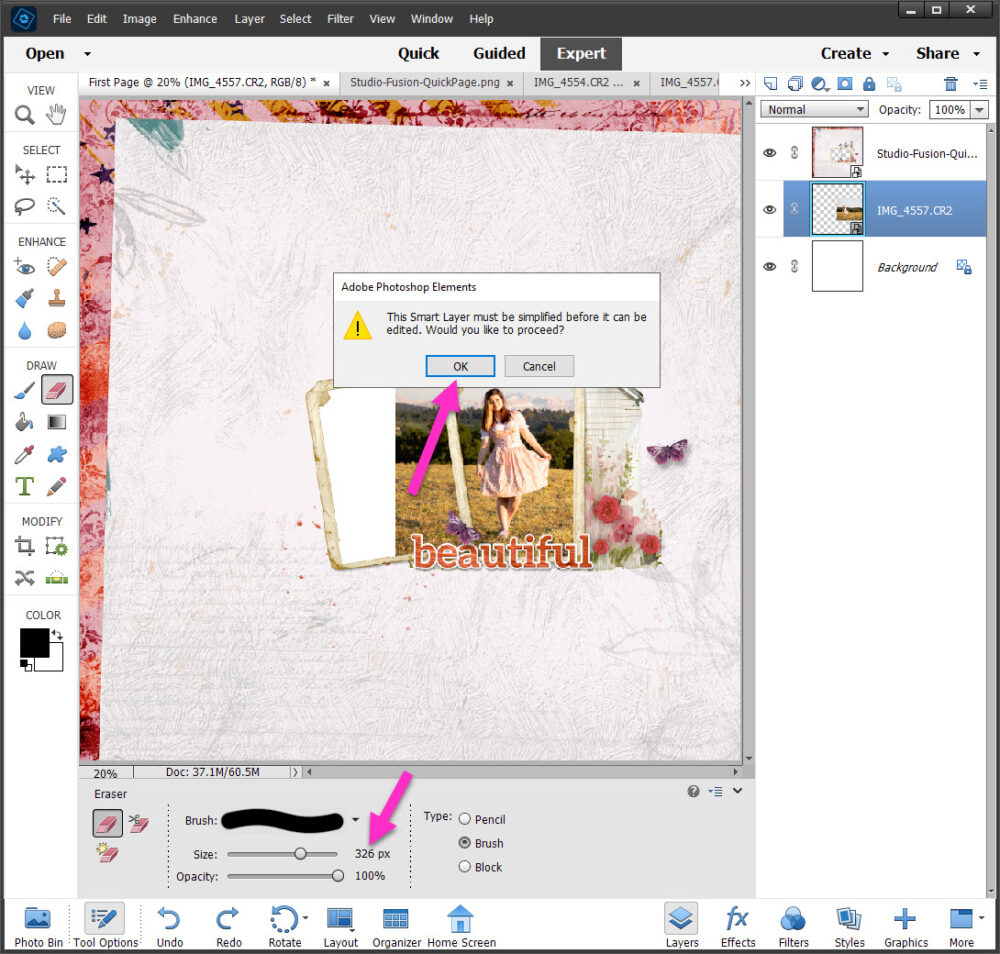
- You may get a warning that the:
“This Smart Layer must be simplified before it can be edited. Would you like to proceed?”
Click OK
Smart Layers are an advanced Elements feature we will cover much later. It is not mission critical to finish this QuickPage quickly.
The Eraser Tool has several setting options. We are only going to change the Size of our Brush:
- It’s easier to Erase with a bigger Brush
- Slide the Size slider to 300px or a size that feels comfortable to you
note: you will see the size of the brush/cursor change faintly on your workspace - Double check that your Opacity is set to 100%
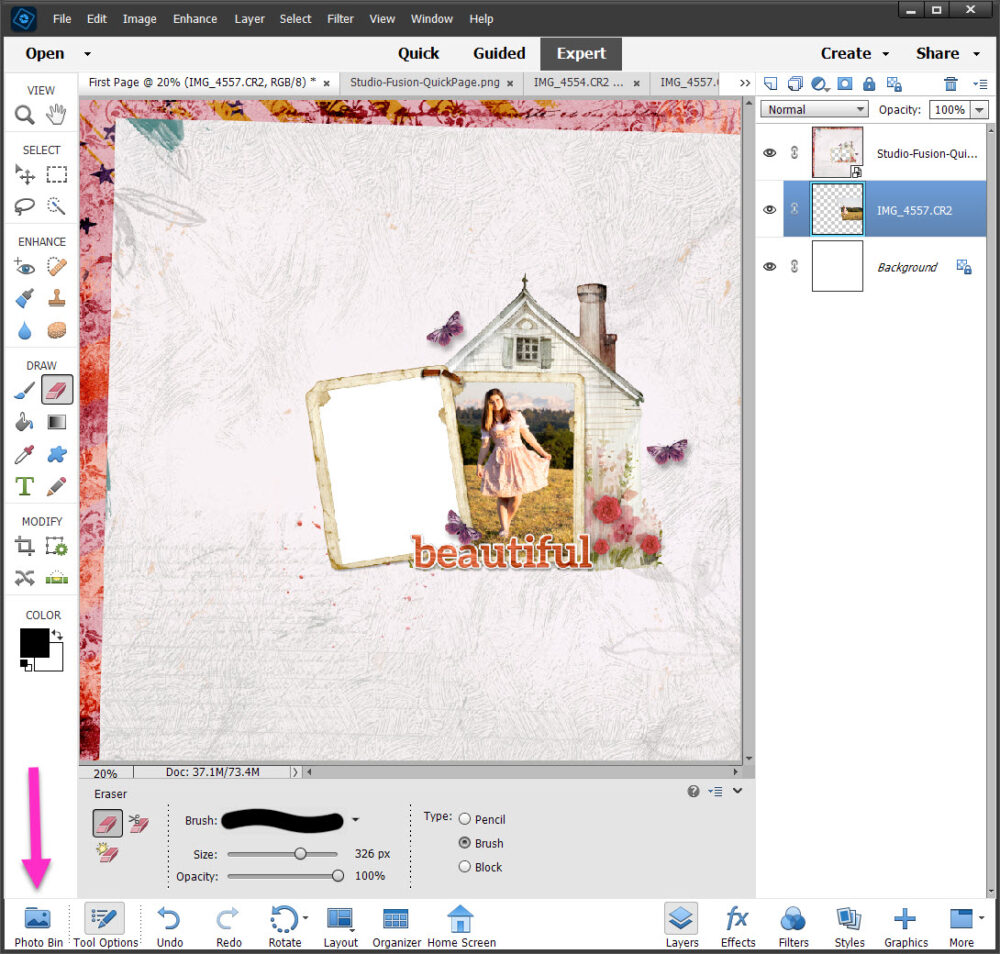
- Erase the bits of your Photo Layer you do not want to see
This is destructive, but you can Undo bad erasing or even add the photo again from your Photo Bin!
We are going to repeat this process and add your second photo. Again, make sure you are on the Background Layer, repeat the directions above to drag in one of your photo.
- Click & Hold your photo icon in the Photo Bin
- Drag your photo icon directly onto your First Page file
- in between the Background Layer and your other photo Layer

Now use the Move Tool to resize & move your second photo as needed. Notice you will not need to erase anything because we put this photo behind all the other layers. YAY!
And that’s it. You’ve completed your first digital scrapbooking page. I’m hoping you are as hooked as I am. Stay tuned for more in the weeks to come, including how to add your own text, papers and elements to get a look that is uniquely you ❤
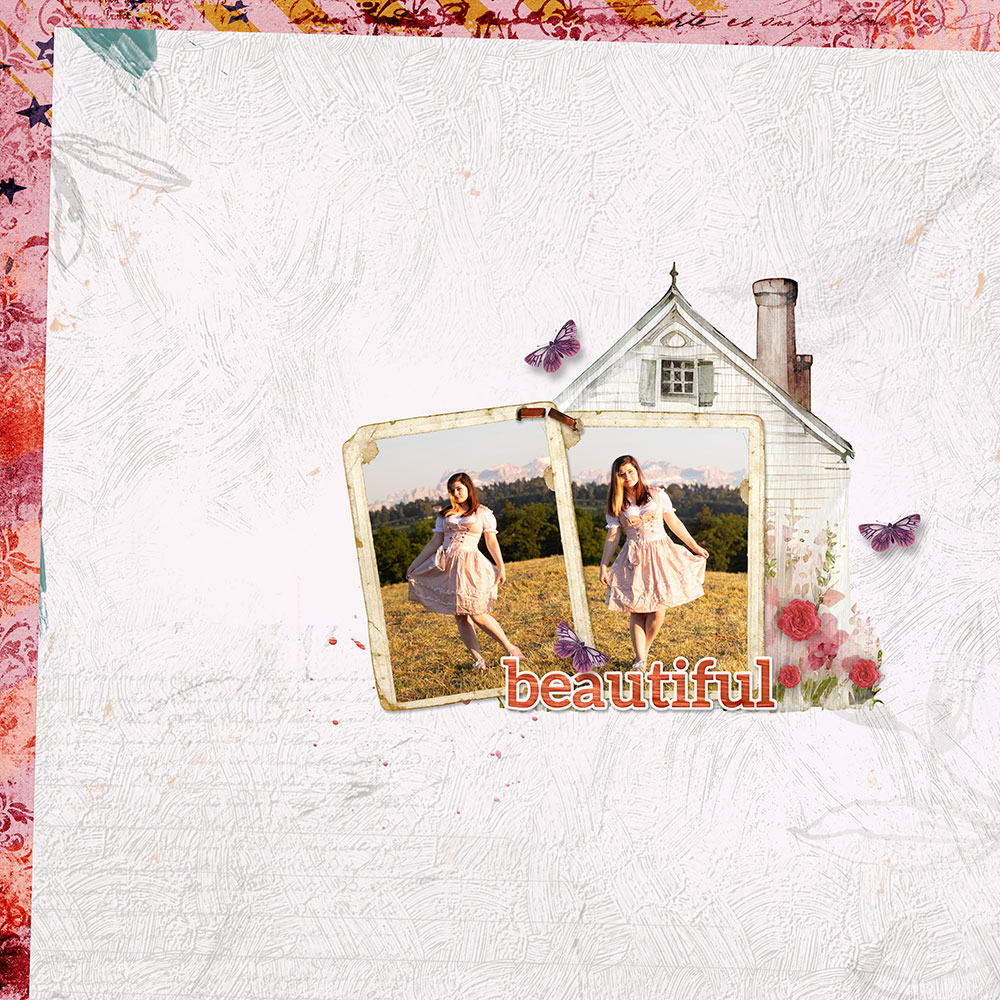
You can download the same QuickPage I used in this tutorial directly from the blog:
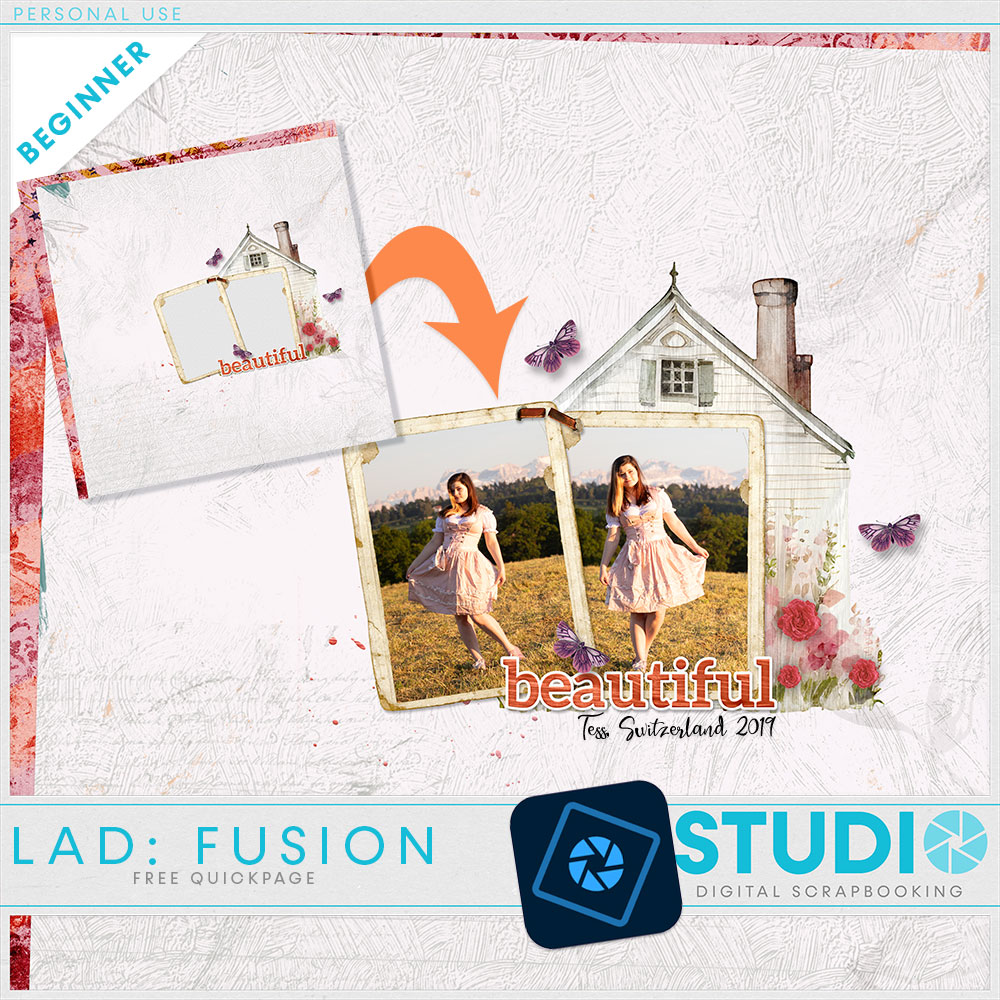
I used papers & elements from our September LAD: Fusion to create the QuickPage. We hold a LAD, Layout-A-Day, six times a year in our forum. Registration is required, but there is no cost. We’d love to see you there. You can also watch this video on our YouTube:


Awesome so good to go over stuff and recap, I also use Elements.
Thank you Toiny
[…] Let’s jump right into the meat of this Quick Tip. I am working in Adobe Photoshop Elements and I’ve already opened my template & added my photo. If you need a review on these steps, please follow along on my first DUO blog & video: Elements: Create your First Page. […]
[…] We’re jumping right in to adding multiple files to your Photo Bin in order to add Layers to your page. If you are unsure about this step, please review the first tutorial: Elements: Create your First Page. […]
[…] I’m assuming you’ve got both the notebook element and the script element open in your workspace. Now drag the script element into your notebook element. For a quick review on how to do this please refer to: Elements: Create your First Page […]